The PSAI Weather Map allows you to set up targeted storm campaigns based on hail and wind events in your region or anywhere nationwide—and now you can also view targeted tornado warnings and official tornado paths within these storms. Simply follow the instructions below to launch your Facebook storm campaign for a tornado event within a few minutes.
Get notified about tornado events by installing the PSAI app today!
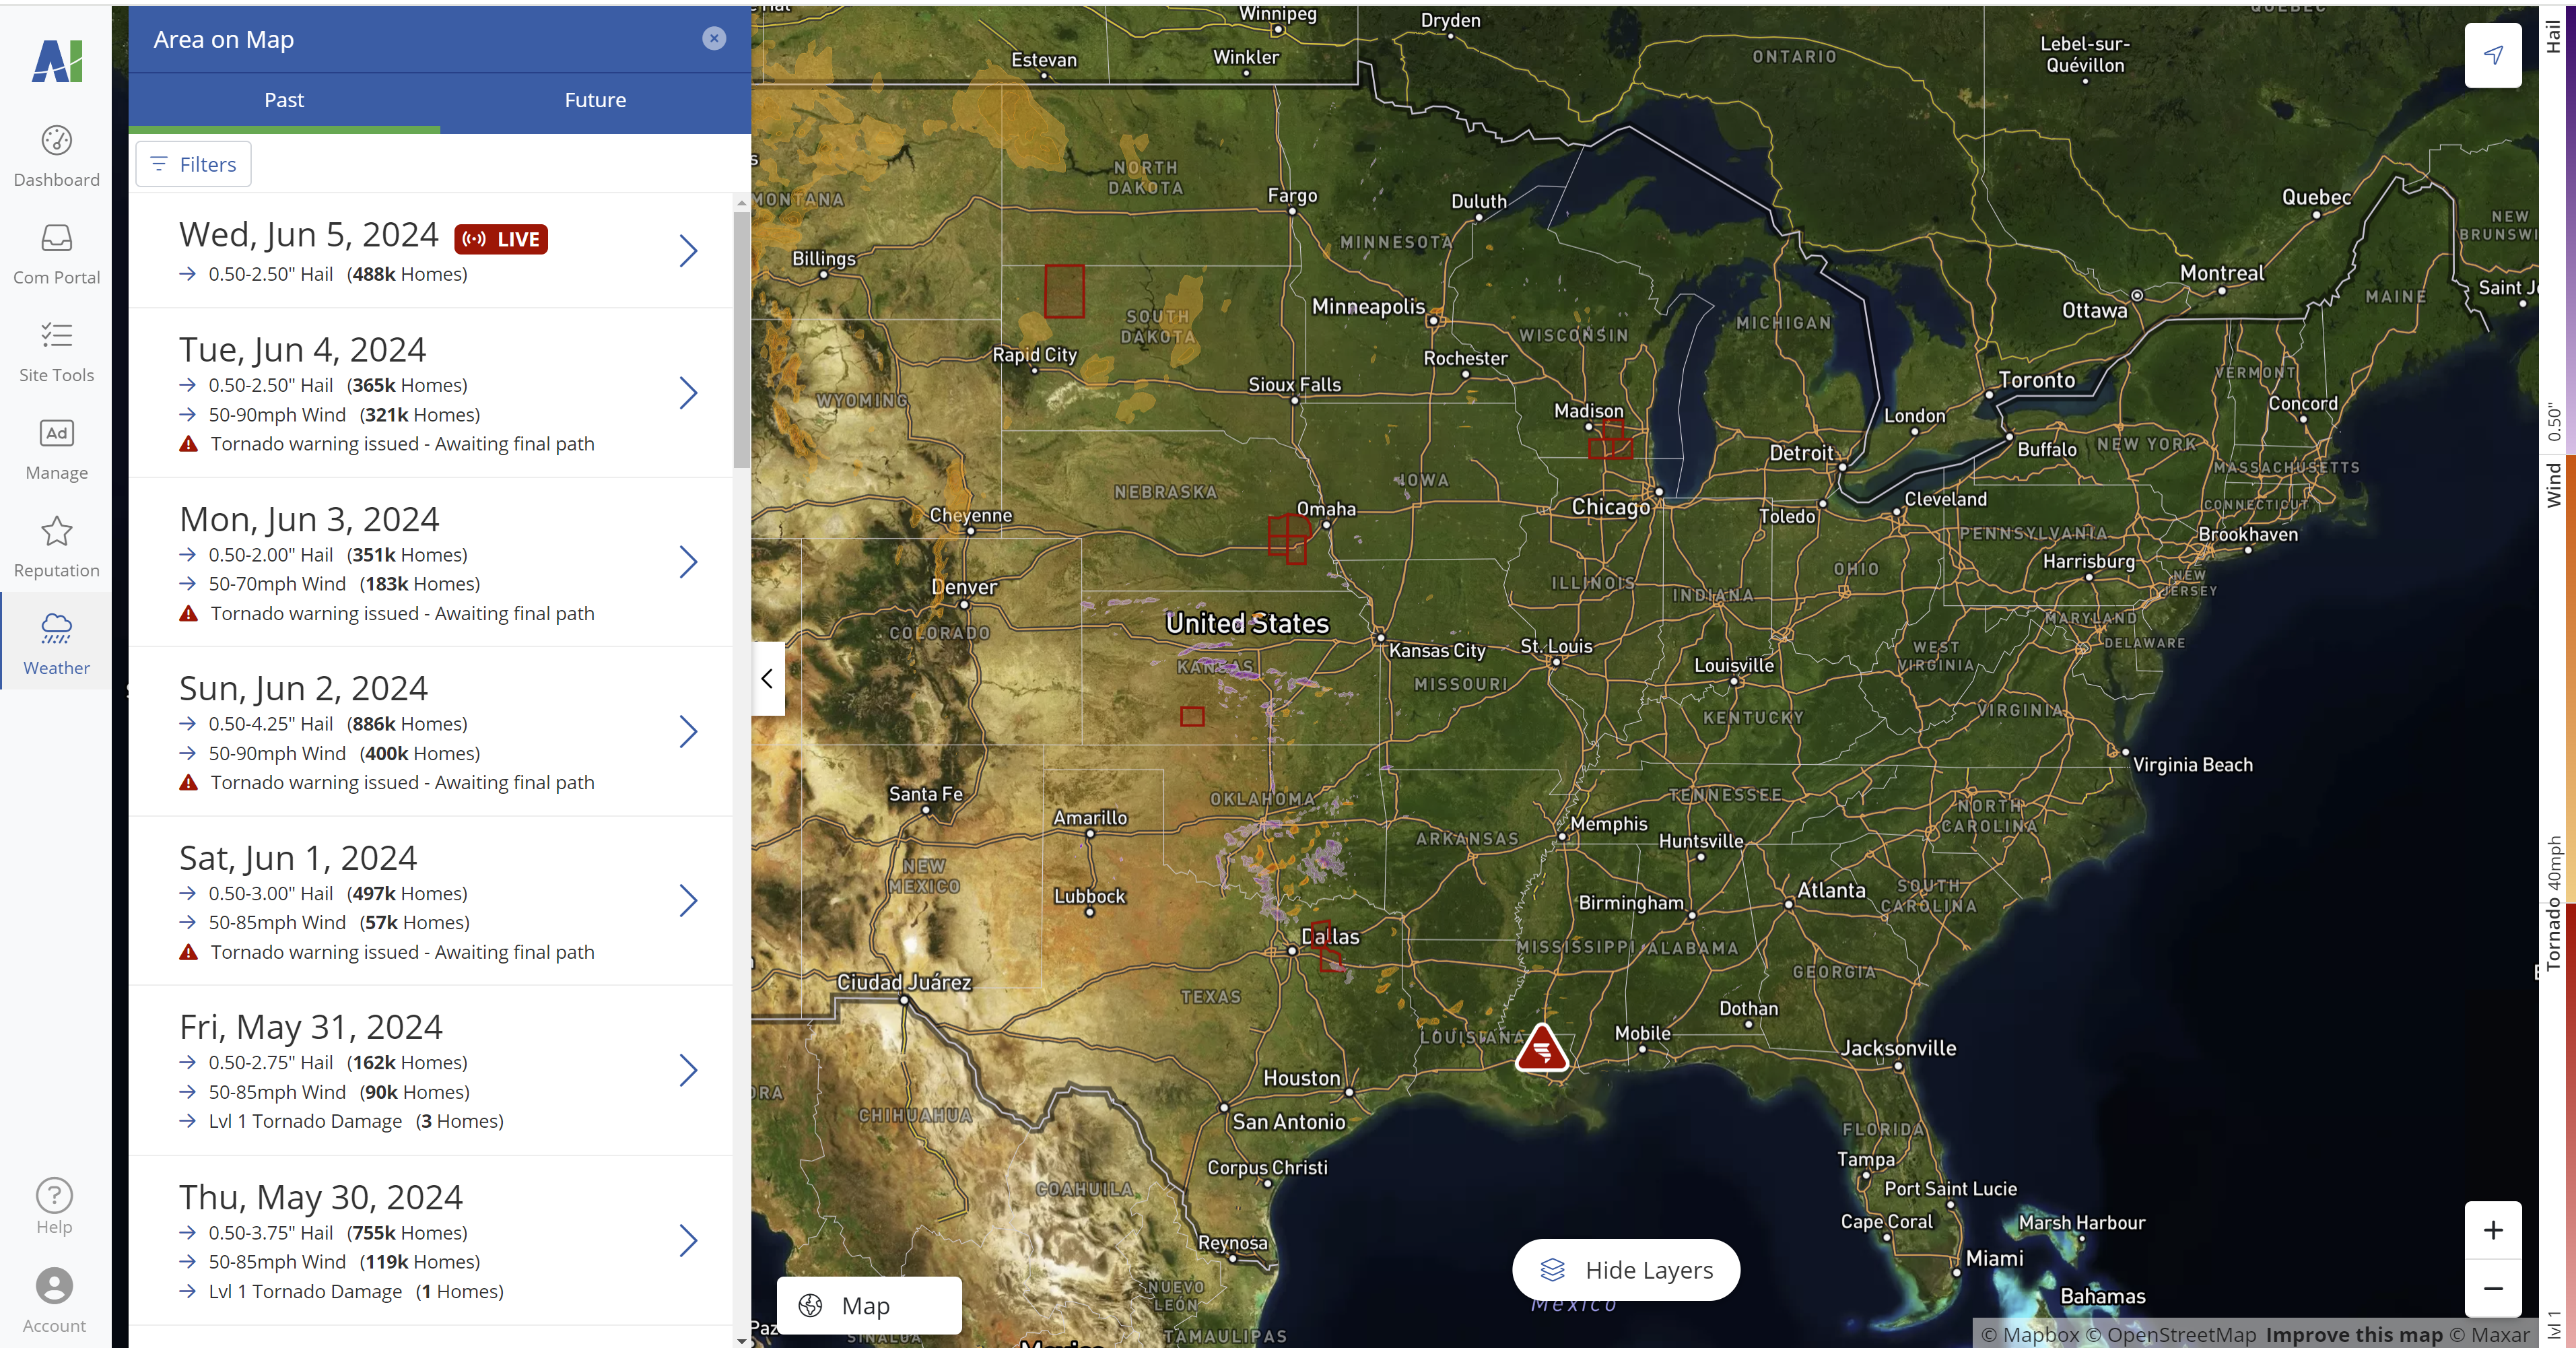
1. View a Storm on the Map
Use the shortcuts on your PSAI Weather Center dashboard to identify a storm of interest. In the Weather Outlook section, a tornado warning will appear if one has been issued by the NWS within the past hour for your area. You can also view forecasted storms, go to one of your favorite markets, search by address, or simply view the map and explore on your own.
Once in the weather map, you can click on View Dates to see any tornado warnings, sightings, or paths nationwide. Click into a specific storm, or search by address to view the tornado-related event.
Learn more about these options on our overview of your Weather dashboard.
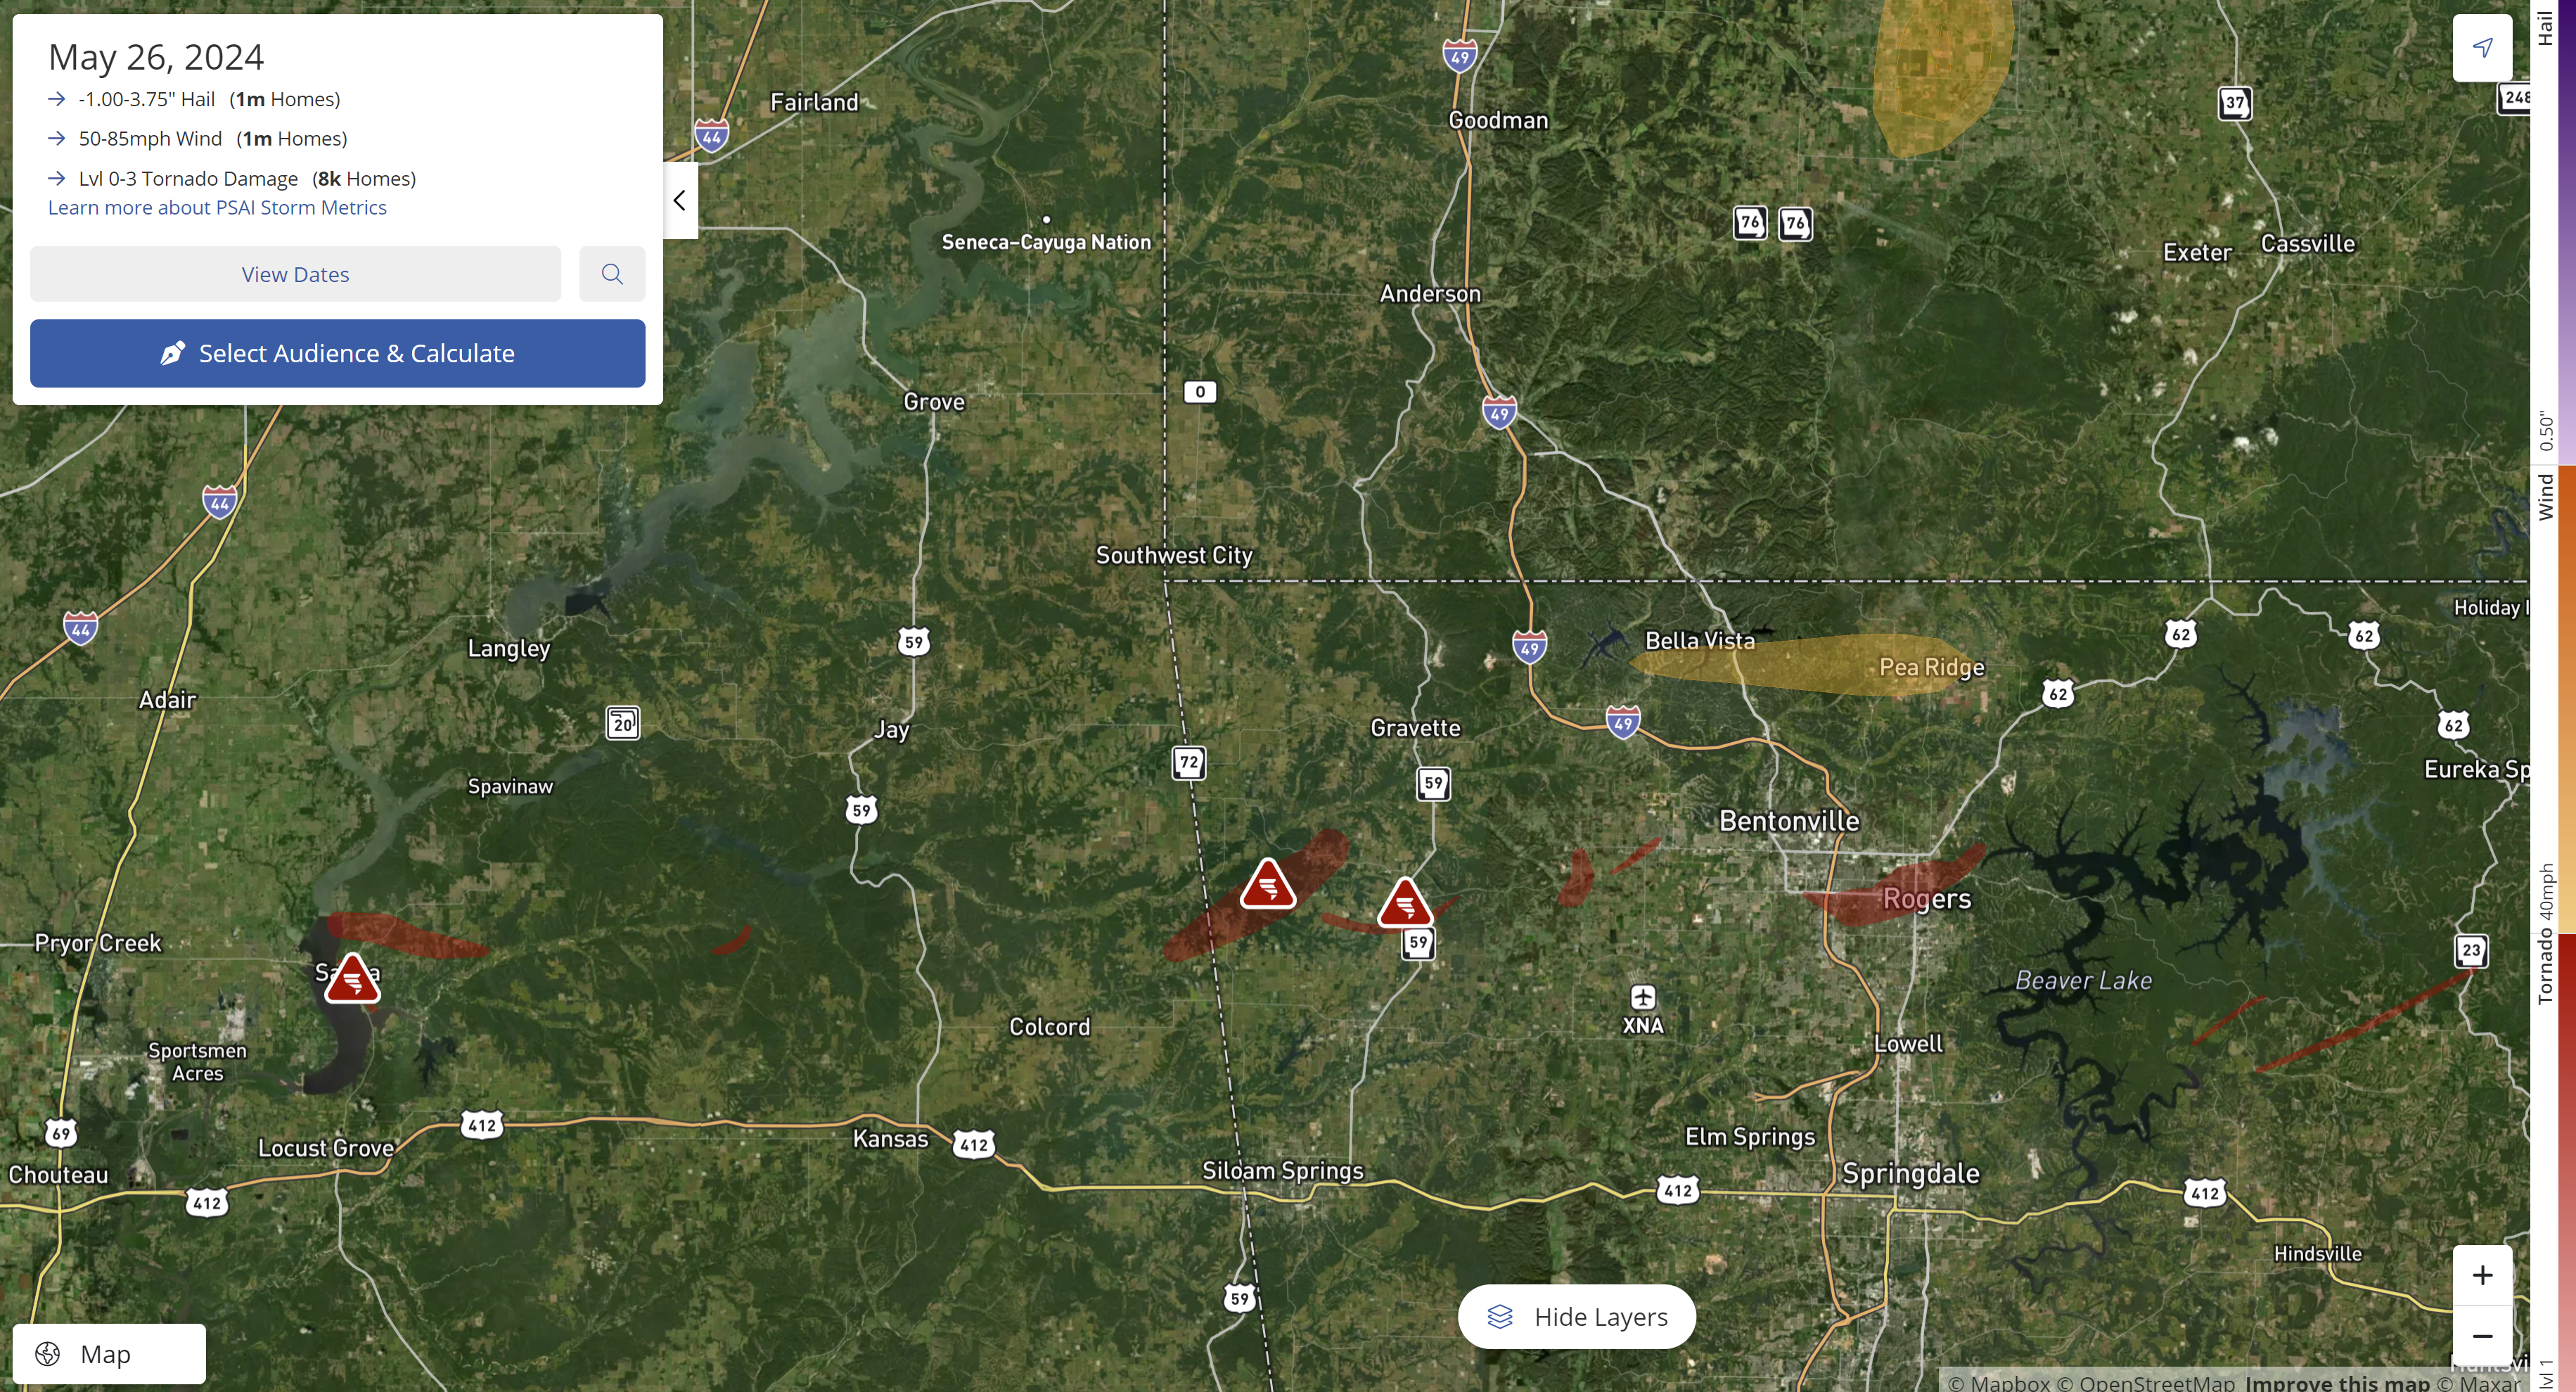
Once you've entered a storm with a tornado event, you'll see a detailed swath view similar to the one shown below.
If you need more help getting started with a specific storm, check out our instructions on finding storms near you, including filtering by wind/hail or searching by date range.
2. Zoom and Filter
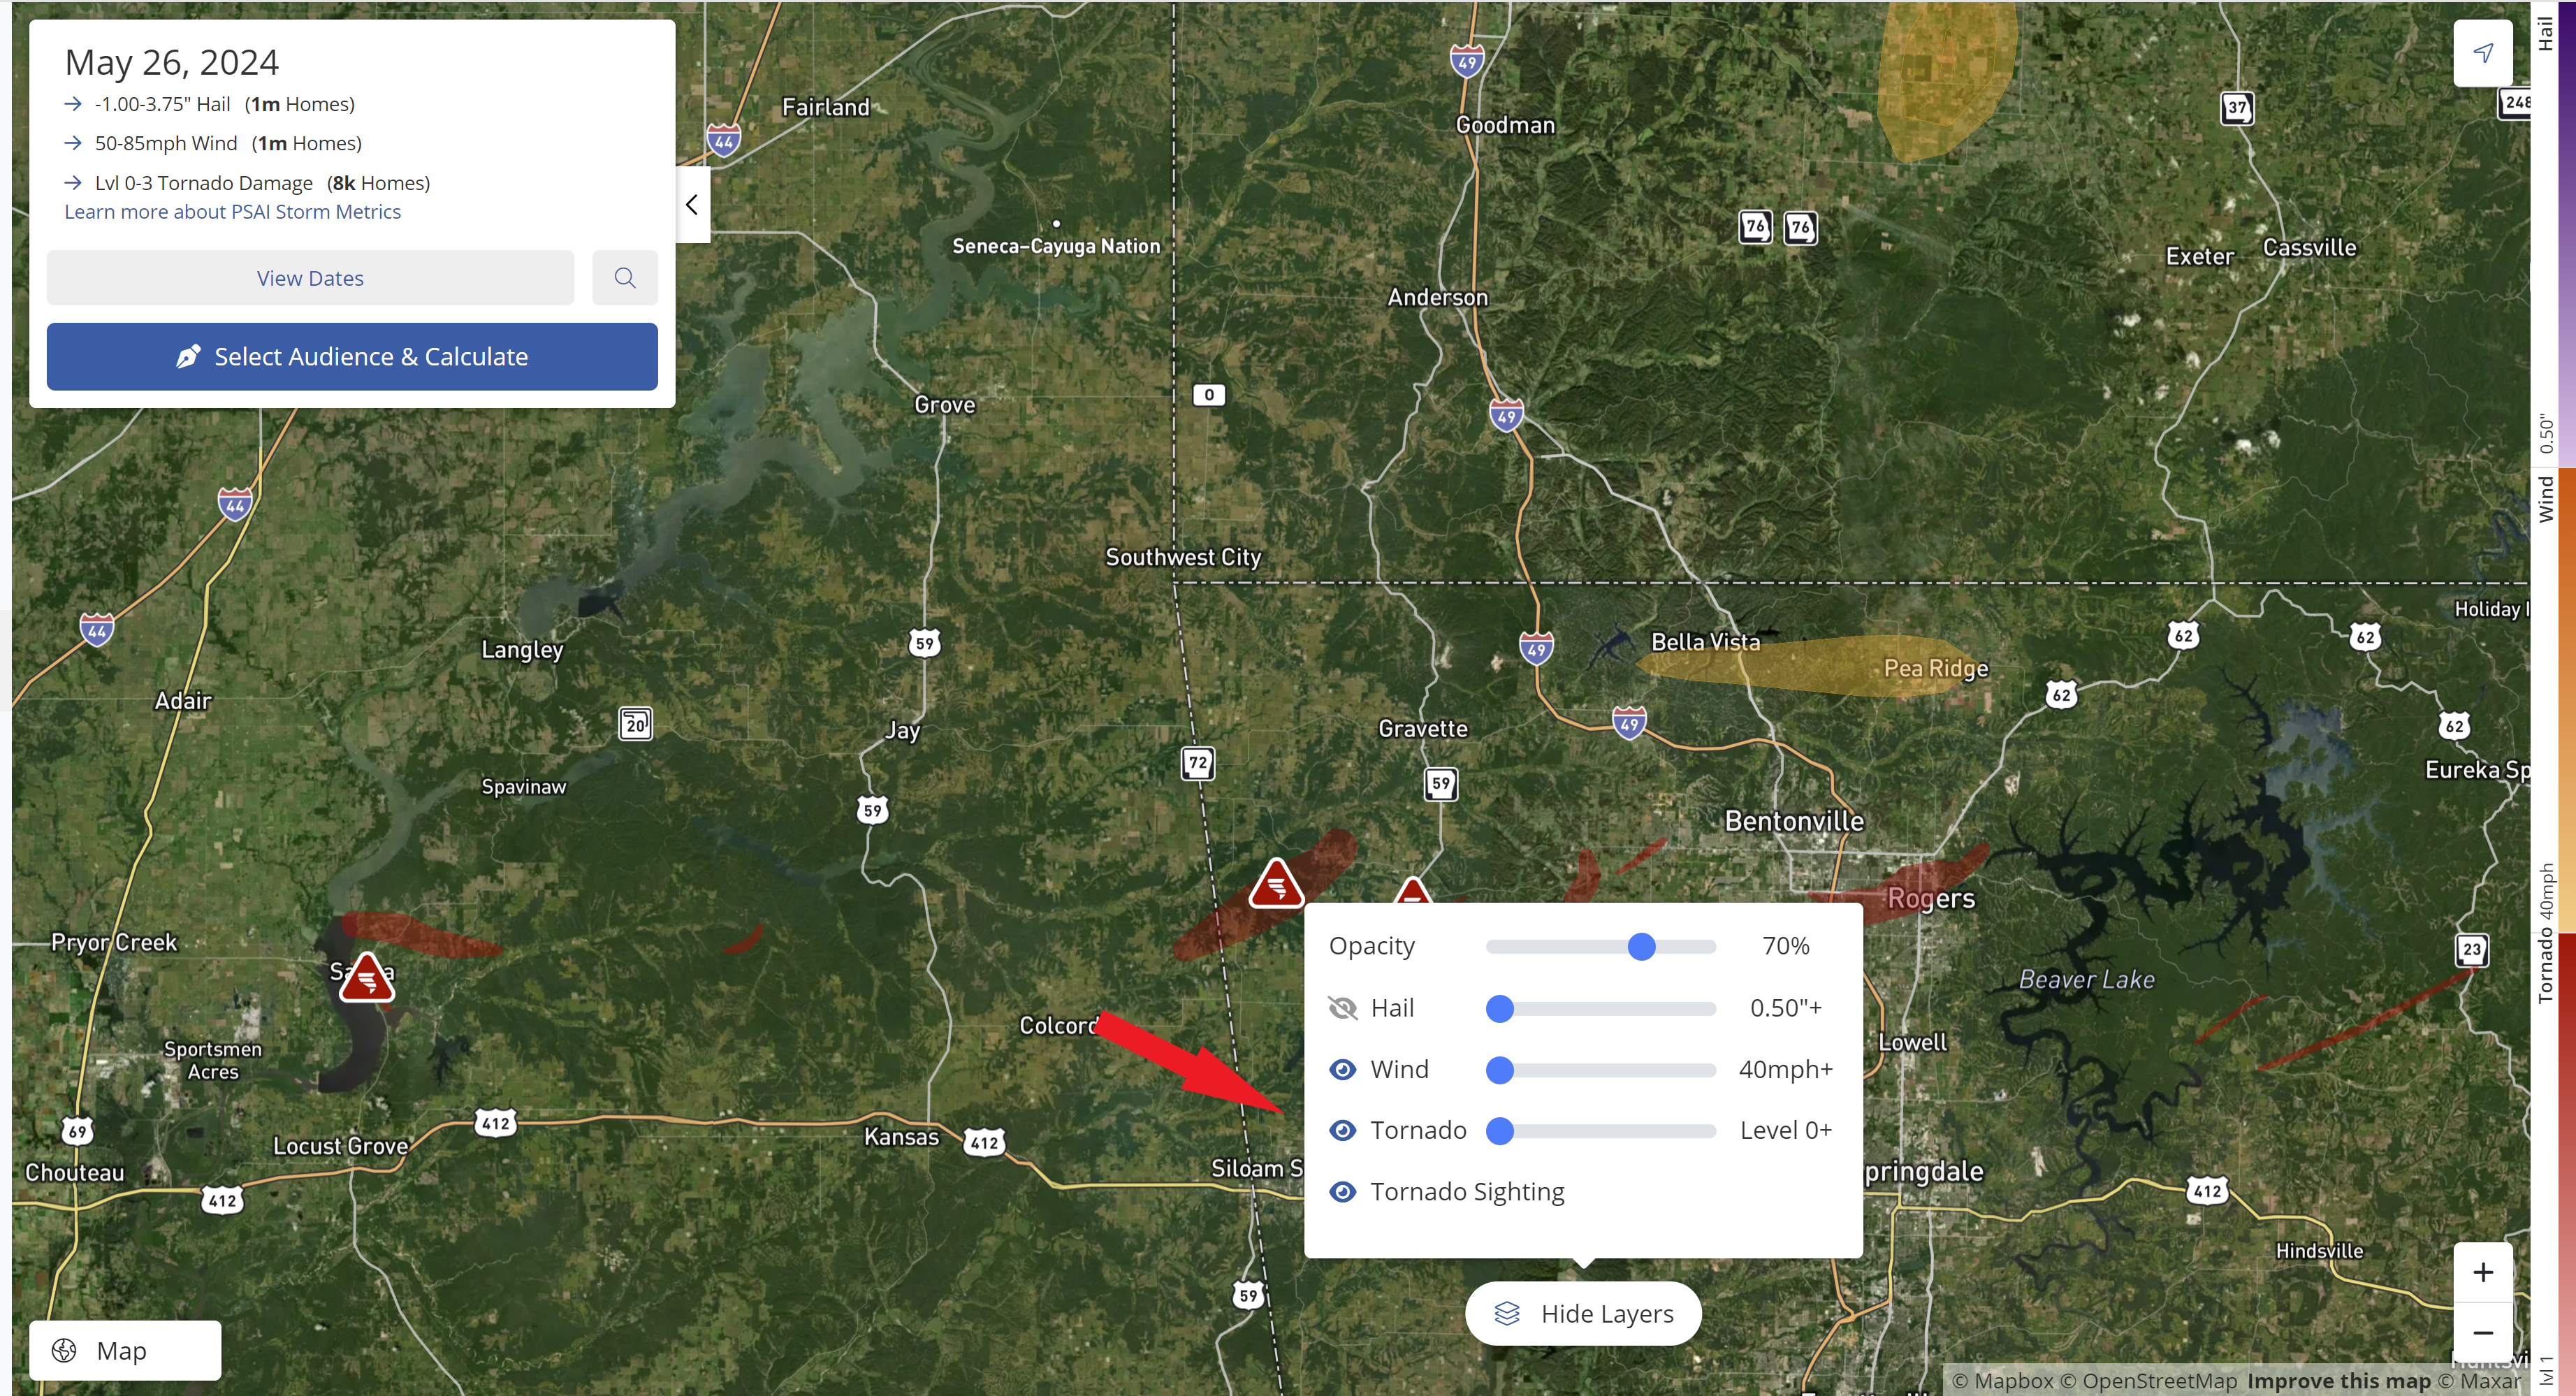
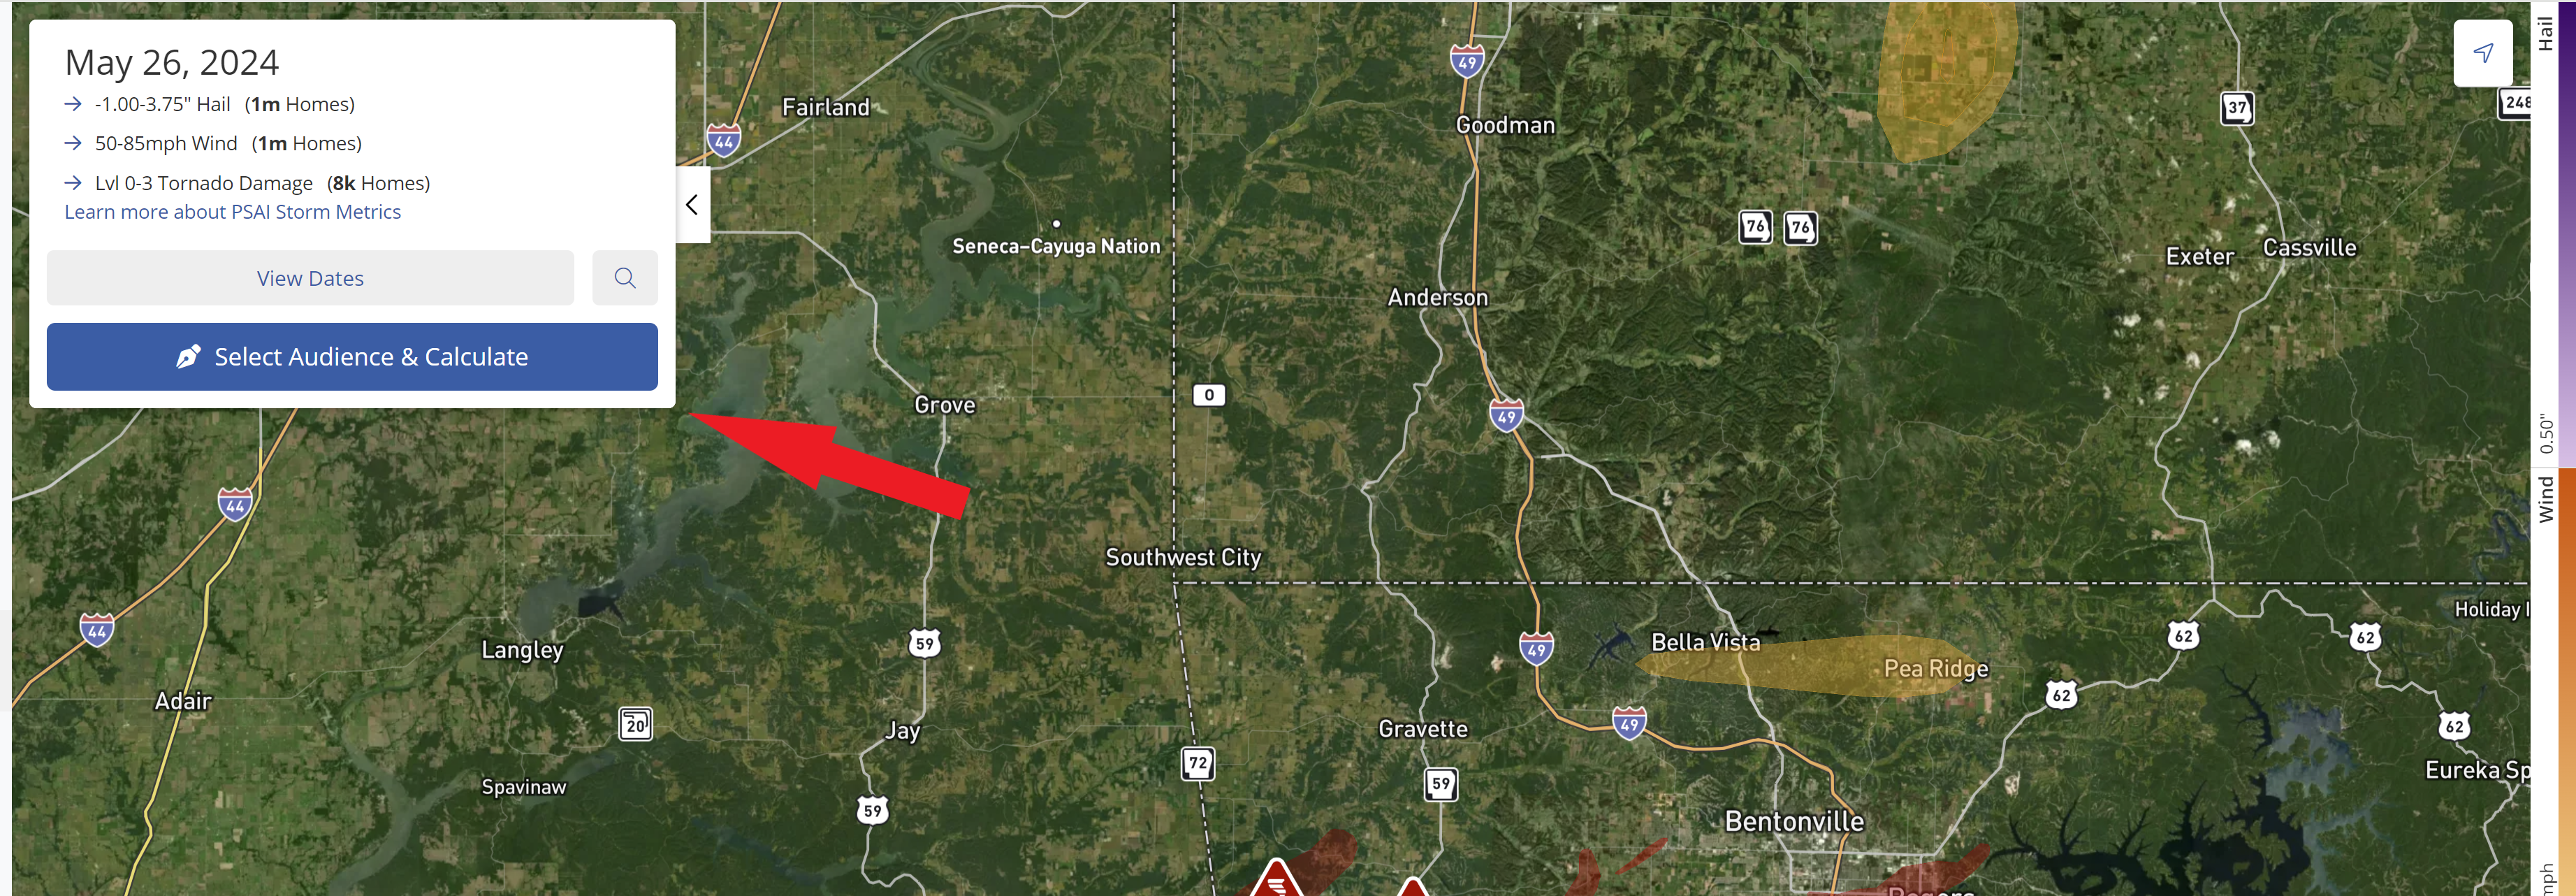
Once a storm is chosen, you can zoom in on key areas of the storm to see more detail. You can also hover over individual swaths to see the number of affected homes or use the "Hide Layers" button to adjust the opacity of swaths as well as the hail size, wind speed, and/or tornado level targeted.
3. Select Audience & Calculate
Once you've narrowed down the storm location based on your desired wind/hail/tornado parameters, click the Select Audience & Calculate in the upper-left corner of the map.
4. Draw Your Storm Campaign Area
You'll now see the Draw panel, which allows you to draw a shape for the specific area of the storm you would like to target with your campaign.
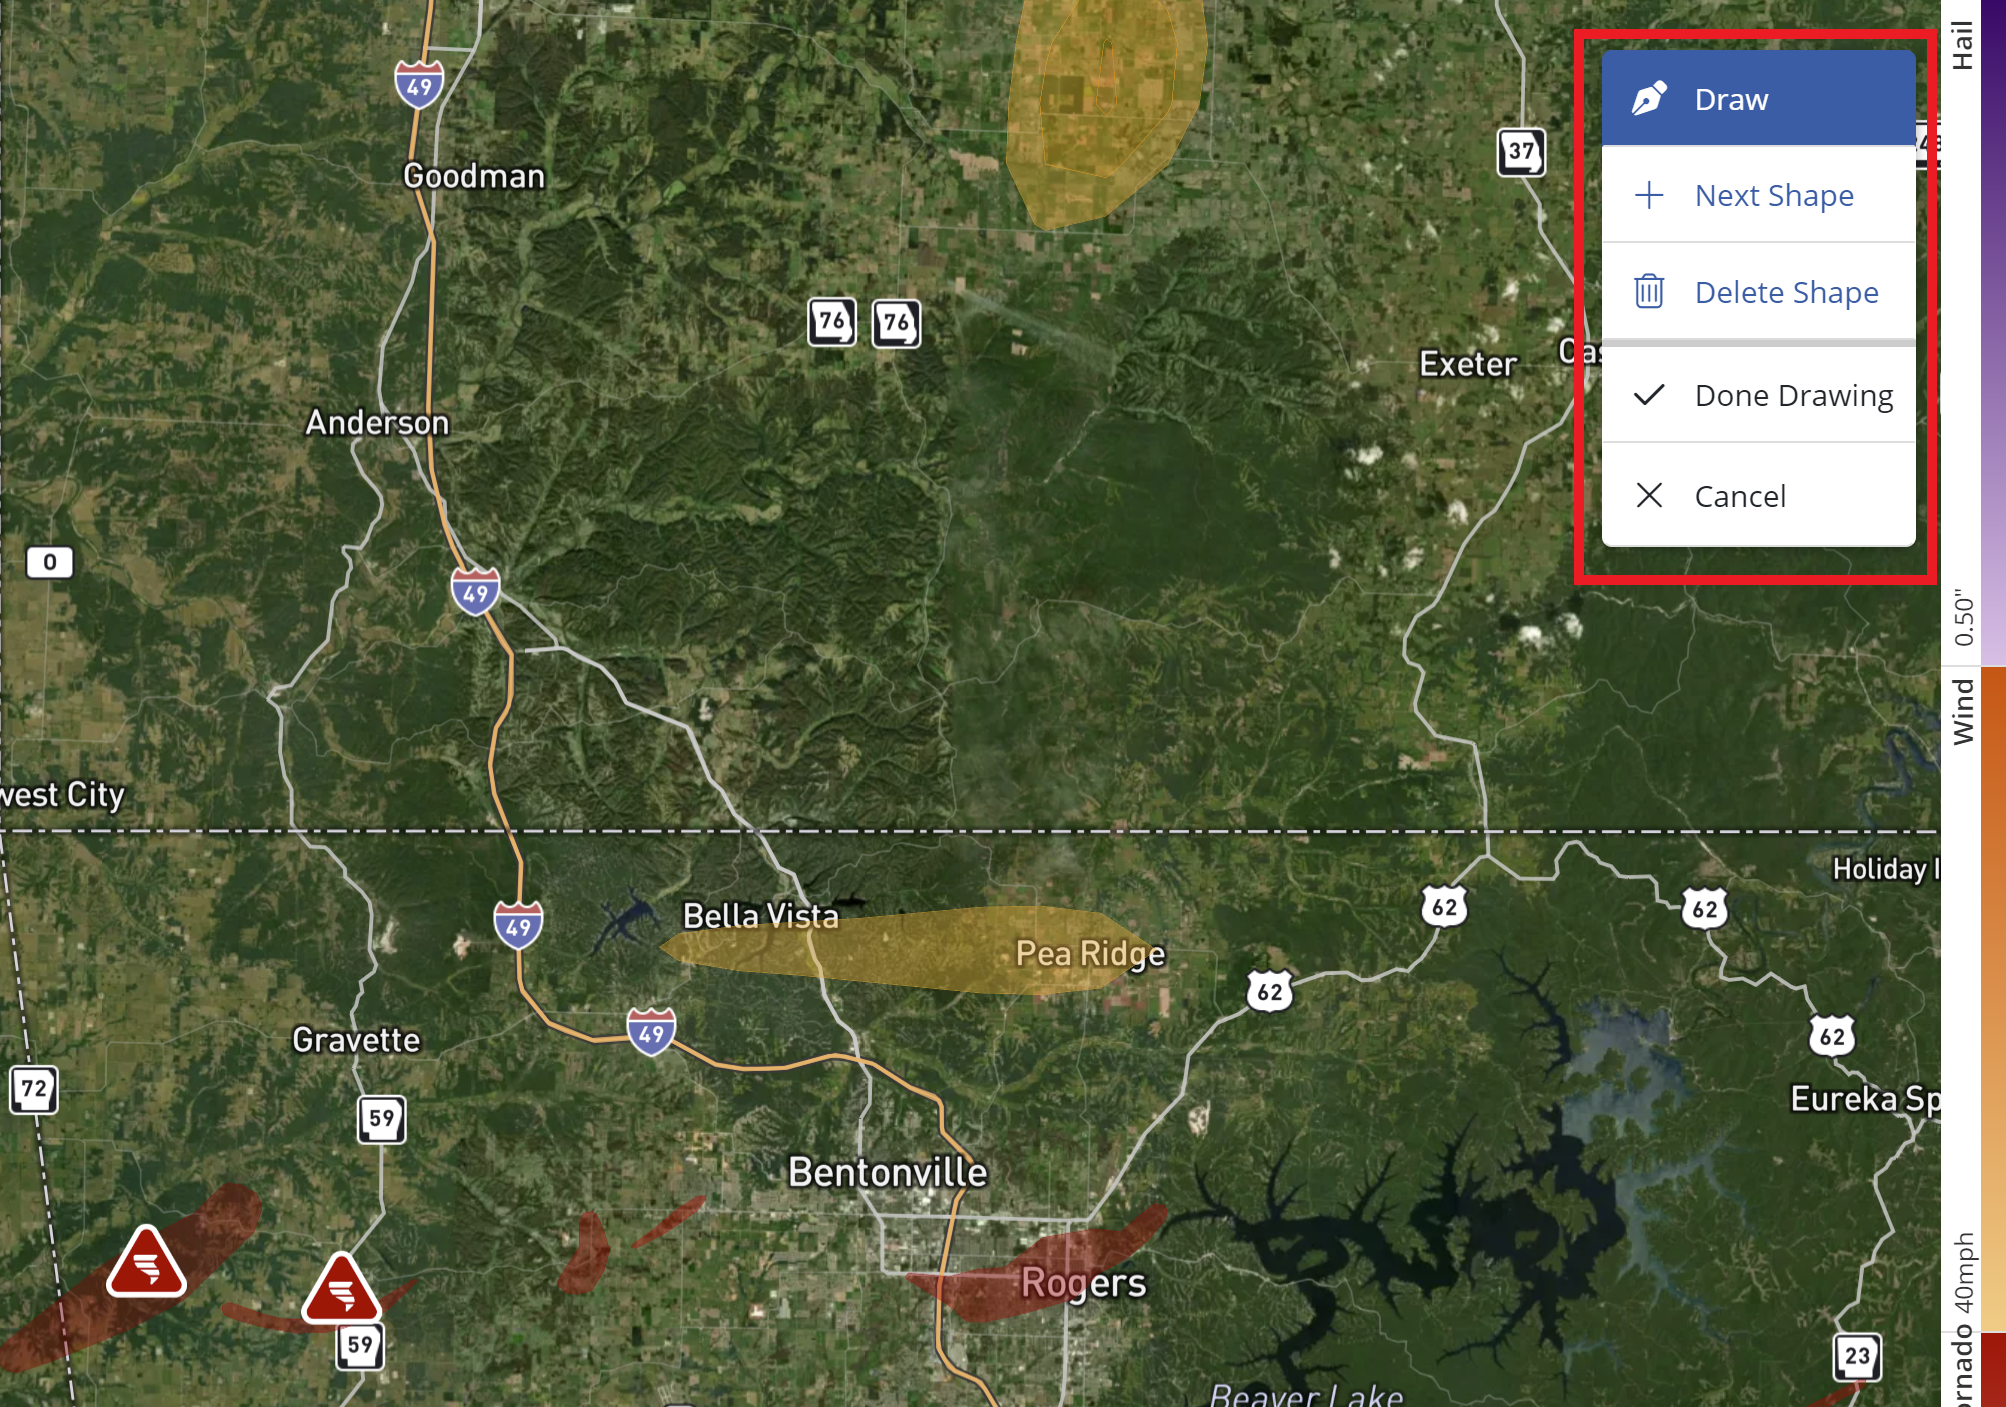
Simply click on the map to start your shape and add new points. For more detail, check out our article on how to draw on the PSAI Weather map.
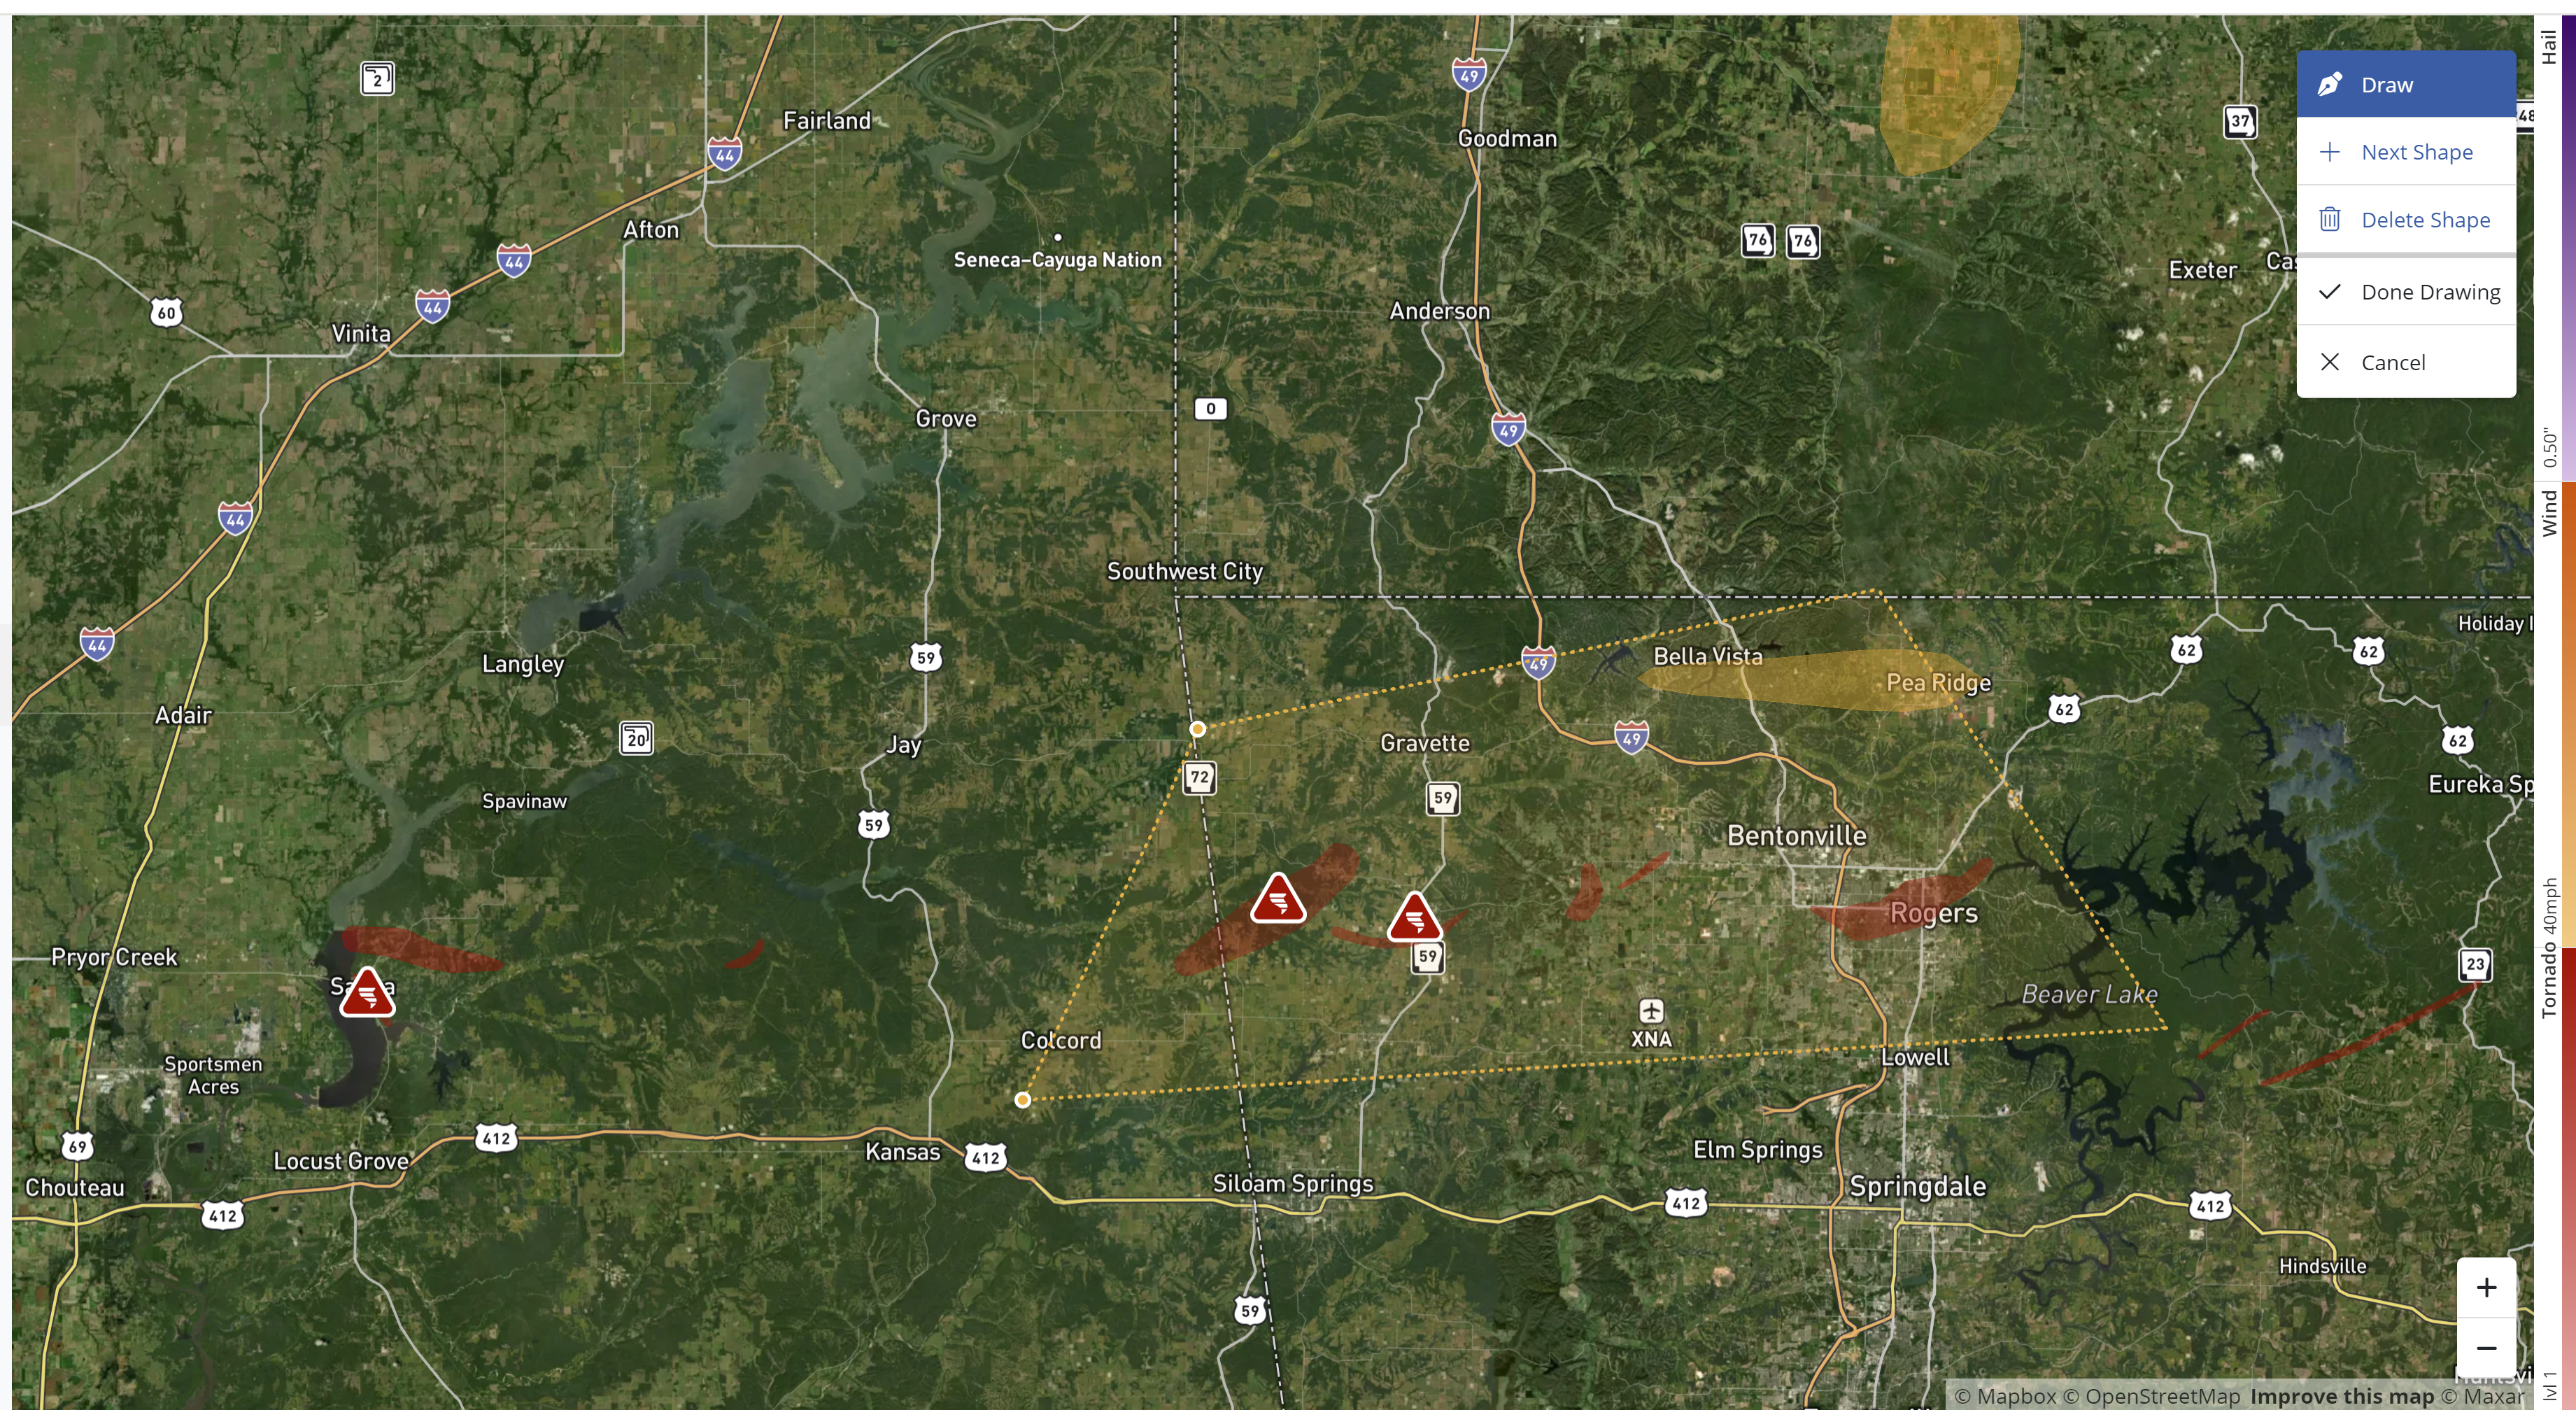
If you're targeting multiple storms on the same date, we recommend drawing multiple shapes and combining them into a single Facebook storm campaign. Find out more about this tip and other best practices for drawing on the map.
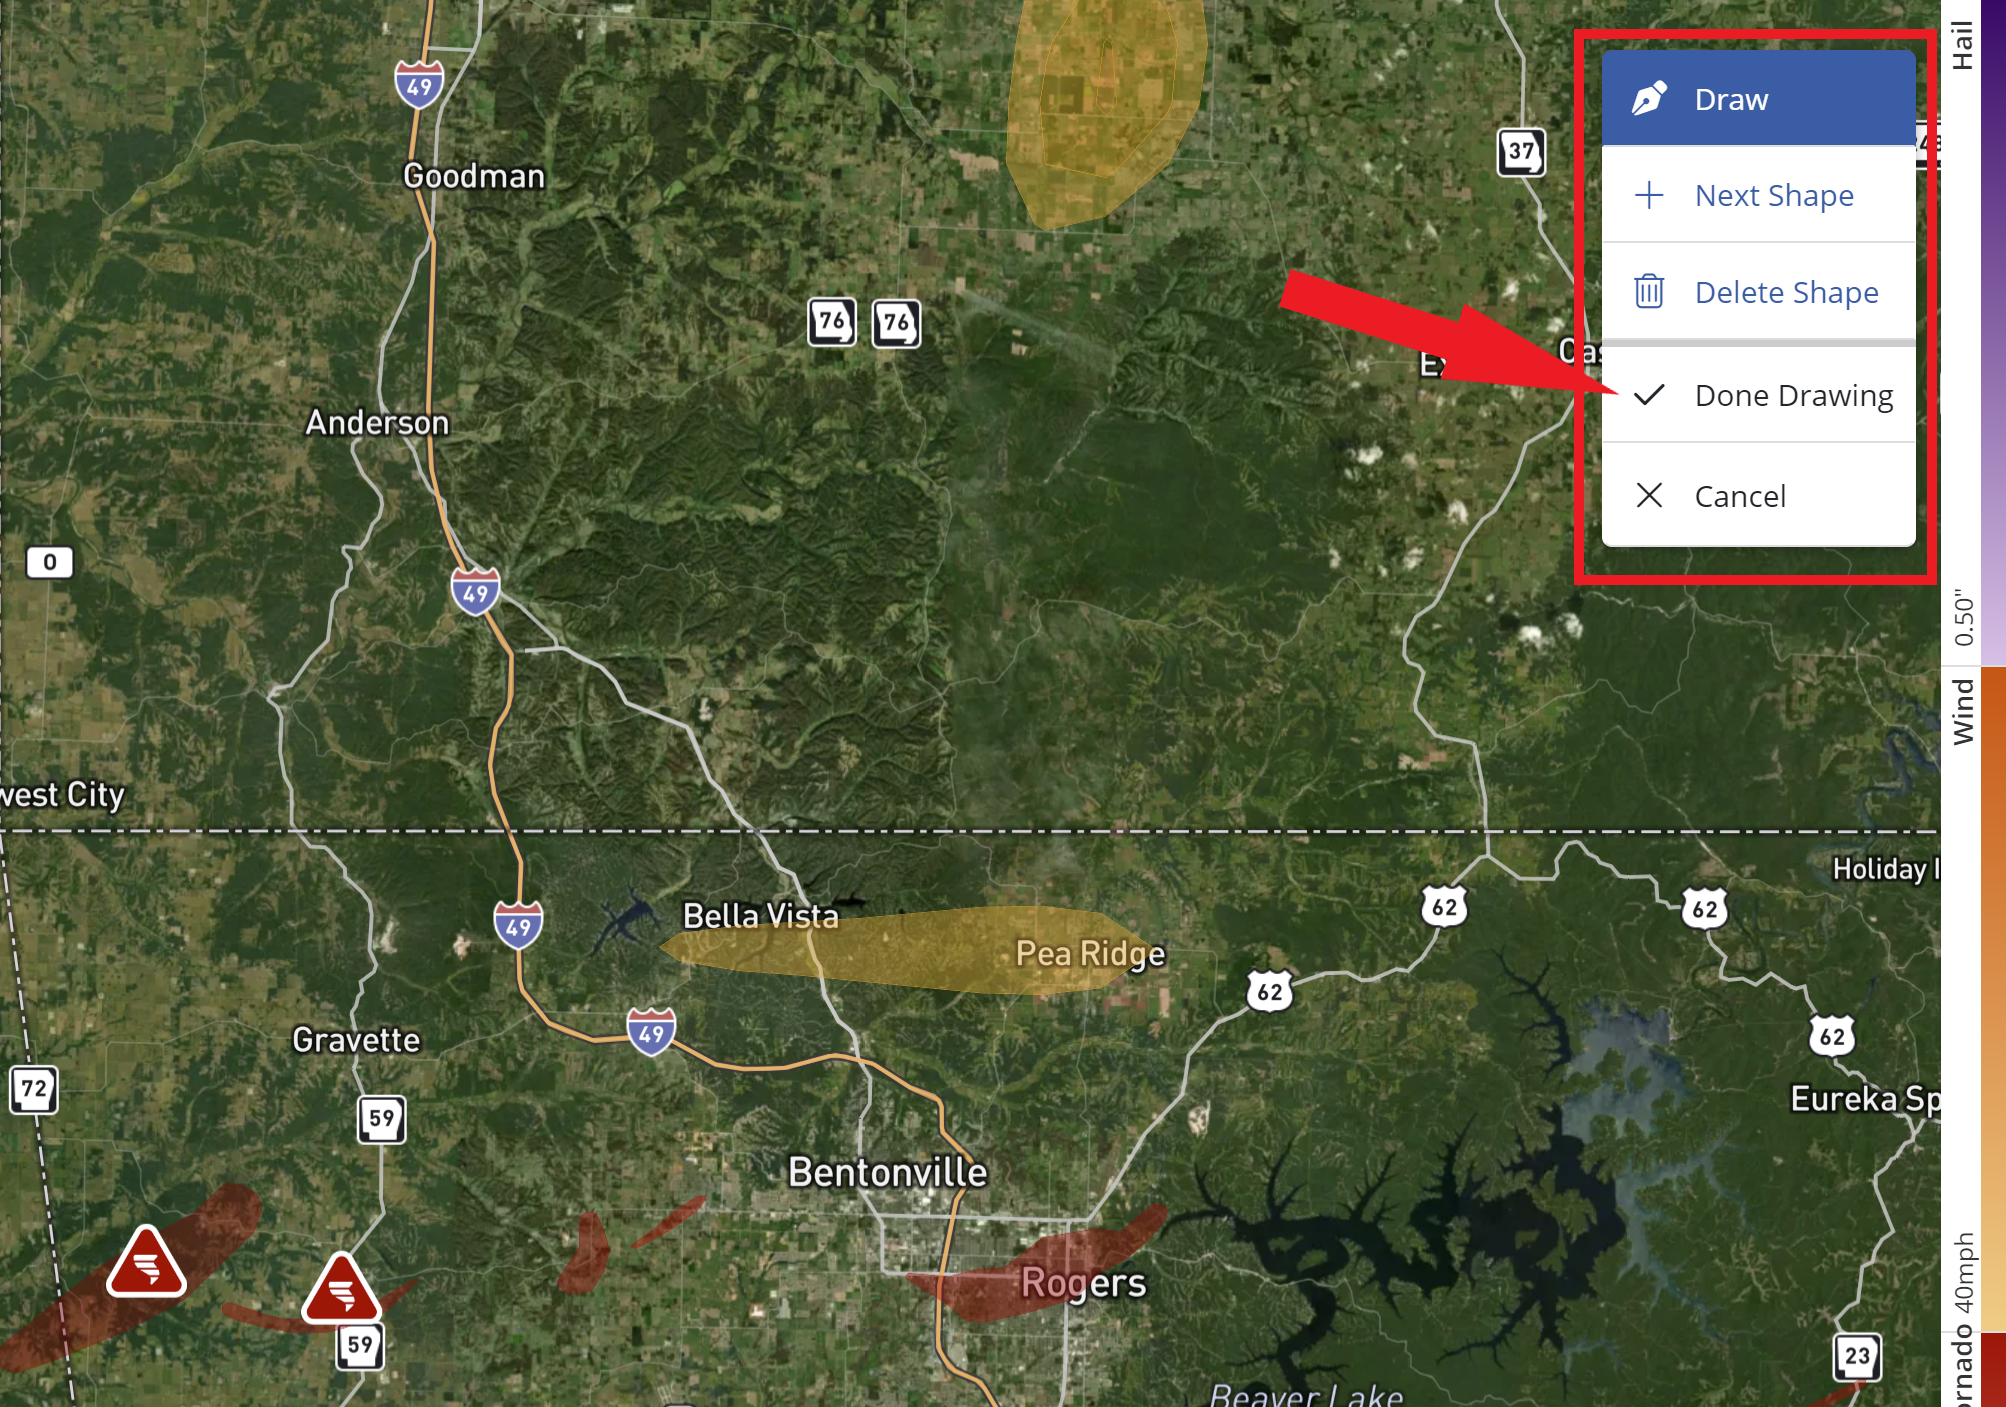
Once your shapes are ready, click Done Drawing.
5. Allow Target Audience to Be Generated
Based on your shape, PSAI will calculate the number of homes in this area. This may take some time, as we are aggregating a huge number of data points for your storm campaign.
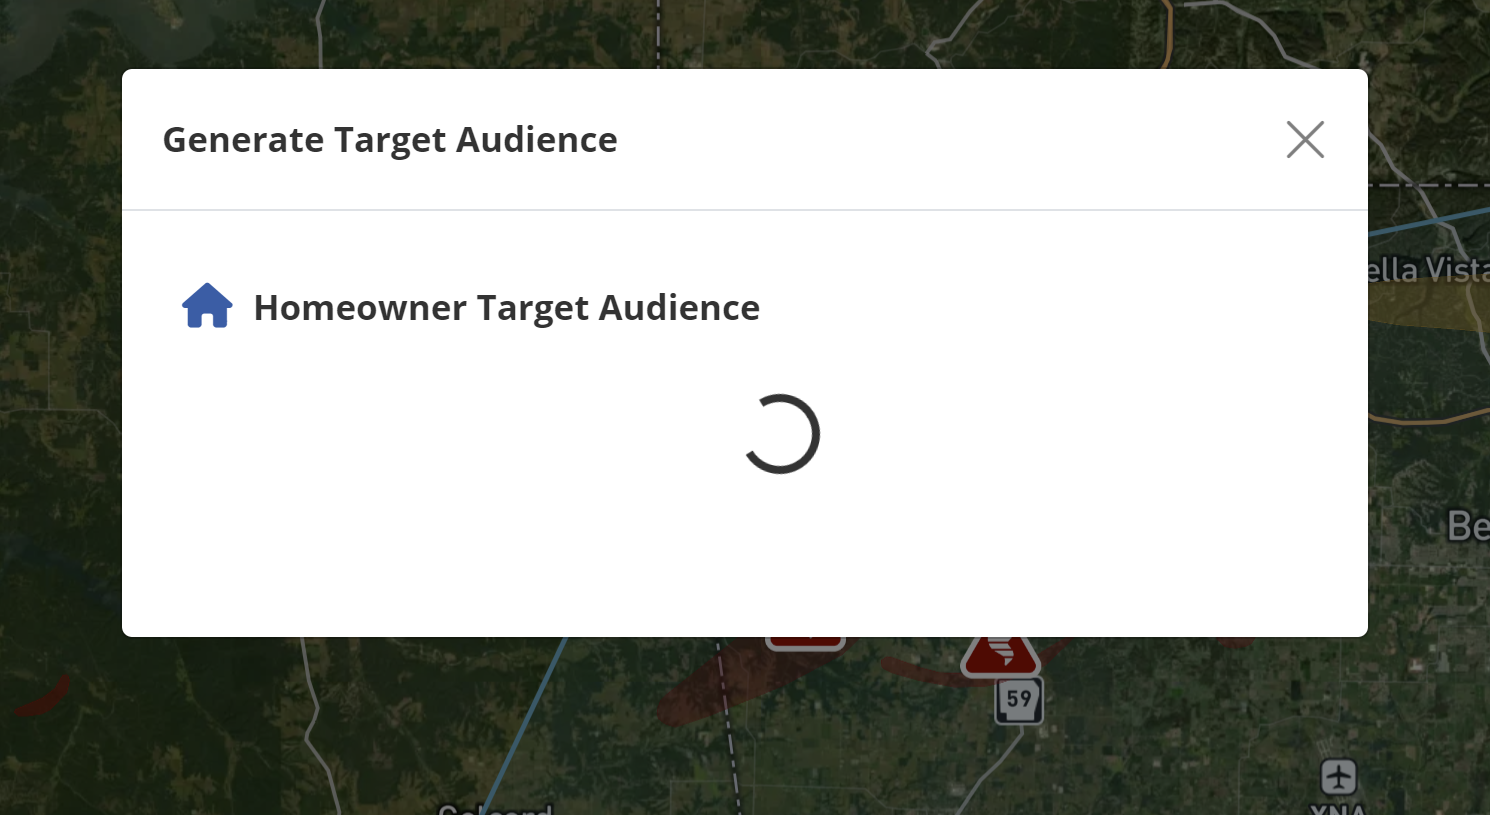
Did the Weather map time out? Then your swath may be too large to calculate.
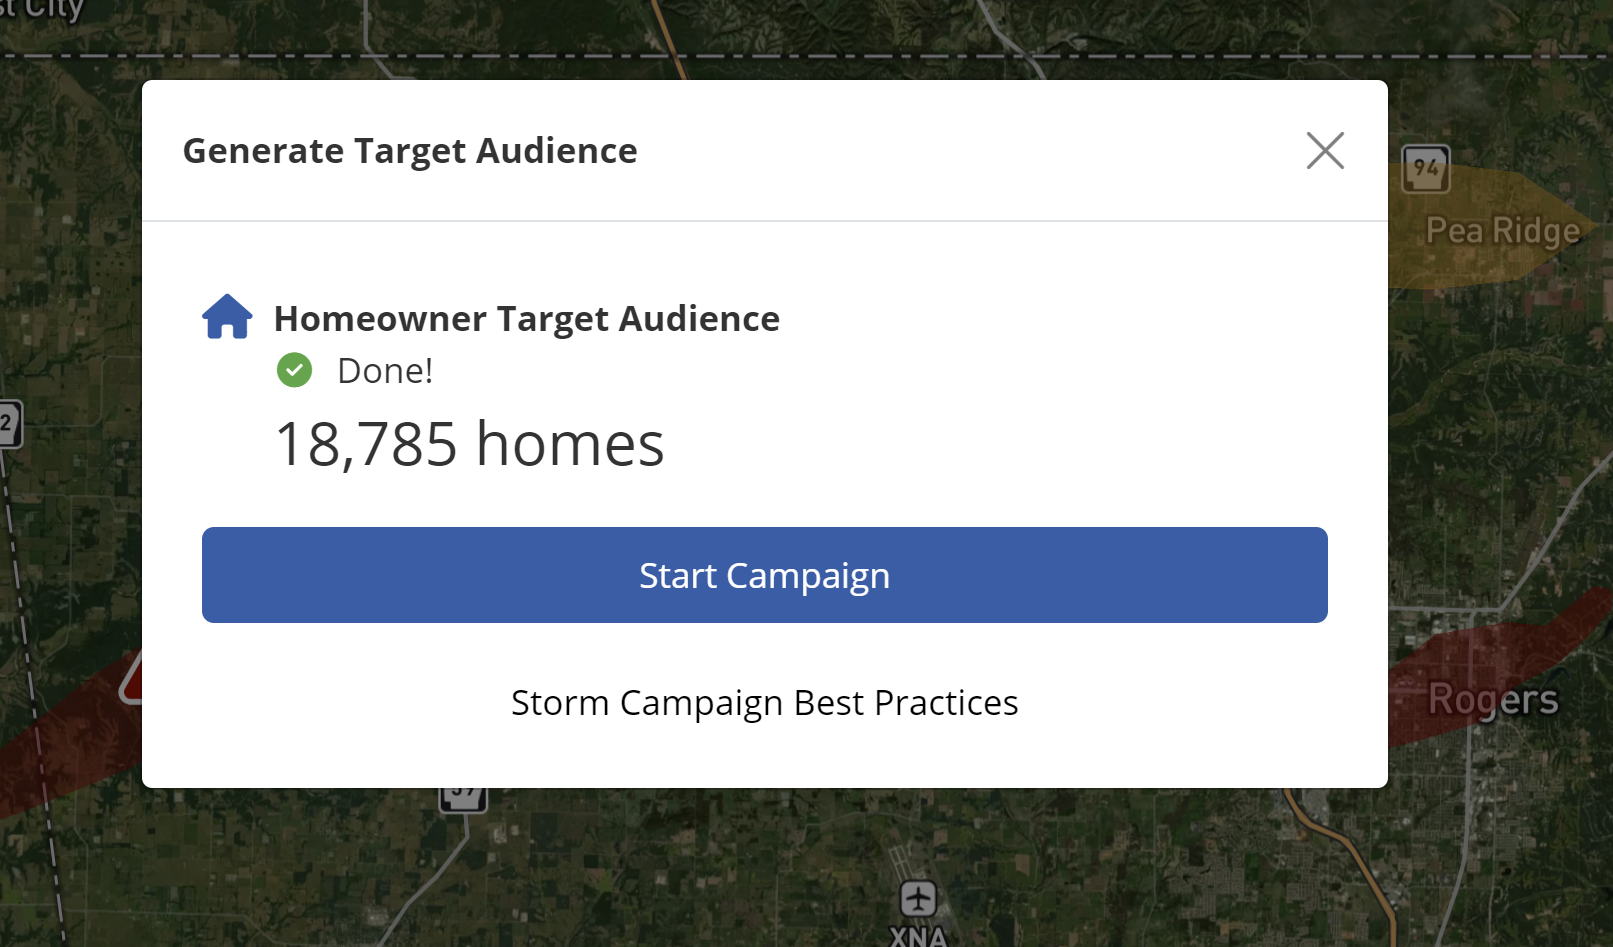
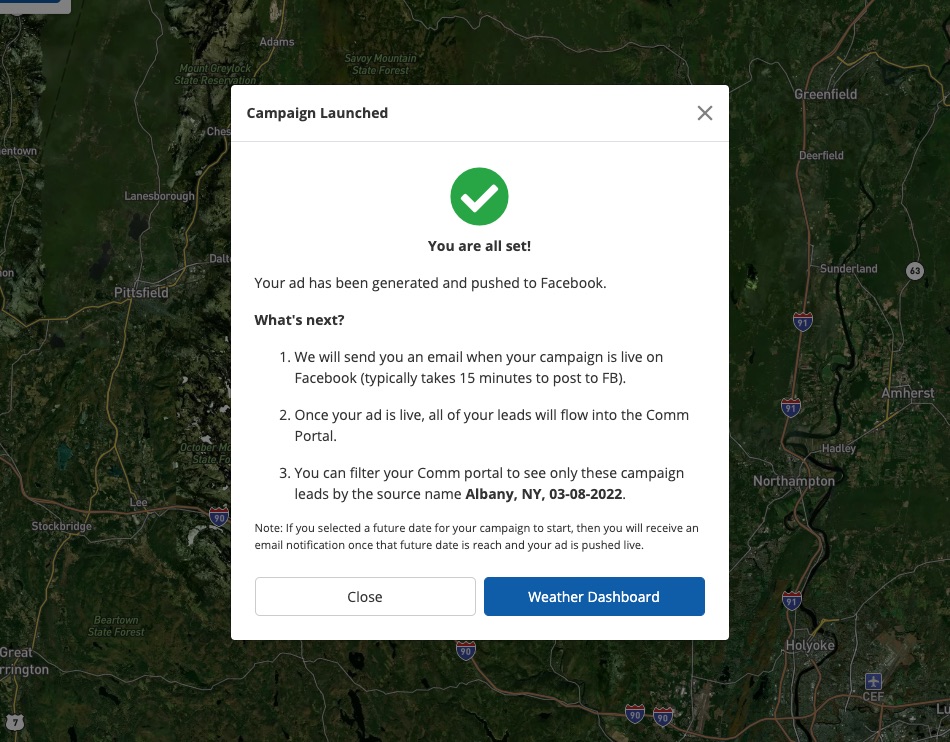
6. Start Your Campaign
Once the calculation is complete, you'll be shown the modal below, detailing the estimated number of homes included in your storm campaign. Click Start Campaign to begin.
Once you've started your storm campaign, you'll be walked through each remaining step to successfully launch your campaign on Facebook. Click Get Started to begin.
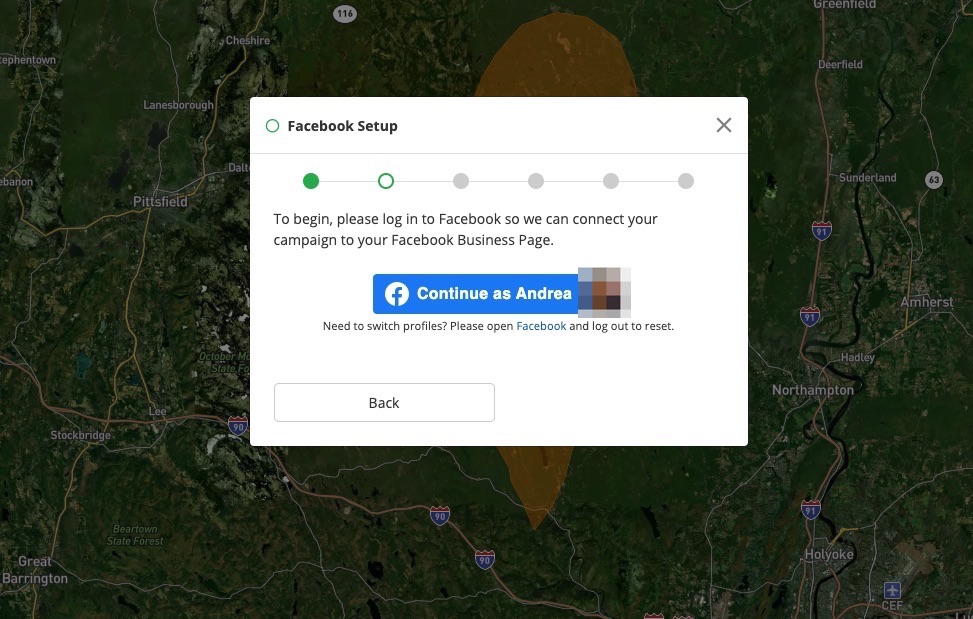
7. Log into Facebook
If you are not already connected, you'll log in with your personal Facebook account.
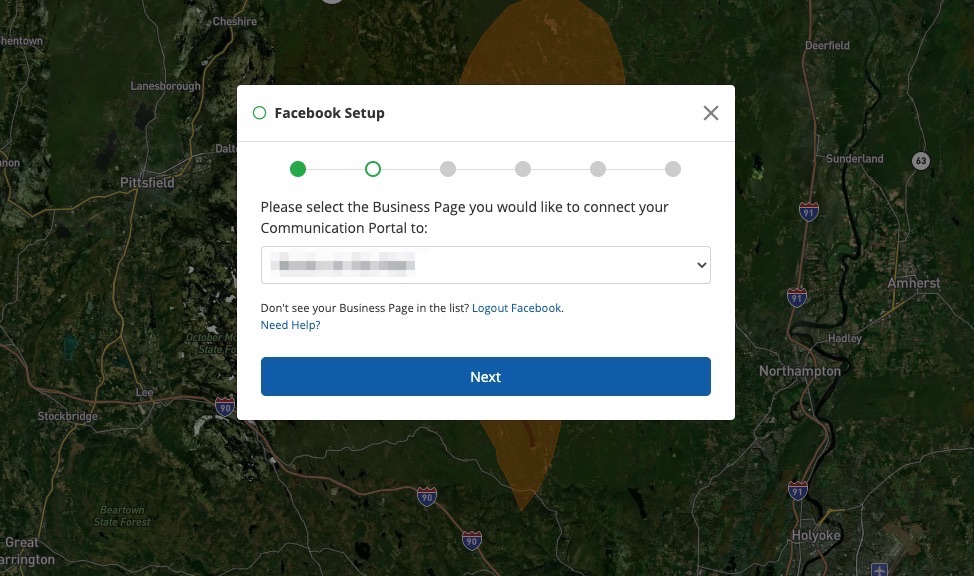
Then select the correct Facebook Business Page from the dropdown menu and click Next.
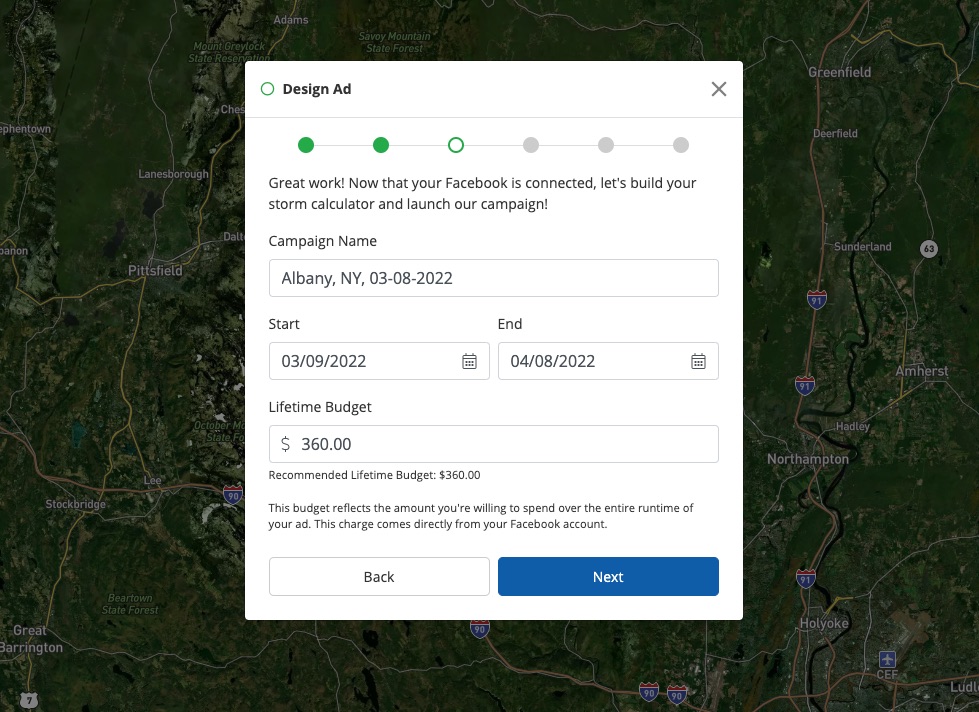
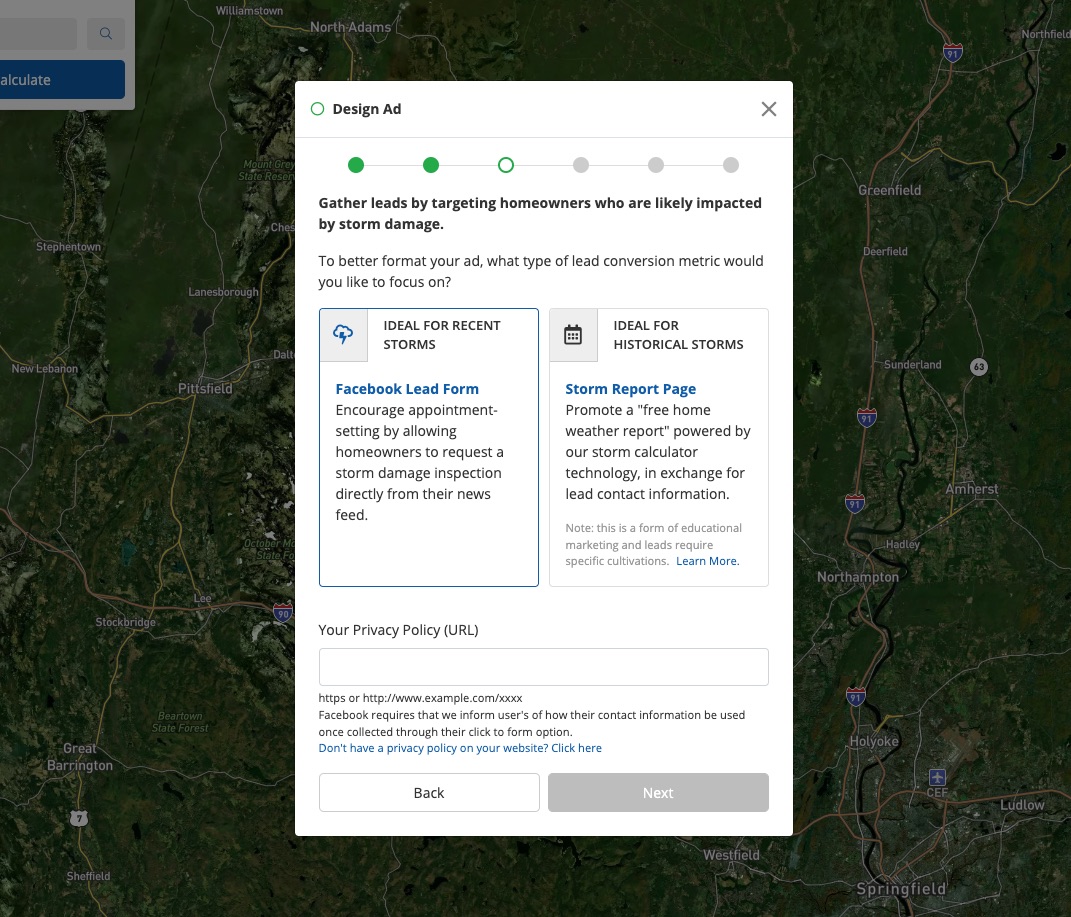
8. Design Your Ad
Next you'll be able to change your campaign's name, start and end dates, and lifetime budget on Facebook.
You'll also be able to choose between a Facebook lead form and a storm report page for your ad.
9. Edit the Creative
Customize your ad's copy and imagery if you want to, following our creative best practices for storm campaigns.
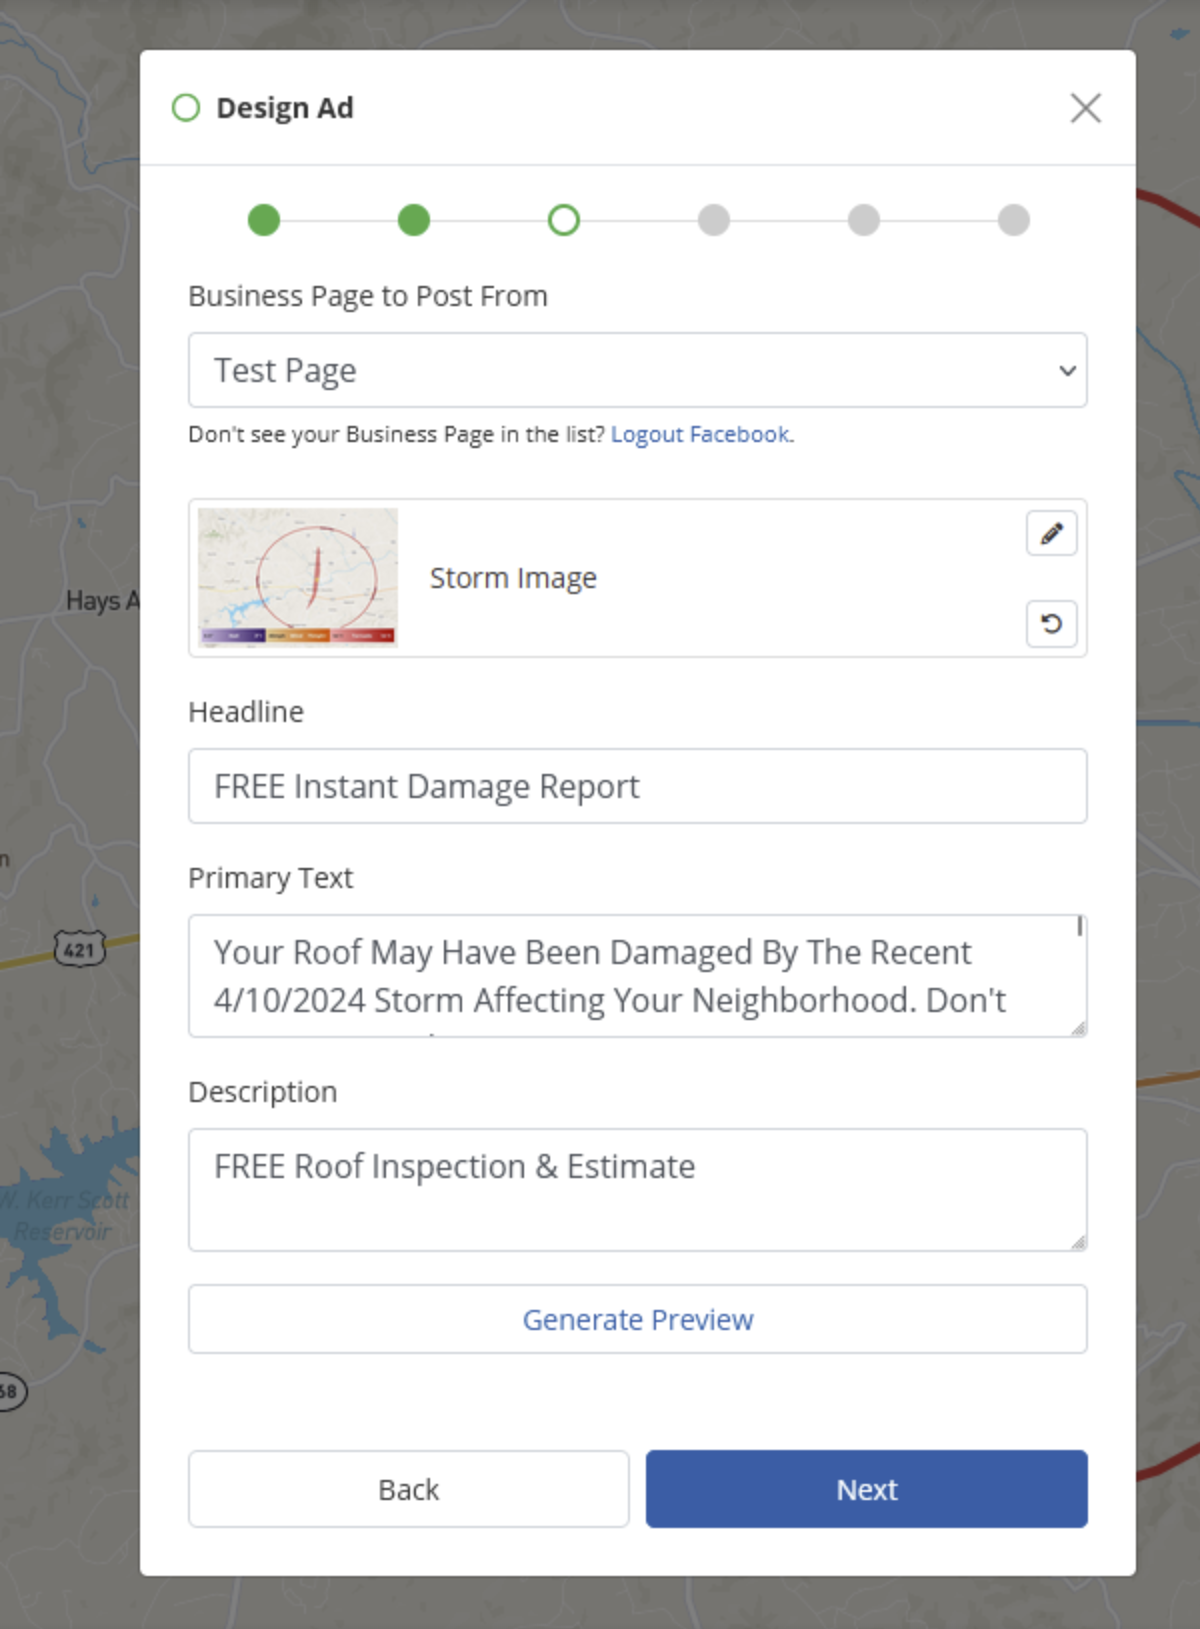
Click Generate Preview to see how your ad will appear in the Facebook feed.
10. Edit Campaign Settings
Here you'll set your storm campaign's lead notifications, including email addresses and SMS numbers. You can also add an endpoint URL to push storm campaign leads into a CRM. When you're finished, click Next.

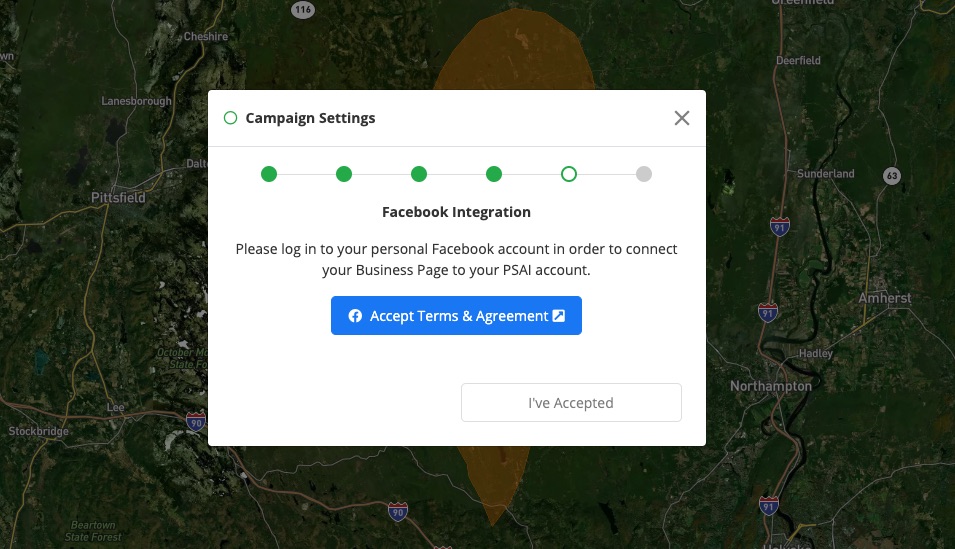
11. Accept Facebook Terms (for Lead Forms Only)
This step will only appear if you selected the Facebook Lead Form option in step 8. Click the blue button to open Facebook in a new tab and accept the terms.
12. Launch
The final step is launching to Facebook! Click Launch Campaign.
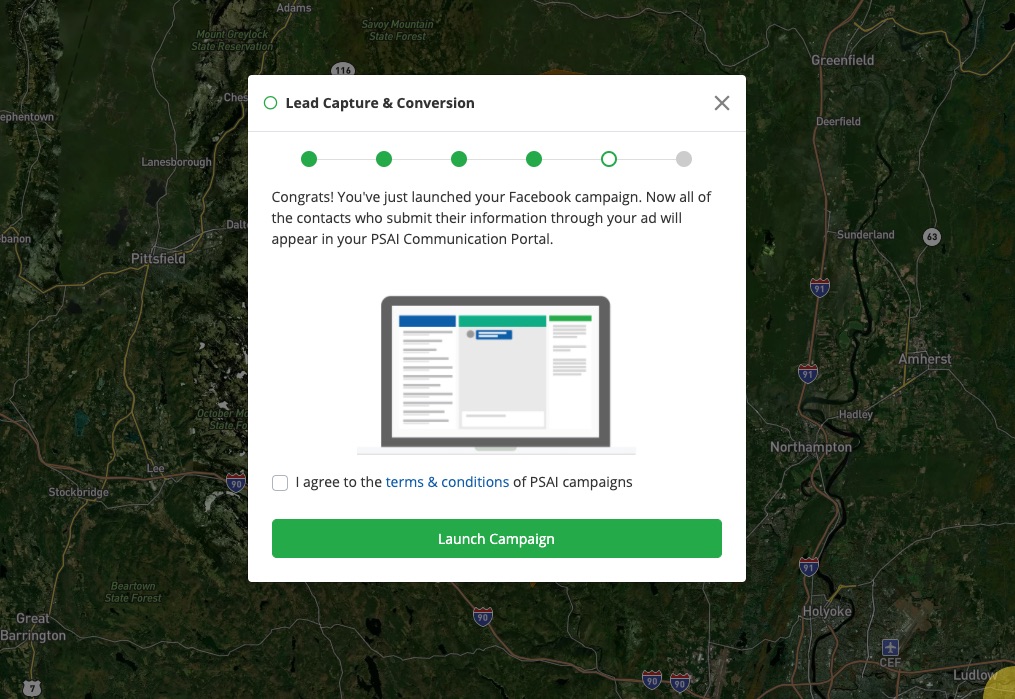
Once your campaign is launched, it will take a few minutes to post to Facebook. From there, you can simply wait for leads to flow into your Com Portal.
Did you know? By connecting Facebook and Instagram, you can automatically post storm campaign ads to both platforms. Learn how to connect Facebook and Instagram here.
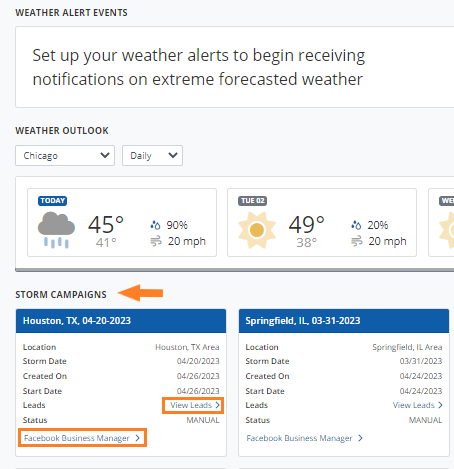
You Launched Your Campaign. What's Next?
Once your storm campaign has launched, it will appear under Storm Campaigns on your PSAI Weather dashboard. From here, you can click to view leads for the campaign or to enter the Facebook Business Manager:
The key to a high-value storm campaign is interacting with leads effectively. Explore our best practices for handling tornado leads (link coming soon!) or start with our more general guide to the Com Portal.
Learn more about tornados in PSAI Weather with these resources:
- Understanding Tornado Data and Ground Surveys on PSAI Weather
- What are the 3 Tornado States in the Weather Map?
- Why Did the Tornado Warning on the Weather Map Disappear?
- How to View Impact Zone Events for an Address
- What are Tornado Sightings?