All leads that come through your PSAI site conversion tools, storm campaigns, and Ads Manager ads will automatically flow into the Com Portal. However, you can also add new contacts manually by following the instructions below.
Because the Com Portal is designed first and foremost for communication, you can only add a new contact with the intent to send an immediate email or text message.
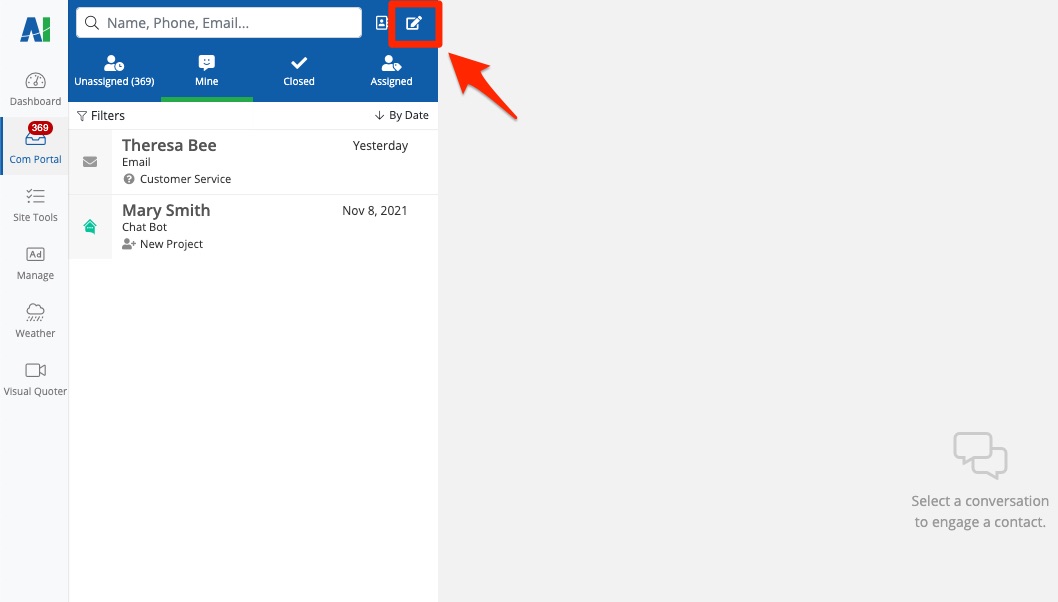
1. Click the Pencil
Go to your Com Portal. From the top of the lead queue, click the pencil icon.
2. Add a New Contact
In the panel that pops up next, click Add New Contact.
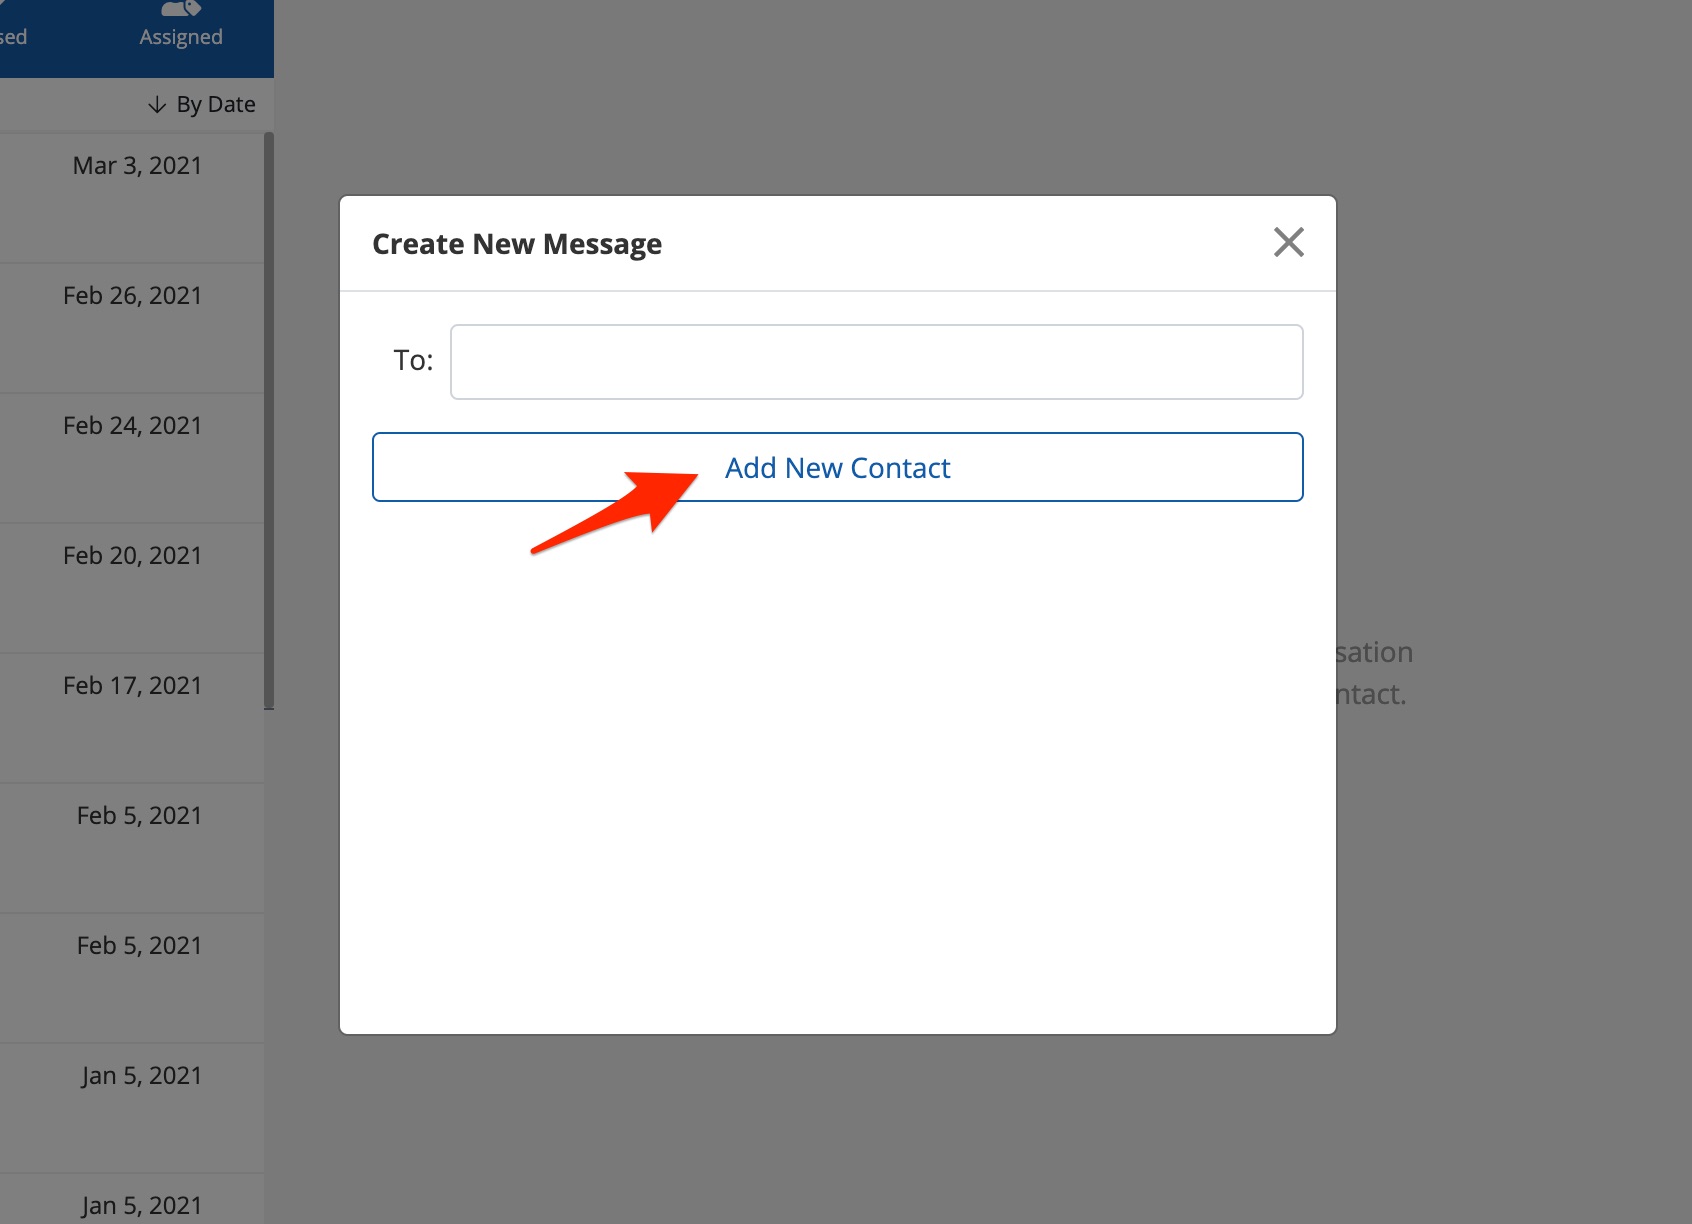
It's worth doing a quick search in the "To" field, just to be sure that the lead does not already exist in the Com Portal. You can search by any key piece of information: name, email address, phone number, and so on.
3. Enter the Details
Fill in your lead's information, as shown below.
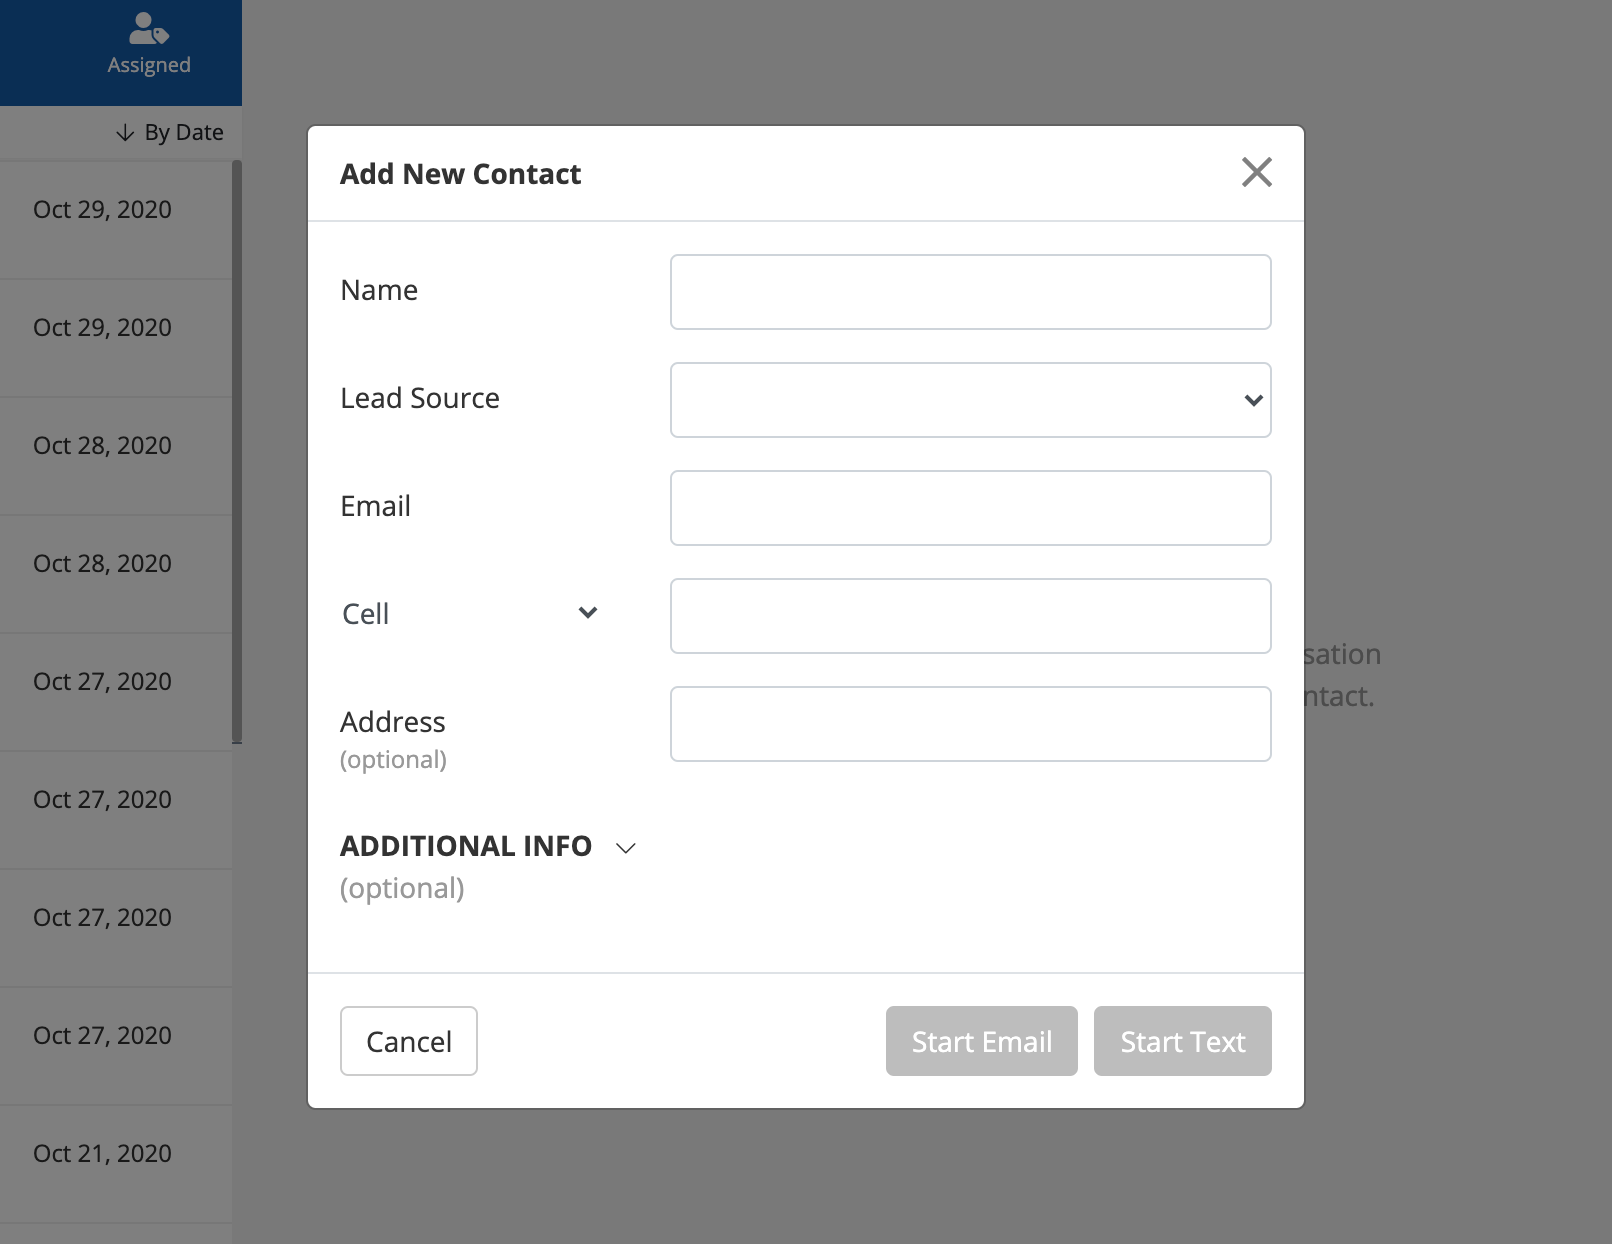
Most of these fields are self-explanatory, but here's a bit more information:
- Name: This is a required field. Be sure to include both the first and last name.
- Lead Source: You can add custom lead sources to help you track all of the contacts you add to PSAI manually.
- Email: This is a required field.
- Cell: This is a required field. (If you click the drop-down menu, you can choose the type of phone number that you're entering. Keep in mind that to initiate a text conversation, the number must be labeled as "Cell.")
- Address: This is optional, but if at all possible, we recommend adding it! A full address is required to leverage Predictive Insights™ and can be used to send weather returns.
- Additional Info: Under this dropdown menu, you can add a company name if you'd like to.
3. Start Email or Text
Once you've filled out your lead's contact information, choose whether you'd like to send an SMS or email by clicking the appropriate button.
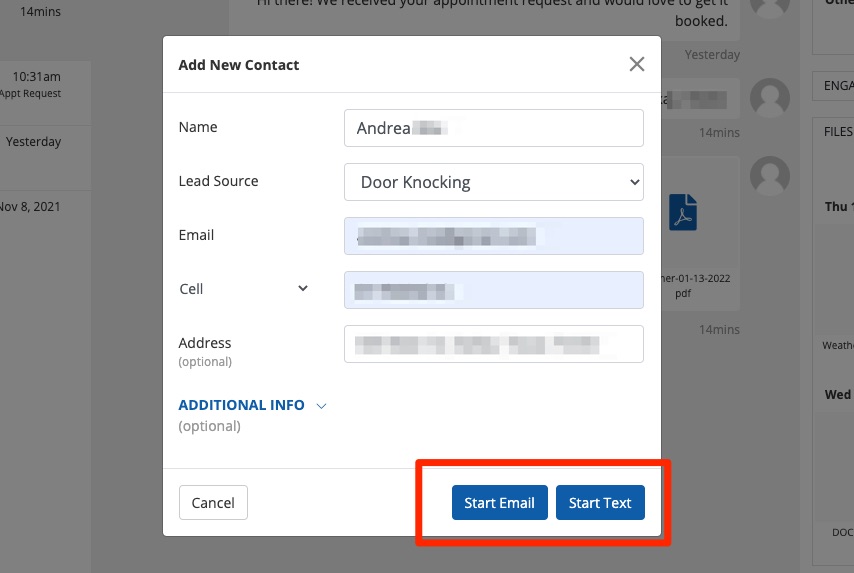
Is "Start Text" grayed out? That's because the phone number has not been labeled as "cell" or it is not a valid mobile number. Doublecheck that the phone number and label are both correct.
4. Type Your Message
From the next screen, you can type your email or SMS message (including the subject line, if applicable).
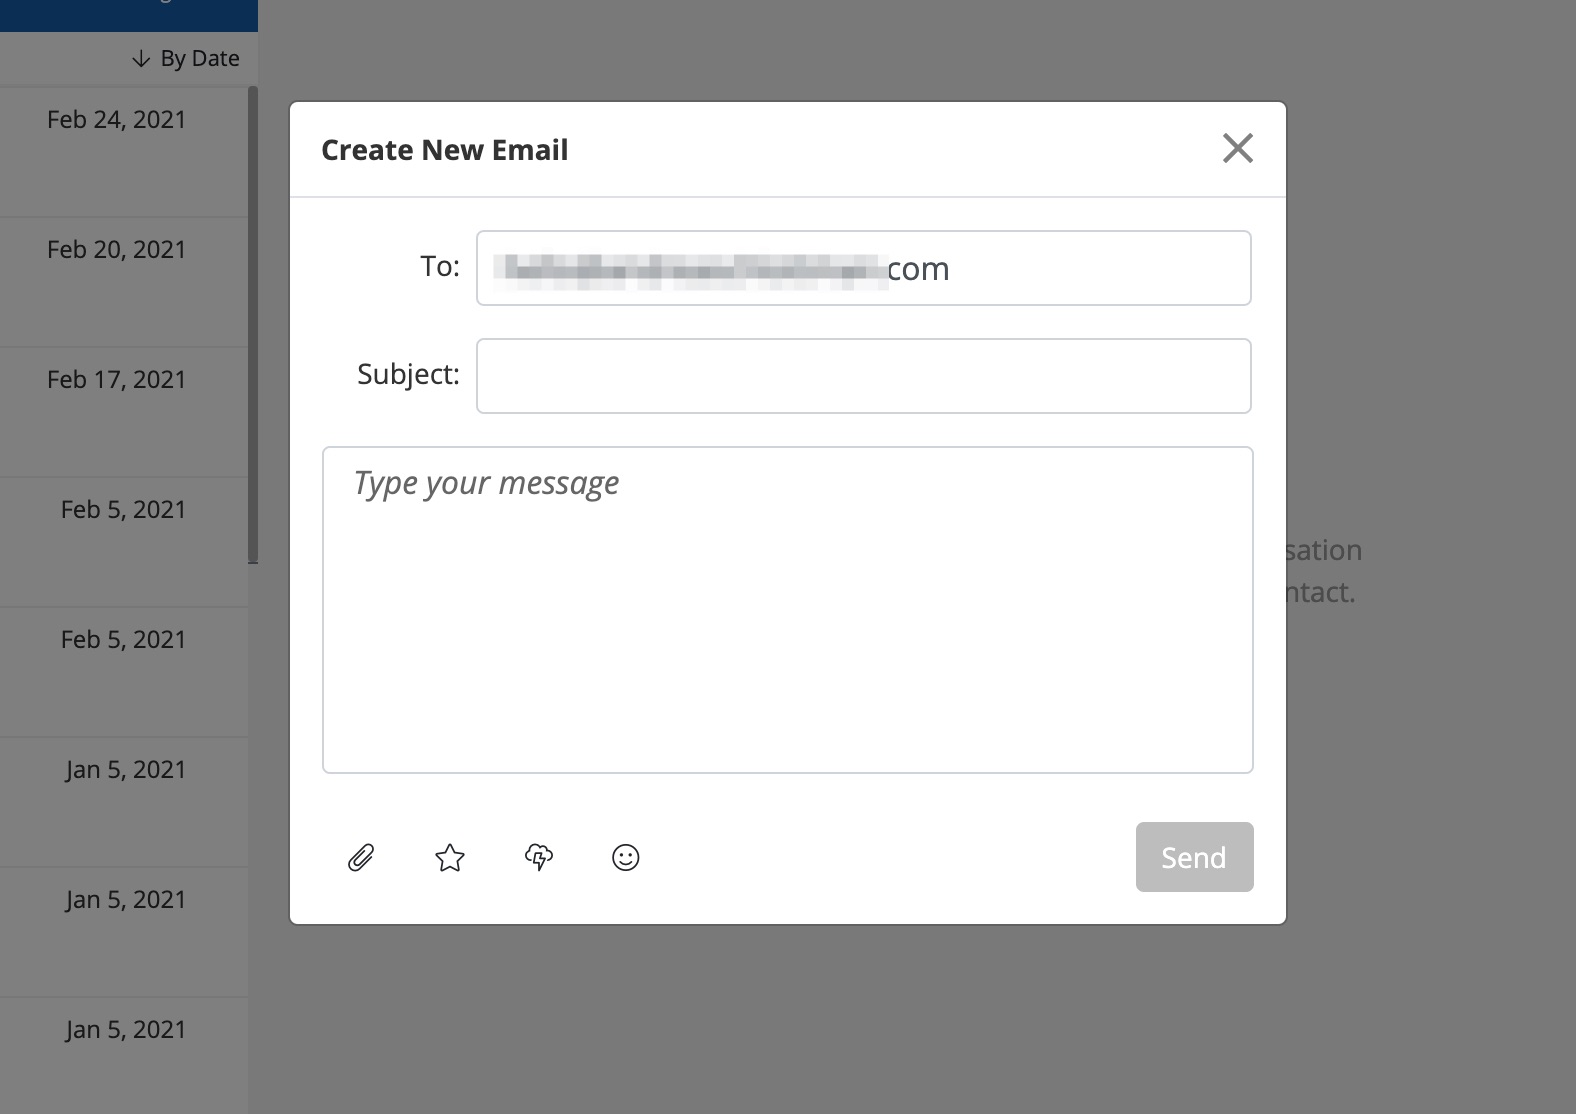
To make your message even more helpful, you can send more than just plain text! Take advantage of the icons at the bottom of the panel to:
- Attach an image, PDF, or other file (by clicking the paperclip icon)
- Request a review on your website or a third-party site (by clicking the star icon)
- Send a weather report for their specific address (by clicking the storm cloud icon)
- Add an emoji (by clicking the smiley face icon)
5. Send
Whenever you're finished writing your message, click Send.

What Happens Next?
Once you've sent your email or SMS, a new engagement thread will be opened in your Com Portal. You'll be able to see all of the messages you've sent, as well as all replies. You can continue nurturing the lead and, if and when ready, assign it to another PSAI user.
Want more information on using the Com Portal effectively? Learn more in these resources: