The Com Portal serves as your single spot for communicating with all of your PSAI leads. There's a ton you can do in the Com Portal, so knowing how to navigate the system will help you make the most of this powerful communication tool.
Understanding Lead Queue Details
To navigate the Com Portal successfully, it will be helpful to first understand what information is displayed in the lead queue (the left-most column of the Com Portal). As shown below, each entry in the lead queue provides key details to help your team tackle lead communications efficiently.
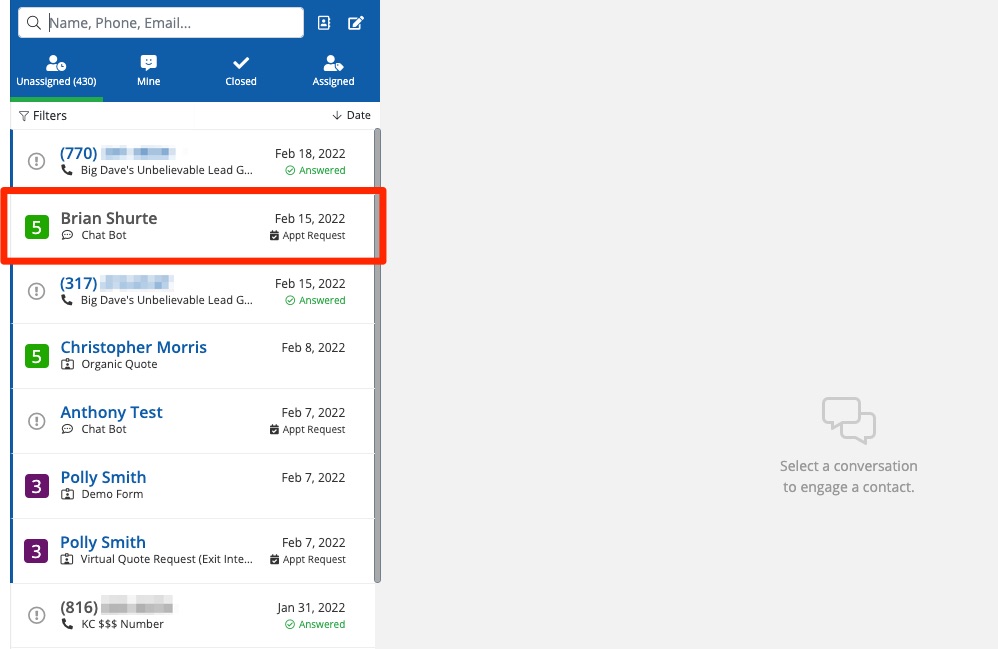
From left to right, each contact's lead queue details include the following:
- PMI: The Predictive Match Index™ ranges from 1–5. (For leads that require more information before calibrating the PMI, an exclamation point will be displayed here instead.)
- Name: The lead's name is displayed or, in the case of a phone call where the name has yet not been confirmed, the phone number will be displayed.
- Engagement Type: Beneath the name or phone number is one of three possible icons. The conversation bubble indicates an active conversation, the clipboard indicates a quote form submission, and the phone indicates an inbound phone call.
- PSAI App/Site Tool: To the right of the icon, you'll see a label indicating which PSAI app or campaign converted this lead, such as "Chat Bot" or "Organic Quote." (You'll set this name when creating your site tool or ad campaign.)
- Date: To the far right, you'll find the date on which this lead first entered your Com Portal.
- Additional Info: Beneath the date, you'll see a note for an appointment request if one was included in the quote form submission or a phone call status if it was a phone call.
Understanding Com Portal Lead Buckets
At the top of the lead queue, there are four lead buckets into which all PSAI leads are categorized: Unassigned, Mine, Closed, and Assigned.
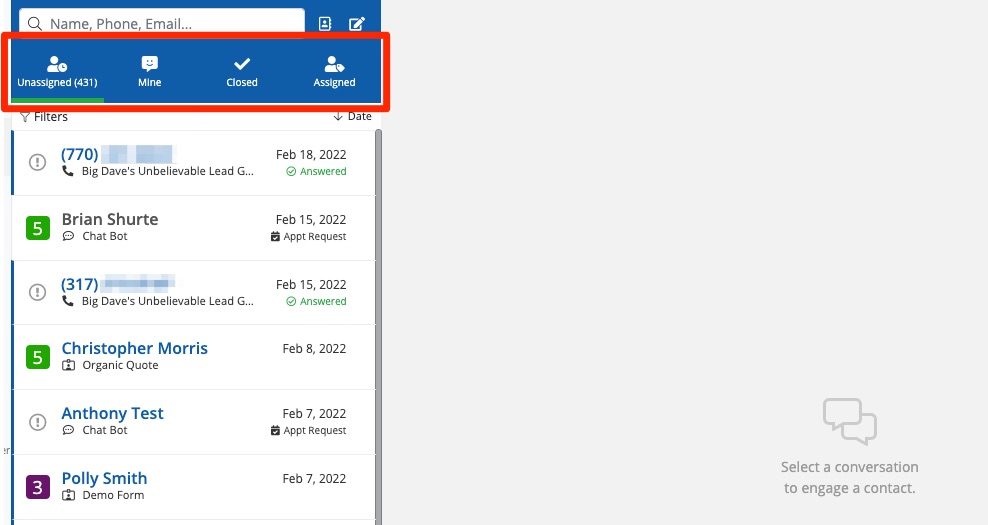
Here's what each lead bucket means:
- Unassigned: All new leads will flow into this bucket. Once a lead is assigned to a specific PSAI user, the will move out of Unassigned and into another category.
- Mine: This bucket only displays the leads that have been assigned to you (meaning whoever is currently logged into PSAI and viewing the Com Portal).
- Closed: This bucket includes lead engagements that have been officially closed. Learn more about closing lead here.
- Assigned: This bucket displays leads that are assigned to other PSAI users (i.e. not whoever is currently logged into PSAI). Learn more about assigning leads here.
User Access and Default Lead Buckets
Whenever you add a new user to PSAI, you can choose which buckets that user is able to see in the Com Portal. Depending on the user's Com Portal permissions, the default bucket will vary:
-
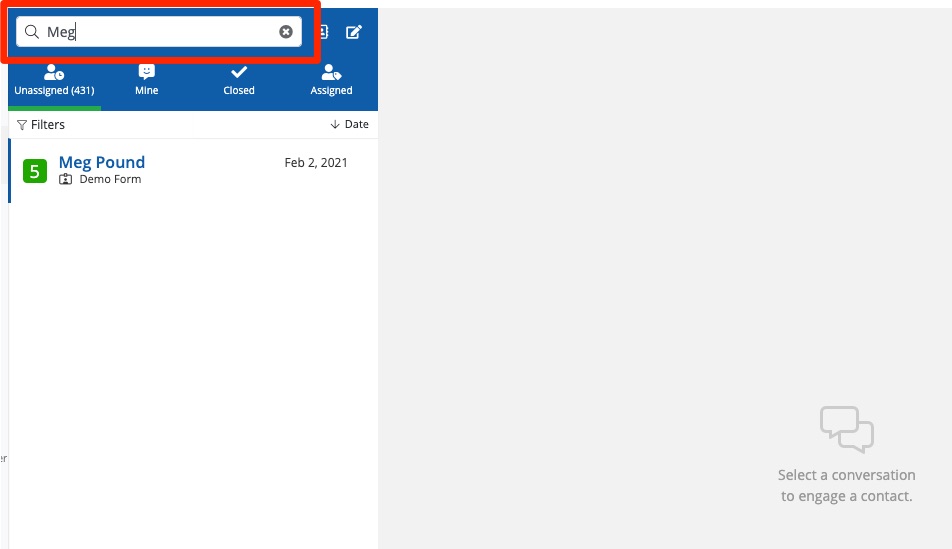
Search results pertain to the bucket that you are currently in. To view results in other lead buckets, click into them one by one, as shown below.
How to Use Com Portal Filters
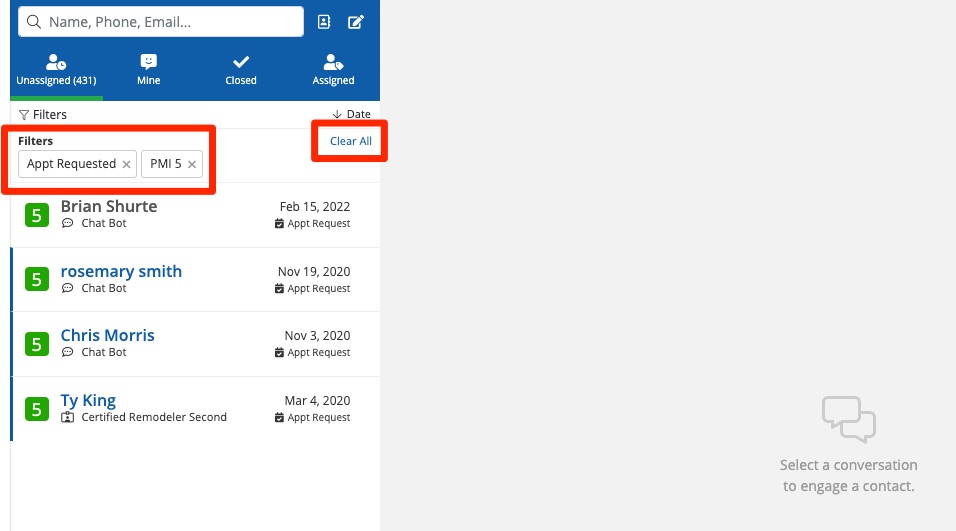
The search bar can help you find an individual lead, but filters are better for finding multiple leads who fit a certain characteristic. Click Filters under the lead buckets to open the modal shown below.

Here's what each filter section allows you to do:
- Status: Set a filter for one or more lead statuses: unread, priority, appointment requested, and archived.
- Request Type: Set a filter for one of eight possible requests: all inquiries, new project, cancellation, reschedule, project status, billing, warranty, or customer service.
- Predictive Match Index™: Set a filter for one or more PMI, ranging from 1 to 5 (as well as NA, which denotes leads requiring action to calibrate the PMI).
- Lead Source: Set a filter for any one lead source, such as a chat bot, a specific storm campaign, a quote form, etc.
Just like the search bar, filters are applied to the bucket that you are currently in.
To remove any filter, click the gray X. To return to the default view, click Clear All instead.
How to Sort Your Leads
Want to show all of your leads but in a different order? Then use the sort tool at the top of the lead queue. As shown in the screenshot below, the default sorting method is by date.
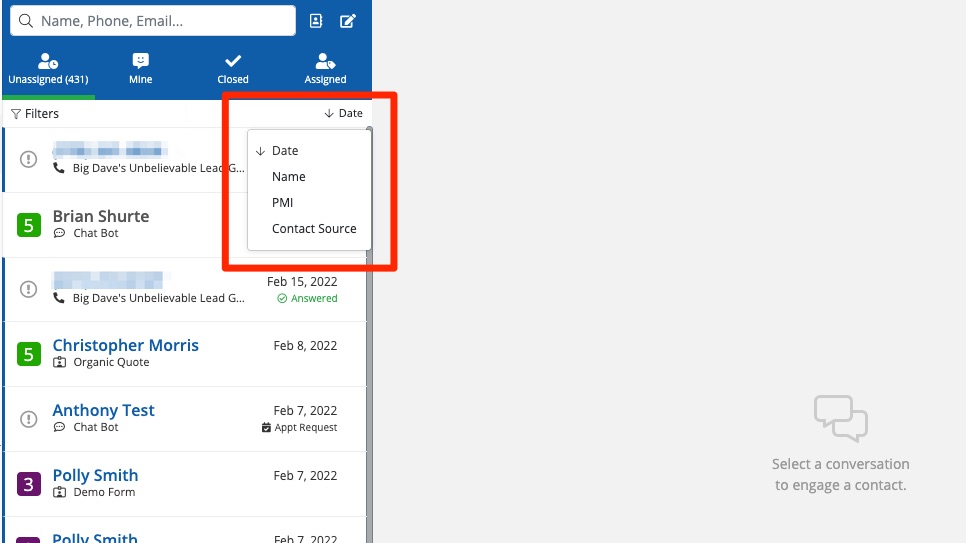
Click Date to expand the sorting menu and choose a new option:
- Date
- Name
- PMI
- Contact Source
Click any option for a second time to reverse the order (ascending or descending). Return to the default view at any time by opening the sort menu and clicking Date.
More Resources on Using the Com Portal Effectively
This article is part of a loosely ordered series on understanding and using your Com Portal:
- Overview: What Is the Com Portal?
- Searching, Filtering, and Navigating the Com Portal (this article)
- Communicating with Leads Through the Com Portal
- Taking Advantage of Predictive Technology in the Com Portal
- Assigning Leads in the Com Portal
- "Closing" Leads in the Com Portal