Has your company recently changed service areas? Whether you've grown your service areas or restricted them, it's easy to update each location by following the instructions below.
This article explains how to edit the borders of an existing service area; if you need a totally new service area, refer to our instructions on adding a new location.
1. Go to Locations
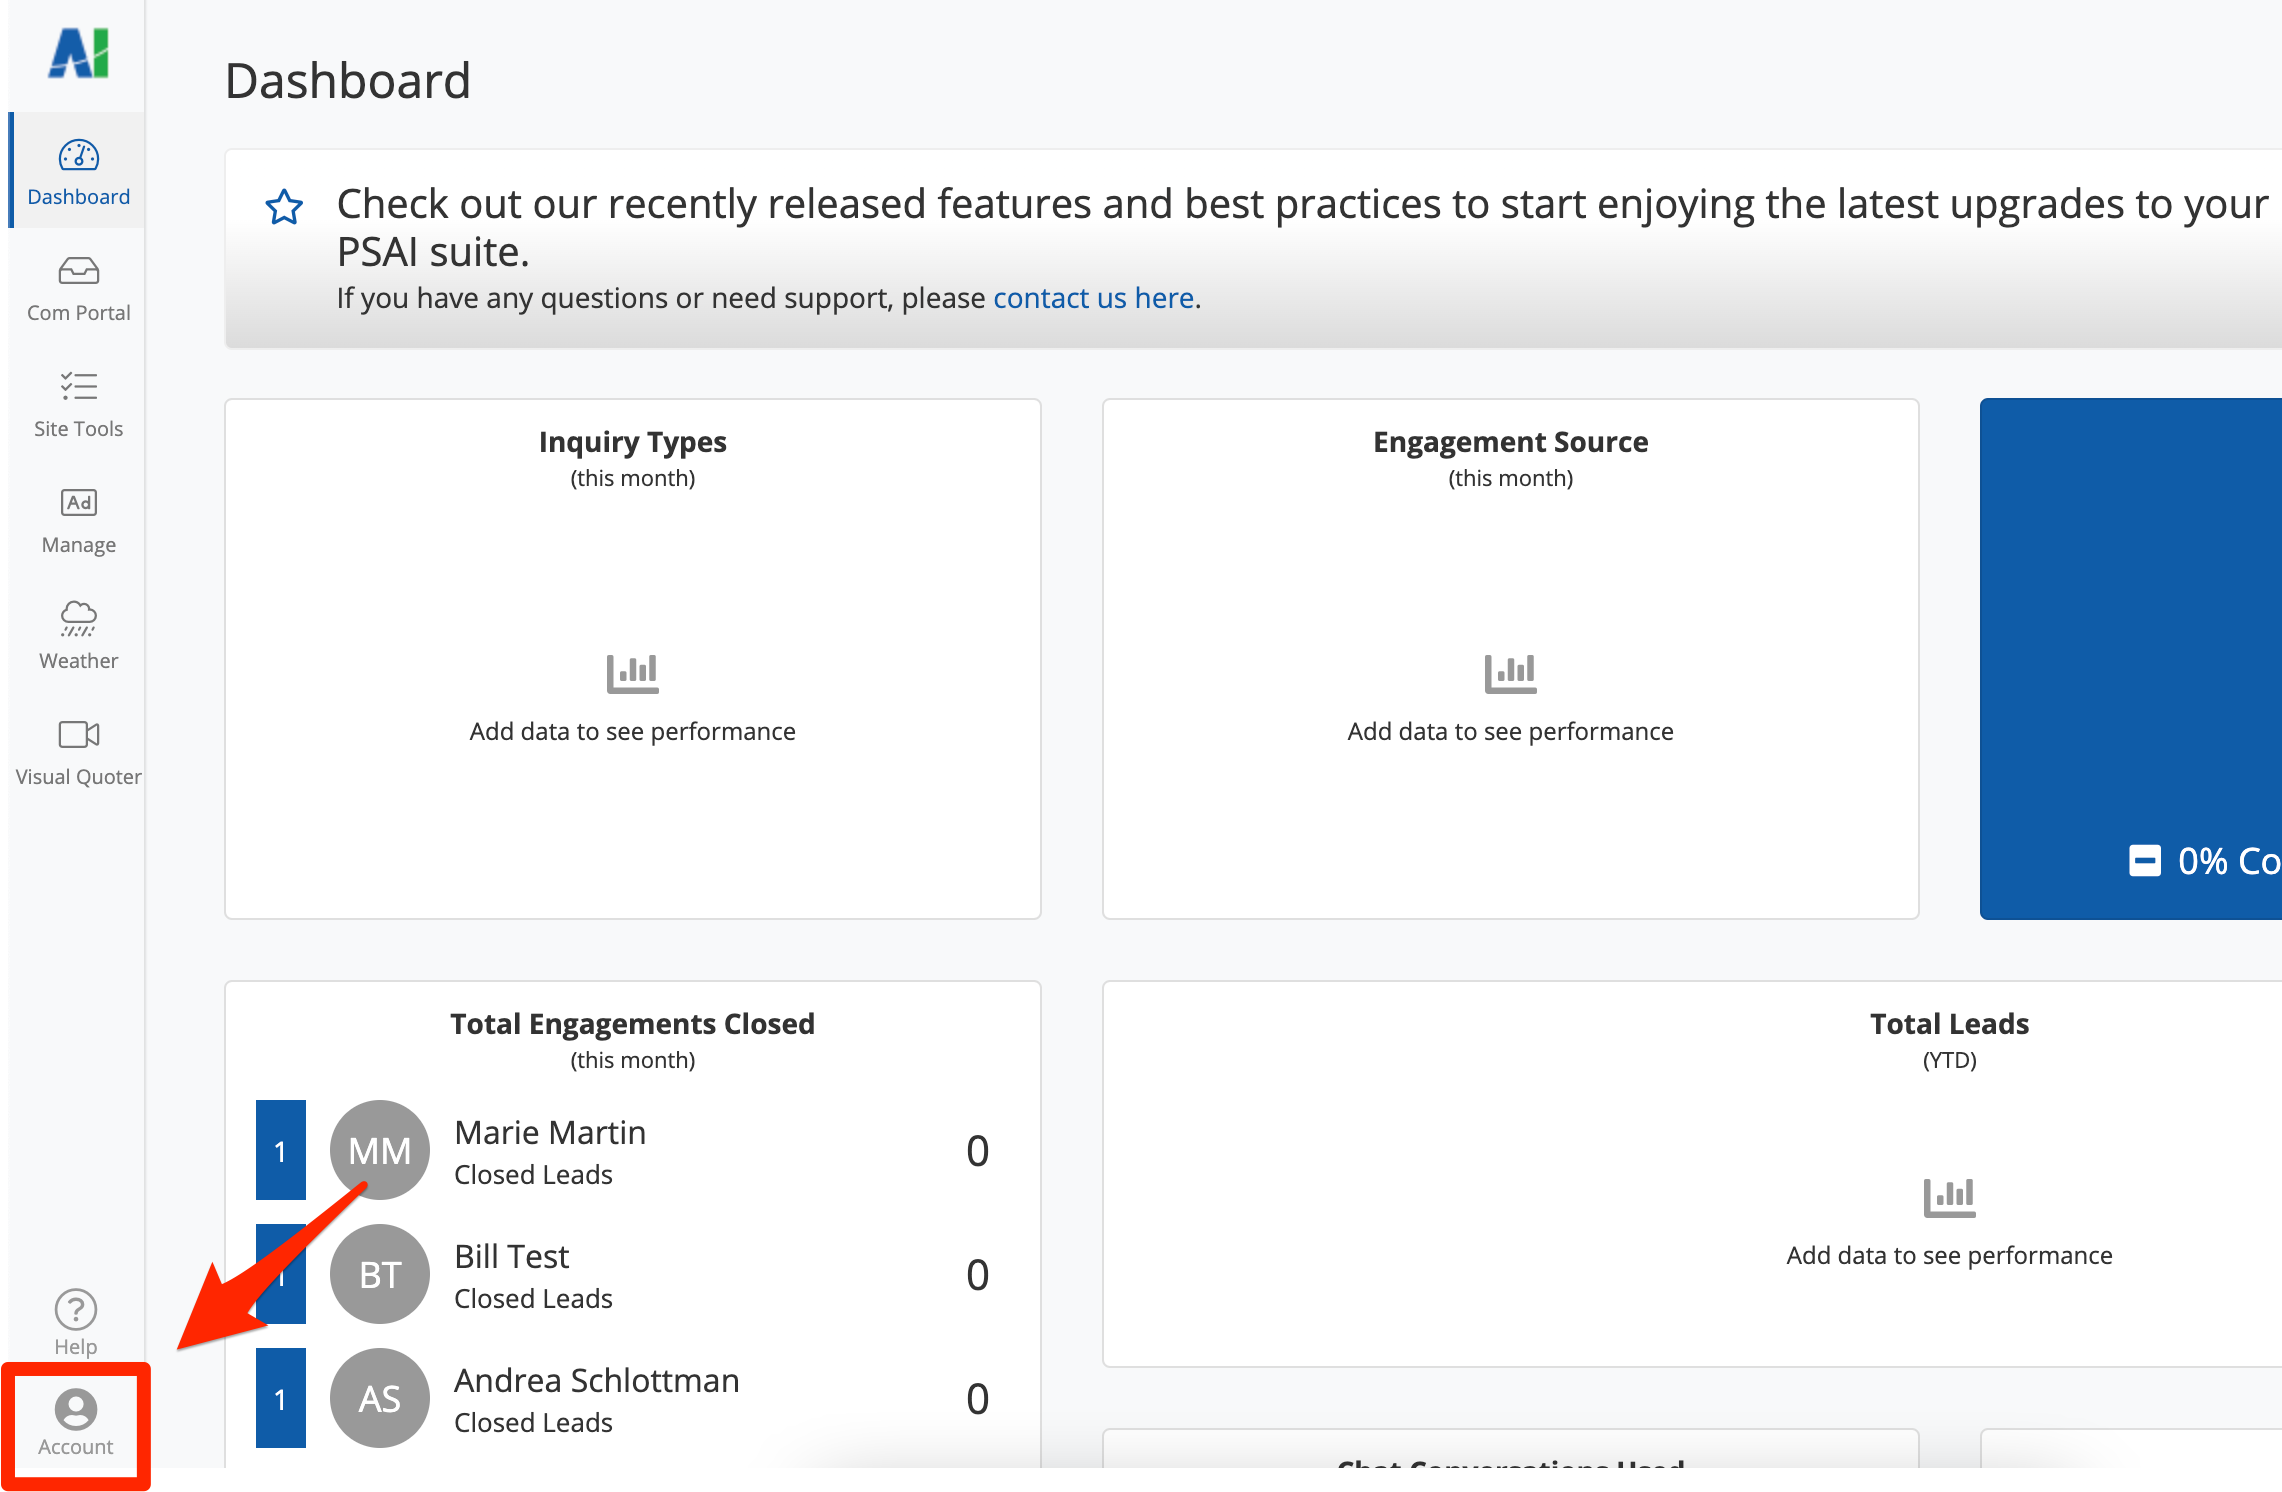
After you've logged into PSAI, click Account from the bottom left corner.
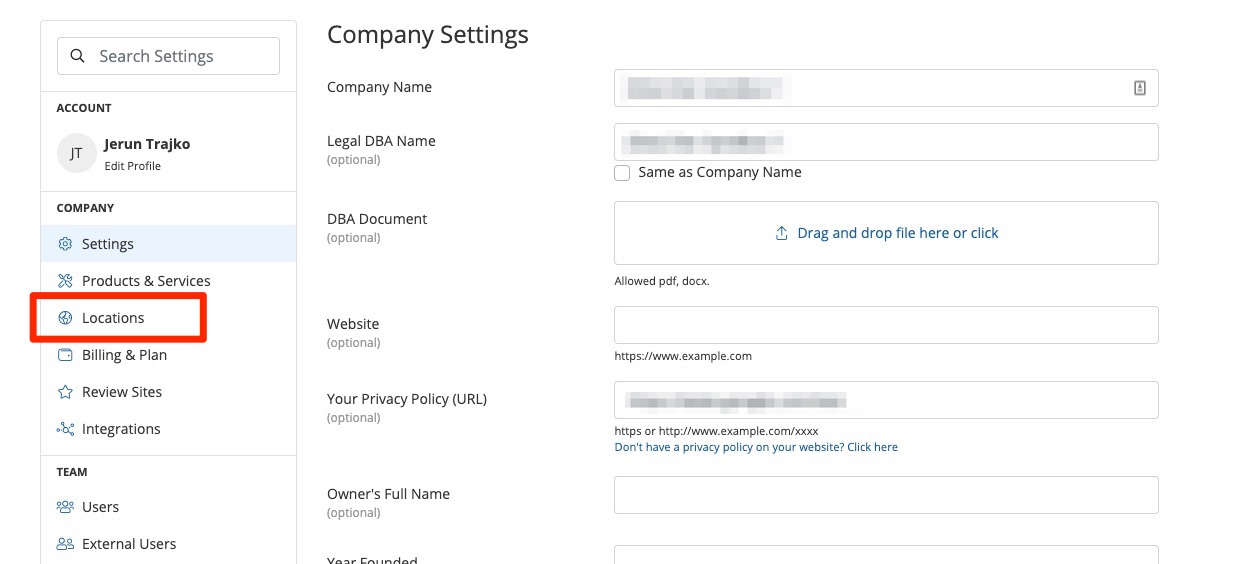
Then click Locations from the left-hand navigation bar.
2. Click Map
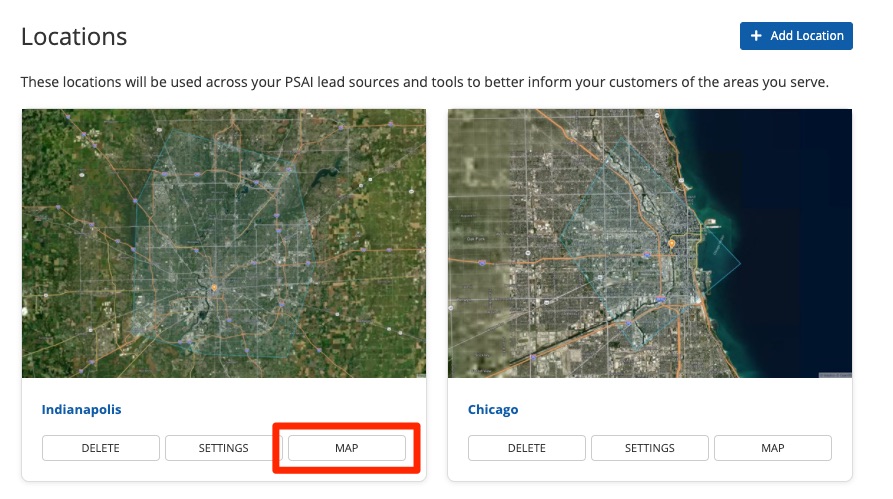
On the Locations page, find the location that you'd like to edit. Then click Map.
3. Edit the Shape on the Map
When you click Map, you'll be brought to your service area with the shape shown in blue.
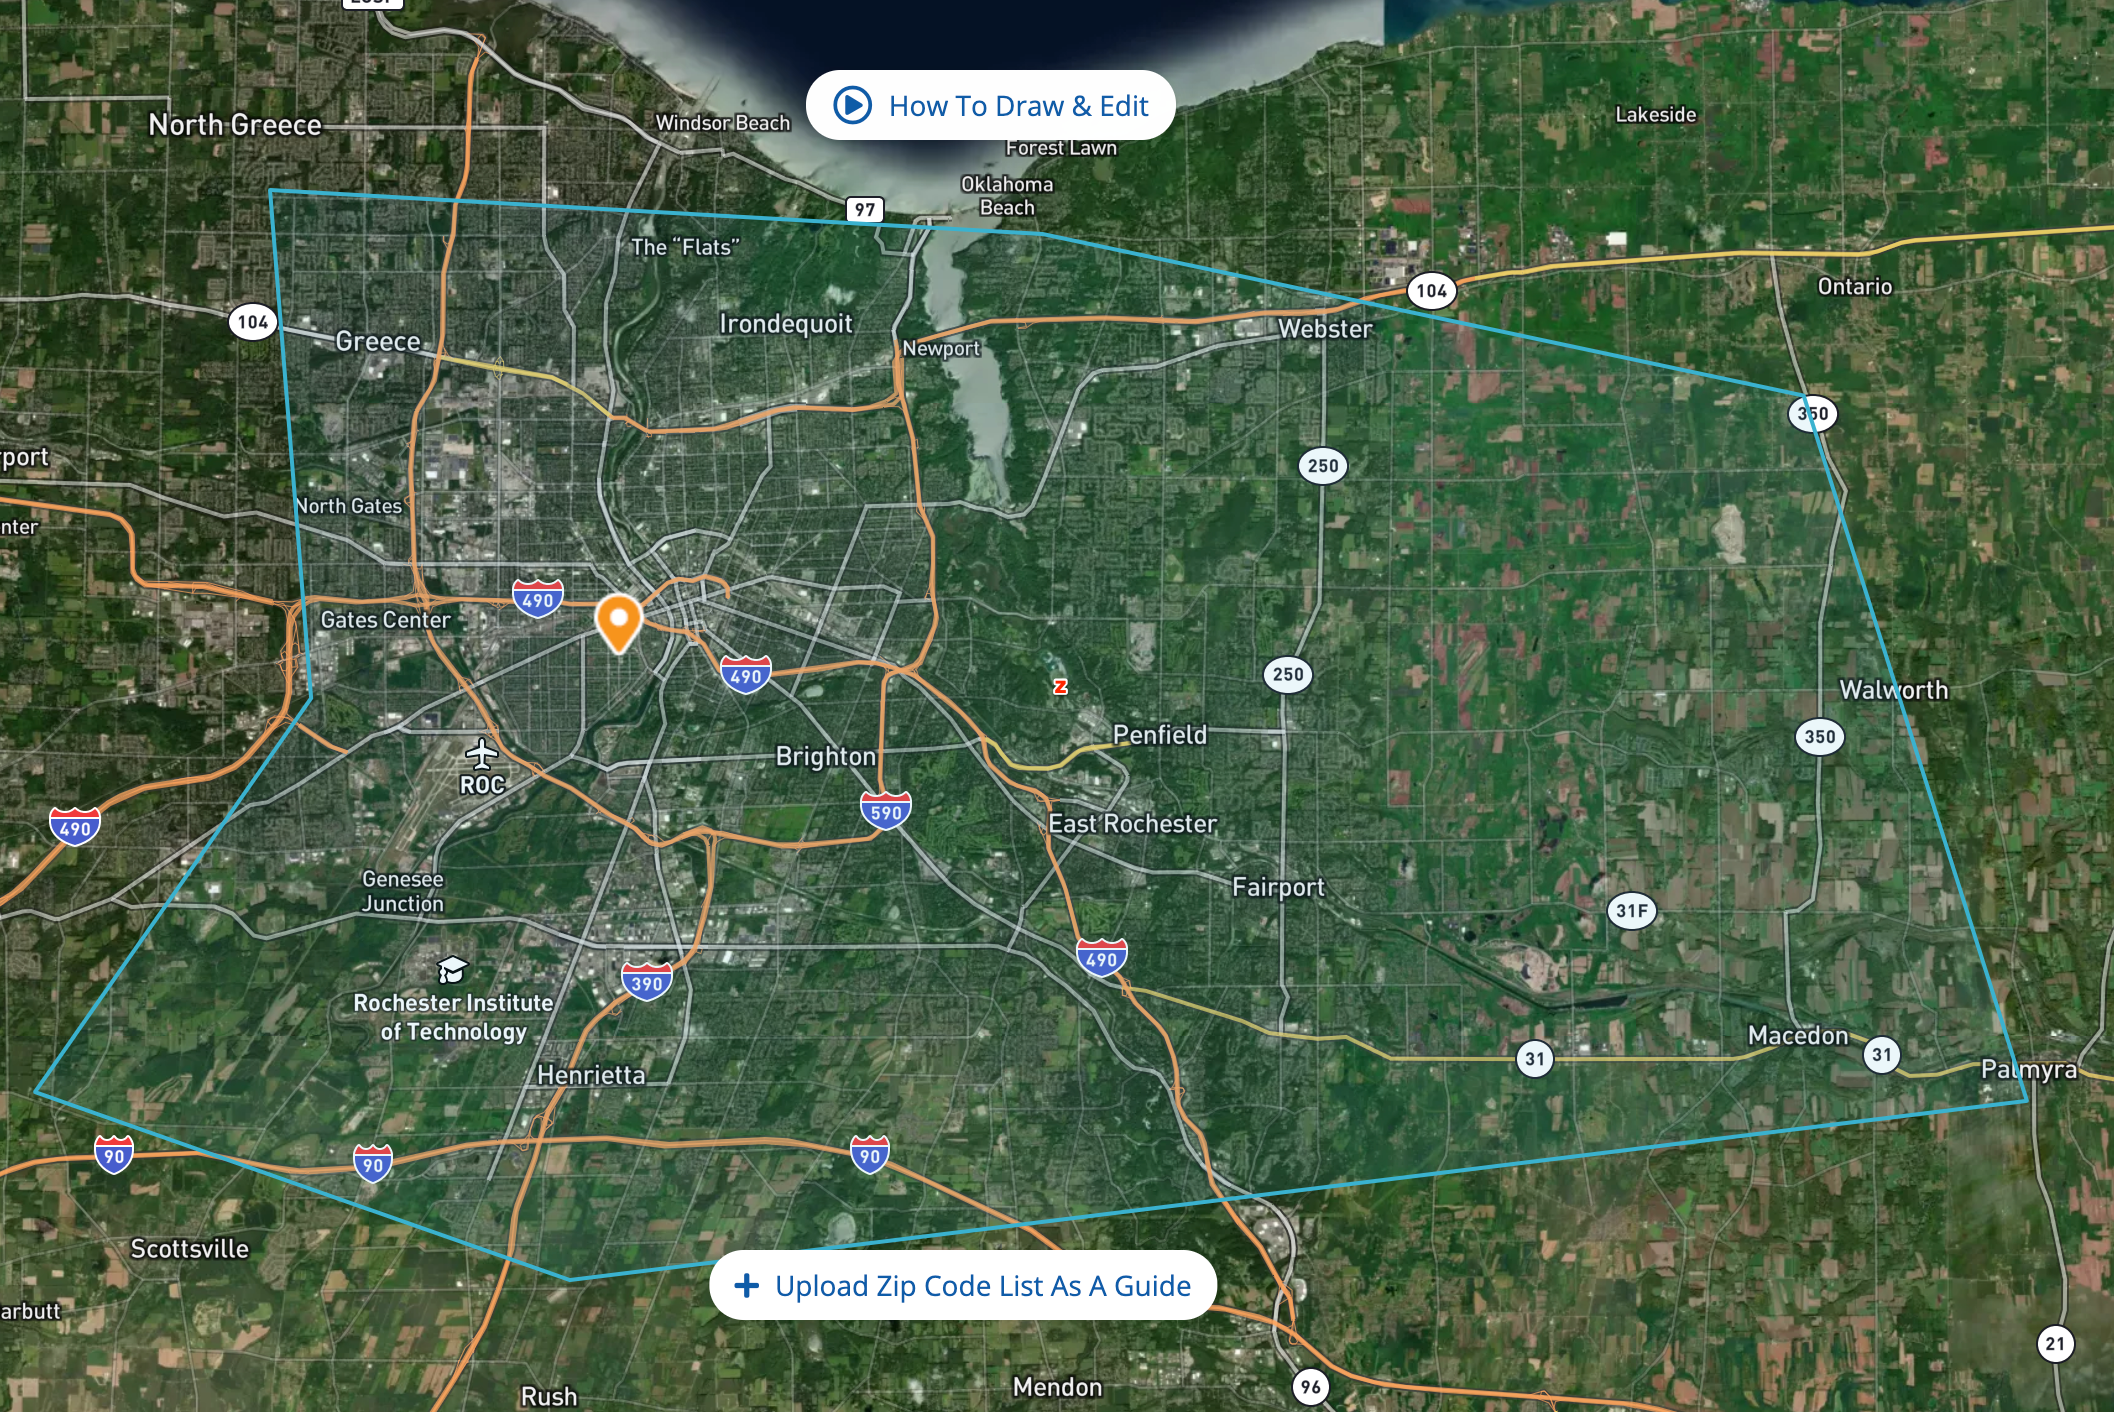
Doubleclick on any dot to turn the shape yellow (with dotted lines). This indicates that the shape is now editable.
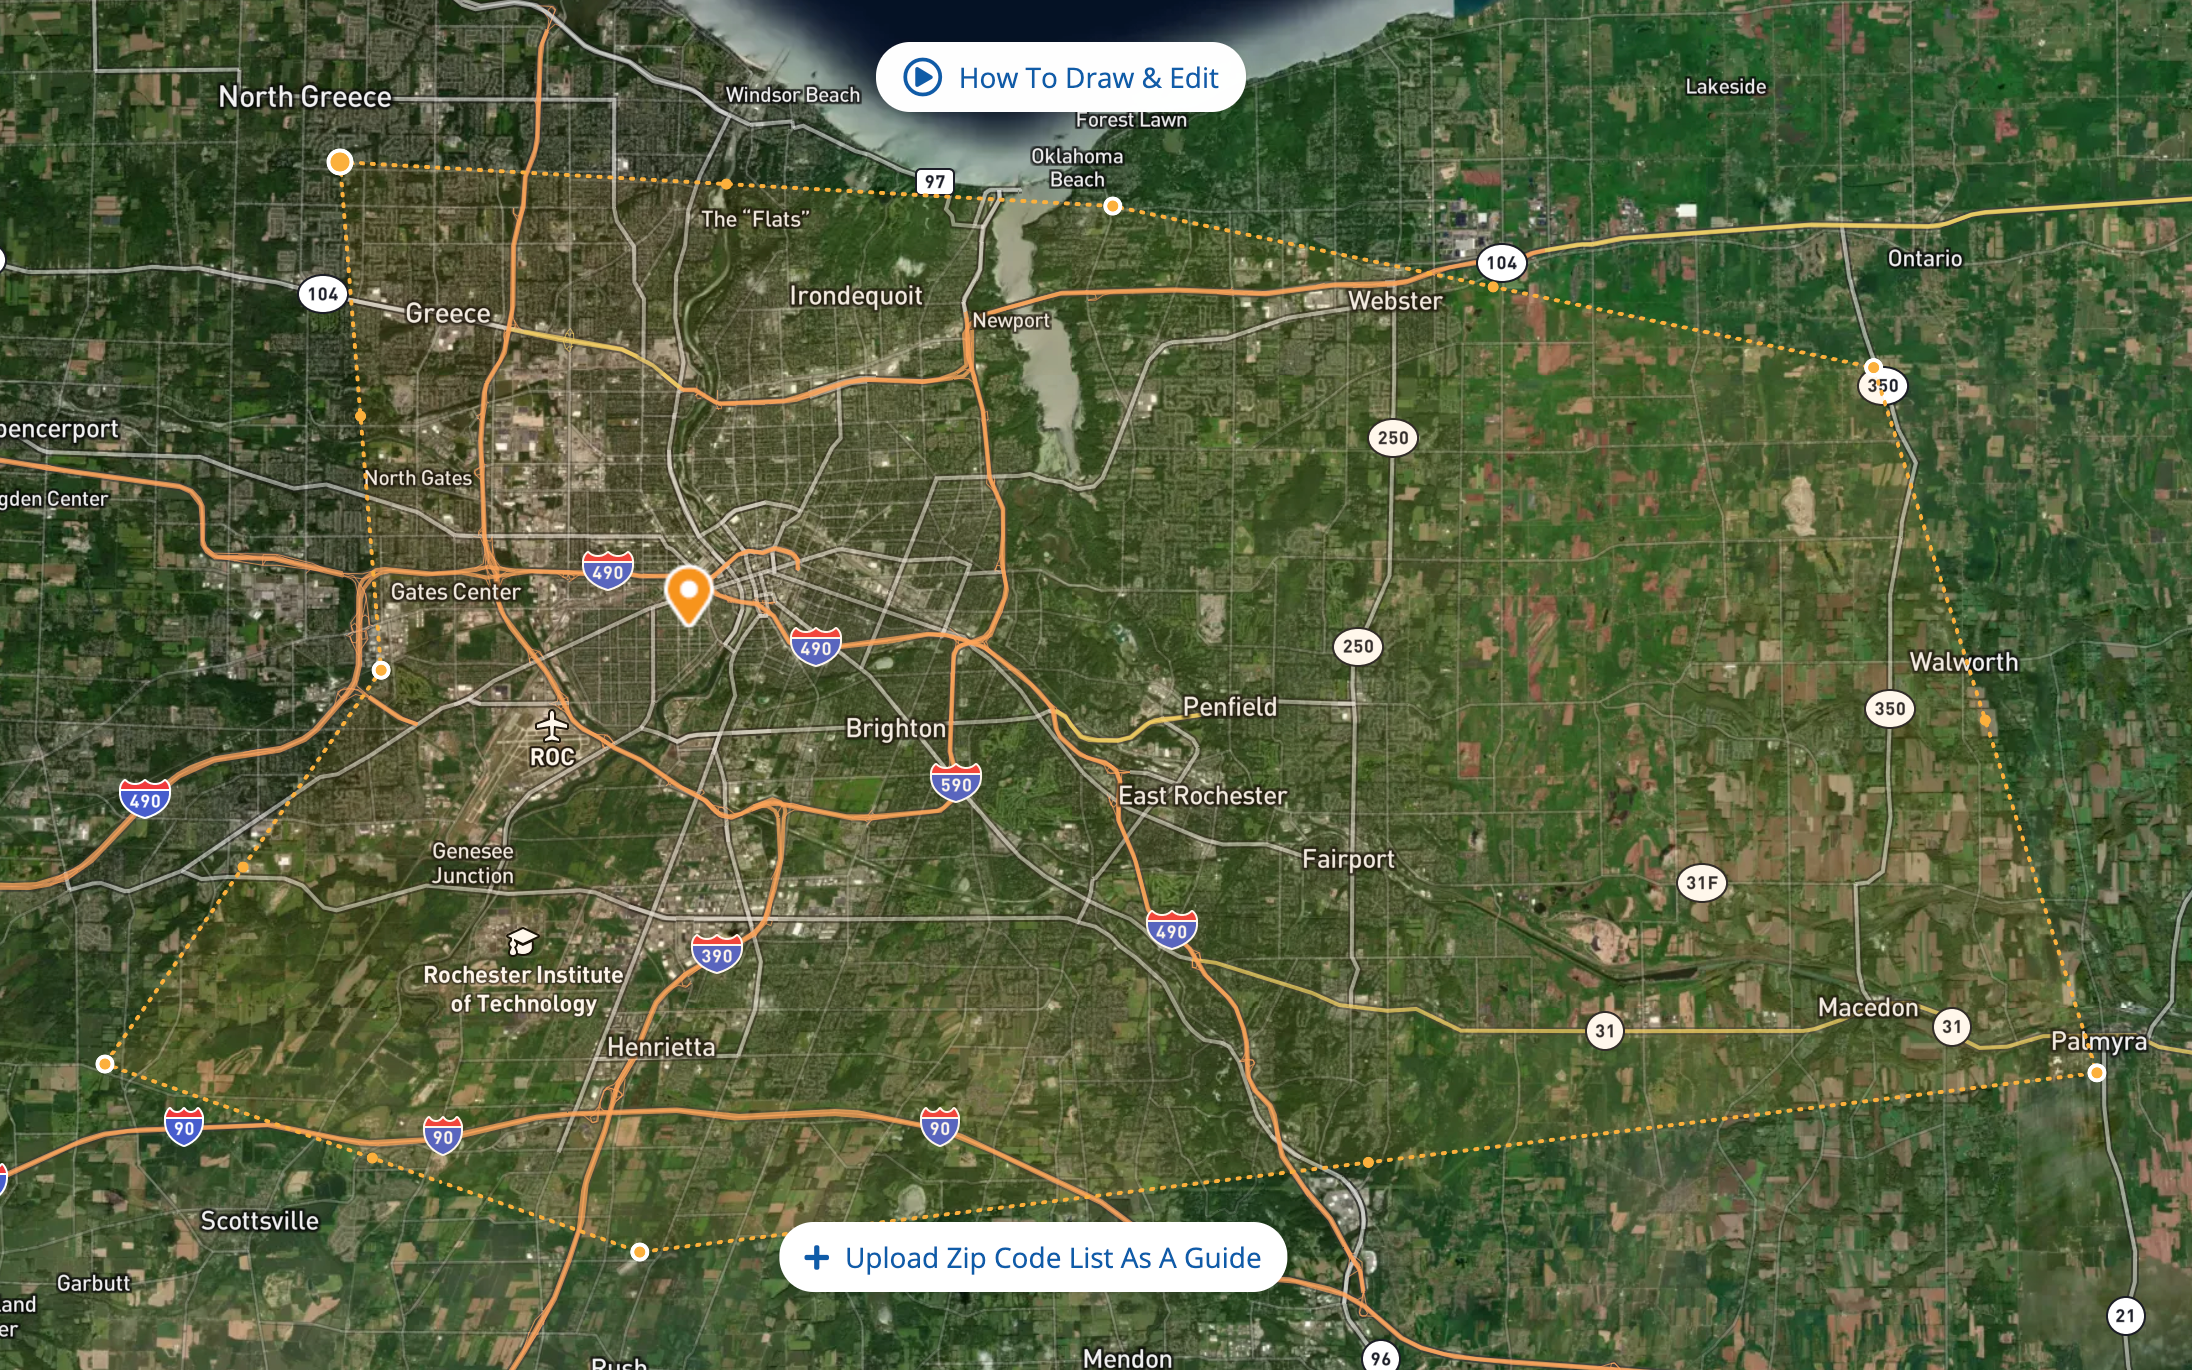
Once it's yellow, you can edit this shape in the following ways:
- Click and drag any dot to reposition it on the map.
- Click on any dot and then click Delete or Backspace on your keyboard to delete that corner.
- Add a new corner to your shape by clicking the solid orange dot in the middle of any line.
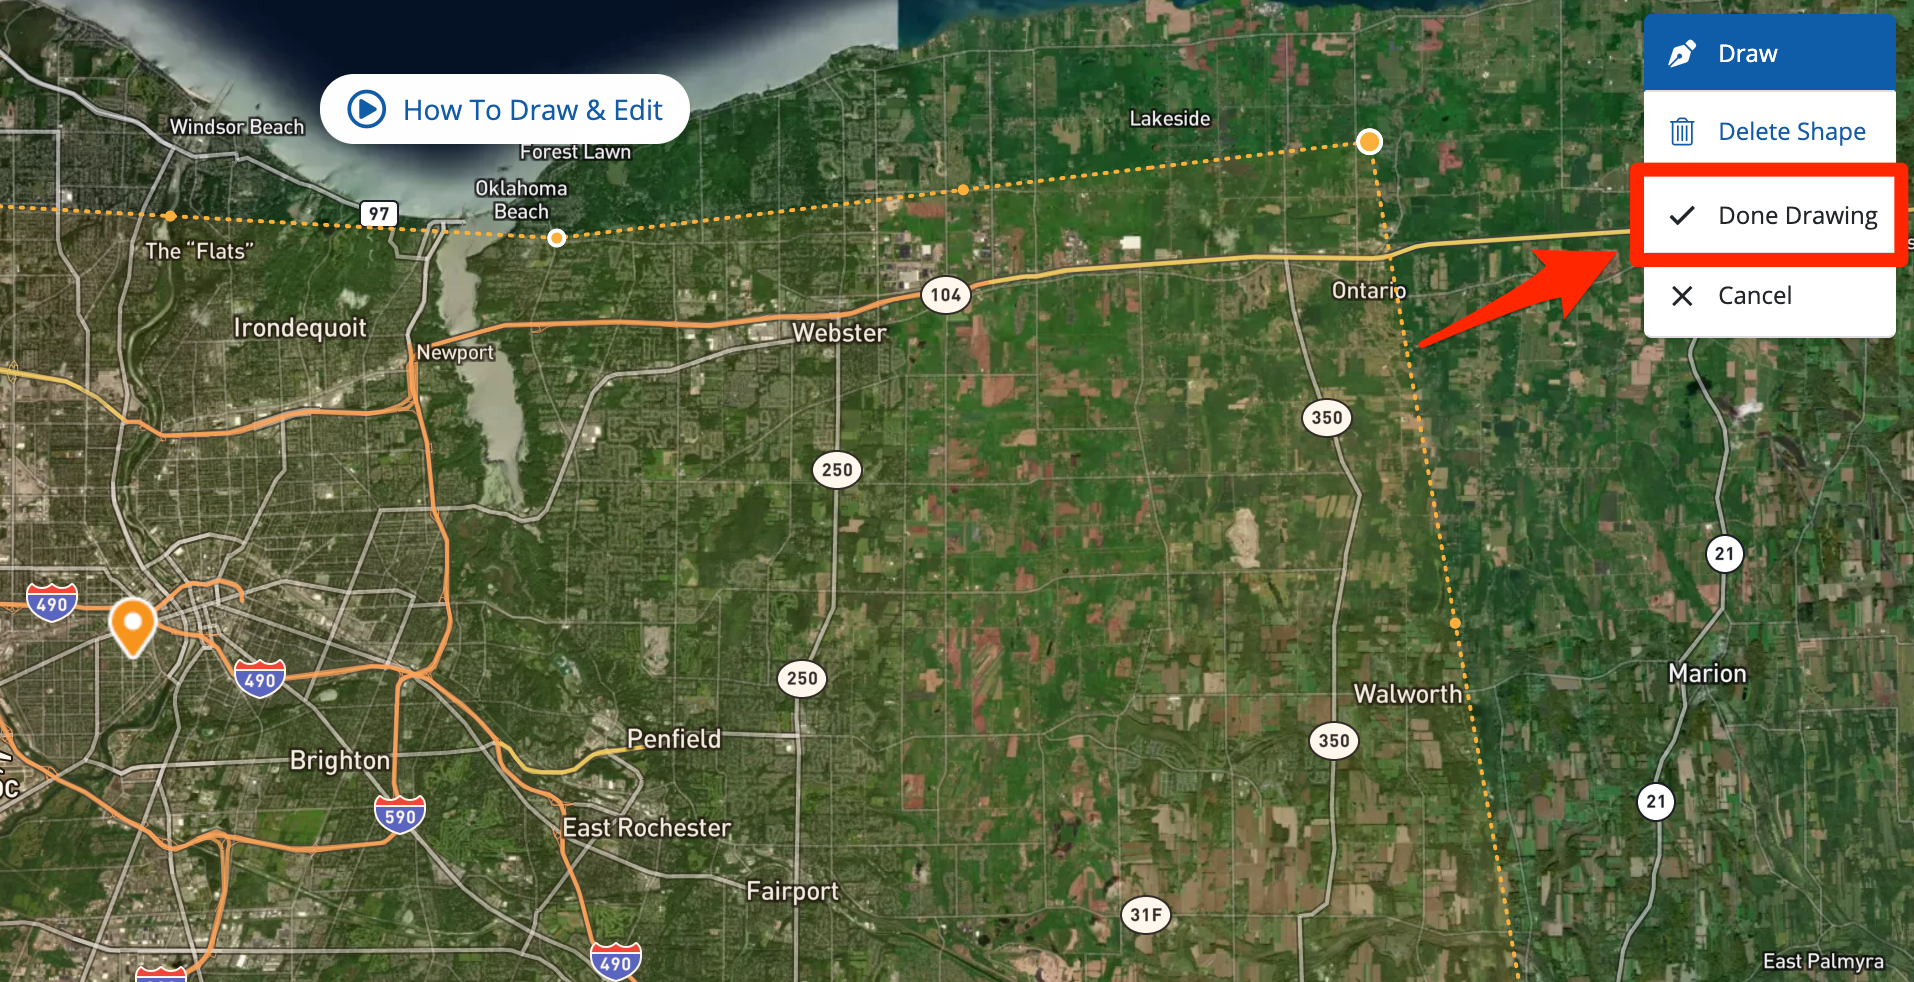
4. Click Done Drawing
After you've made your desired edits to your shape, click Done Drawing to finalize the process.
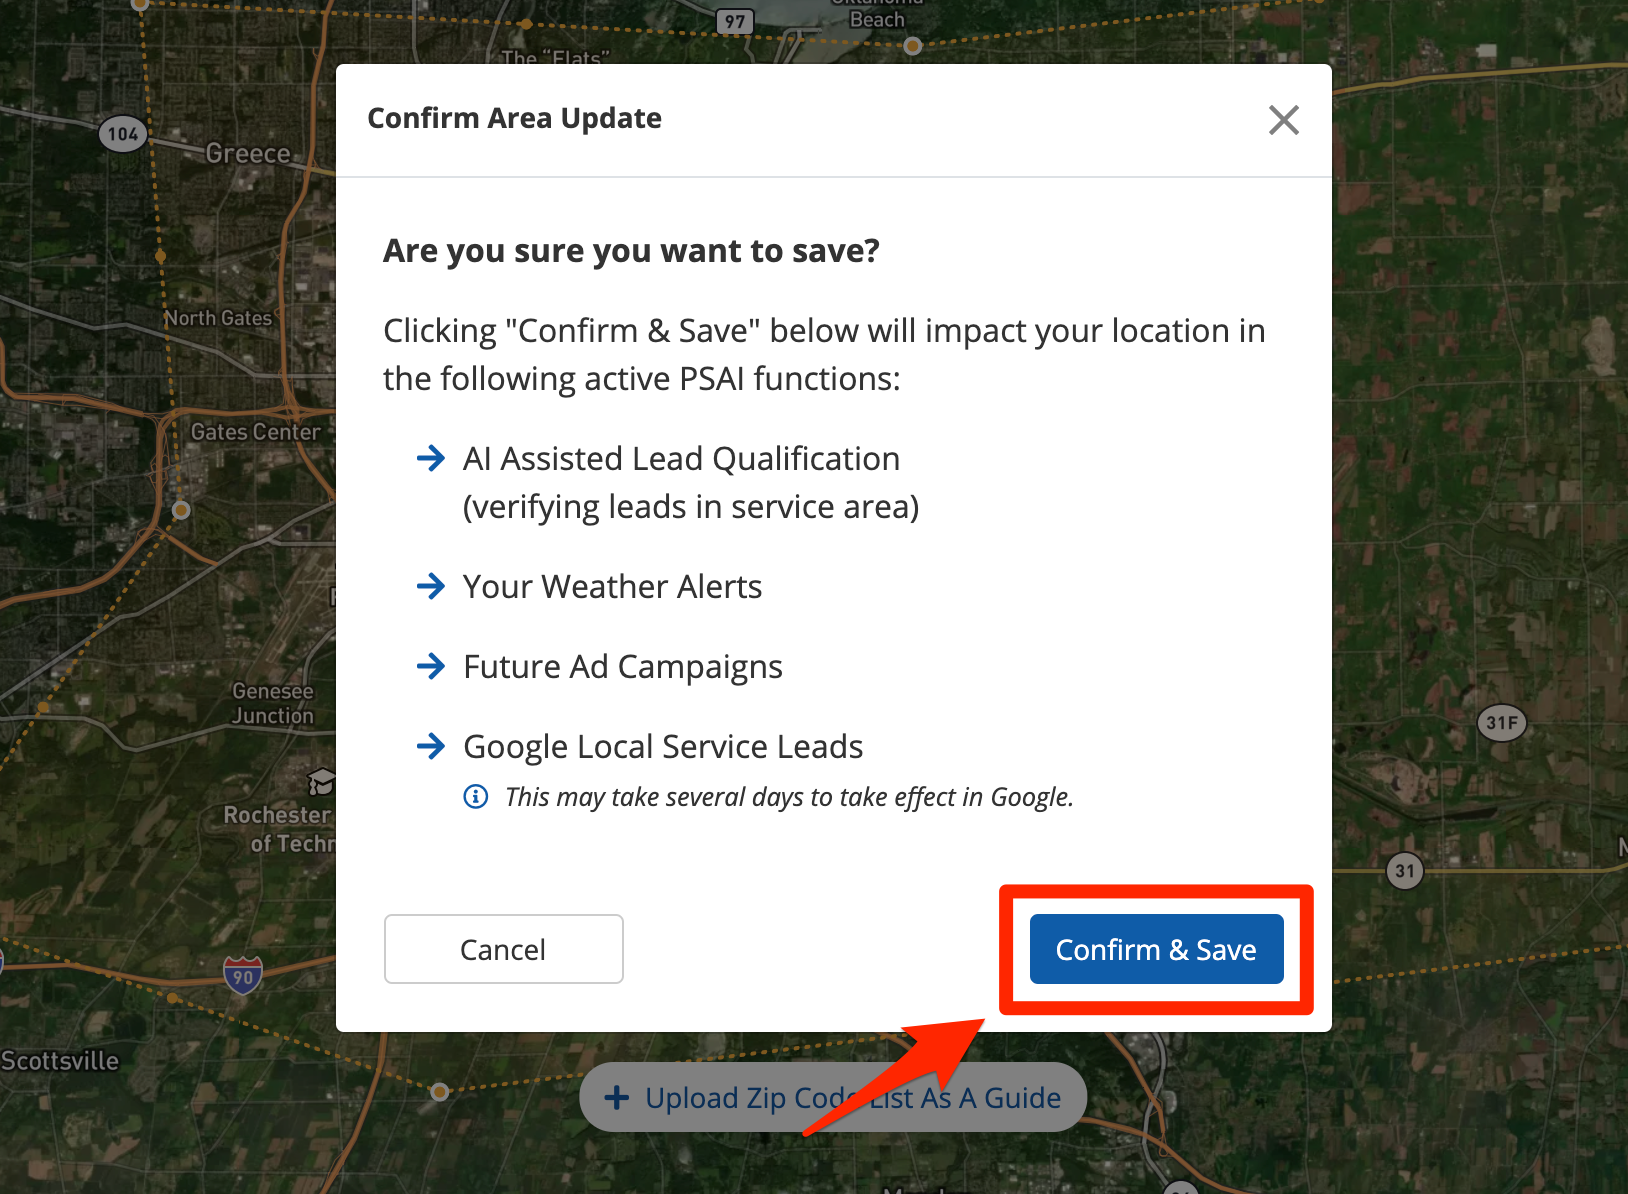
5. Confirm & Save
After reading the warning text, click Confirm & Save.
That's it! Your areas served has now been updated. Please note that your changes may take a few days to take effect.
It's important to keep your areas served up-to-date, as this data is used throughout your PSAI tool suite. See why company settings are so important and where they're used.
Wondering about other key company settings to update? Learn how to: