Weather is a powerful PSAI tool, and you can ensure that your team gets notified of every storm and lead alert with the Notification Center.
Customize your Weather notifications by following the steps below.
1. Navigate to the Weather Section within Notifications
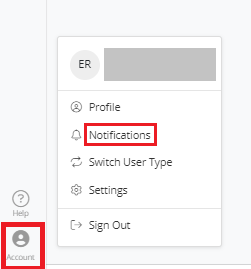
Navigate to your user Notifications through the Account menu.
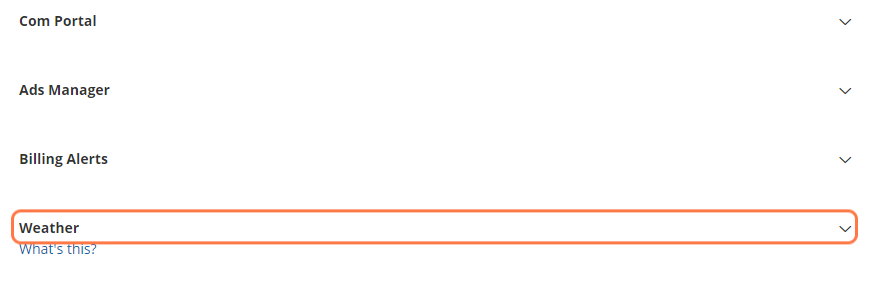
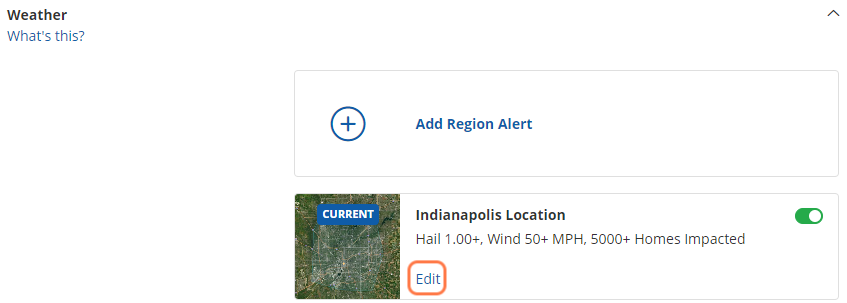
On the My Settings page, scroll down to the Weather section under Notifications. This section can be expanded to show all notification settings for Weather.
2. Toggle On/Off All Notifications
Individual notifications can be toggled on and off within the Notification Center.
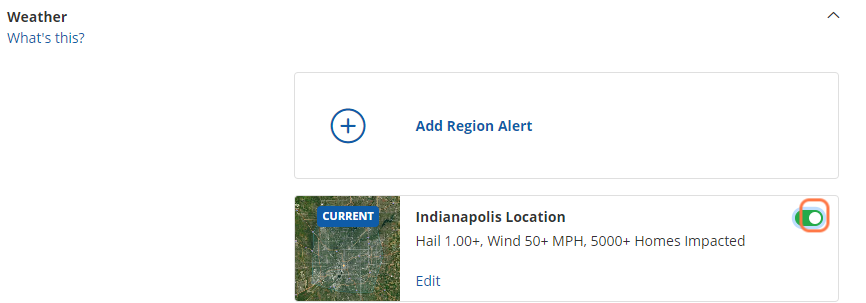
3. Edit Notification Preferences
To customize preferences for any of the Weather notifications, click on the "Edit" link.
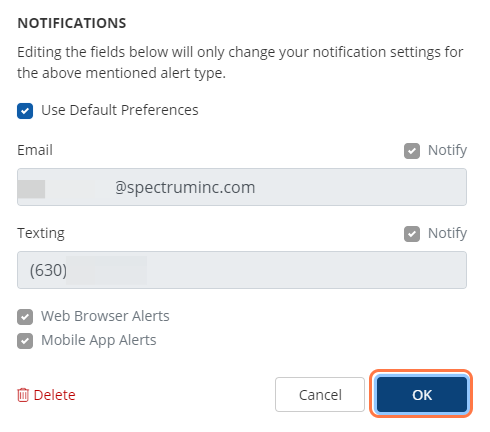
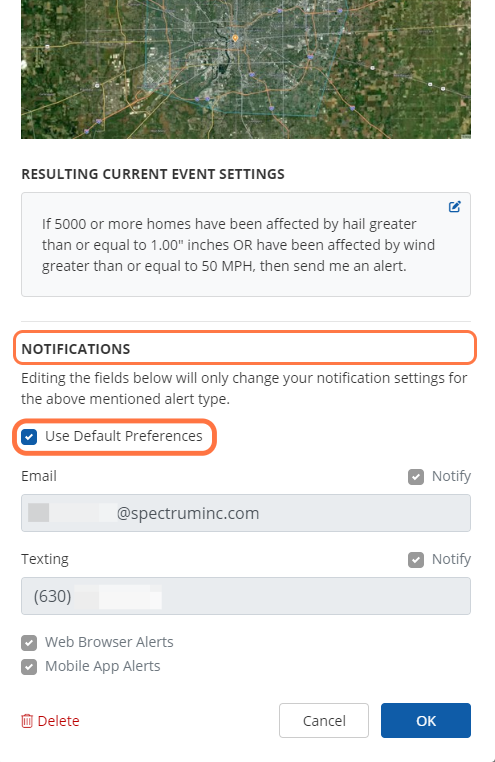
4. Uncheck Use Default Preferences
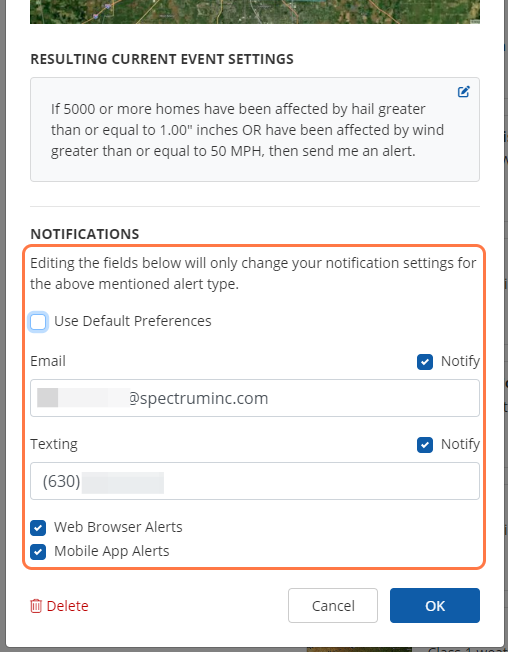
In order to save custom notification preferences, you must first uncheck the "User Default Preferences" box within the notification modal.
5. Edit Notification Preferences
With the Default Preferences box unchecked, you can now customize the email address(es) and mobile phone number(s) that you want to receive the notification.
Web browser and mobile app alerts can be turned on/off through the checkboxes.
6. Turn Notification Methods On/Off
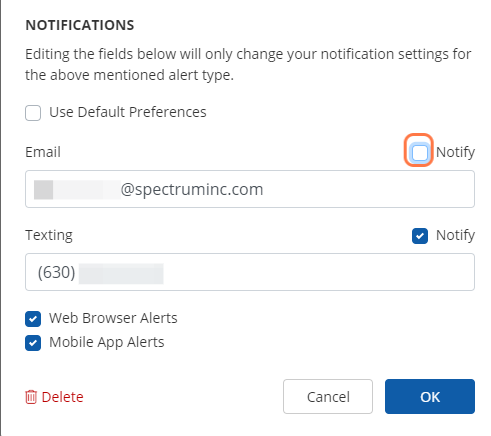
To adjust individual notification methods for email or texting, check/uncheck the "Notify" box beside each field.
7. Click Ok to Save Settings
To save your customized Weather notification settings, click the blue "OK" button within the modal. This will return you to the Notification Center.