To add a floating element to your WordPress website (such as a floating button CTA, a weather widget, or the Gia chatbot), you'll need to paste the PSAI site tool code into your WordPress footer file. Follow the instructions below.
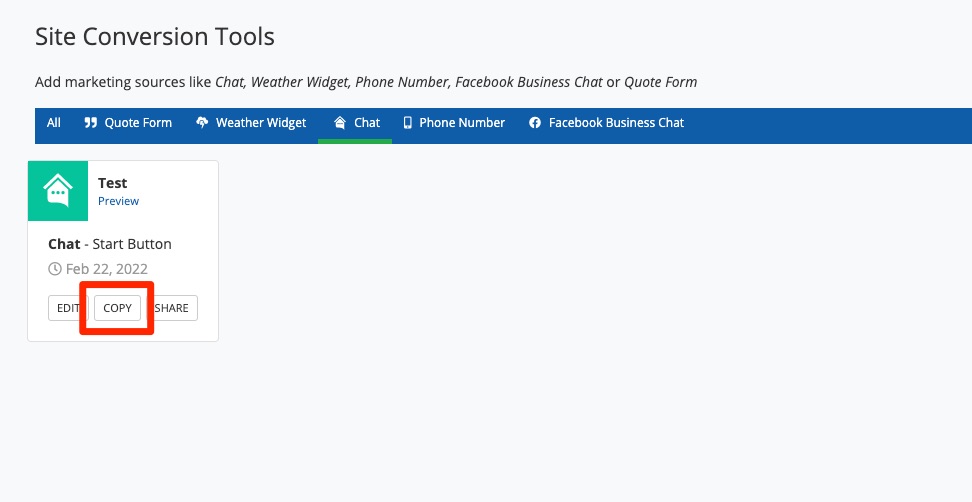
1. Copy the Site Tool Code
Log into PSAI and copy the site tool code by clicking Site Tools from the left-hand nav bar and then clicking Copy under the tool.
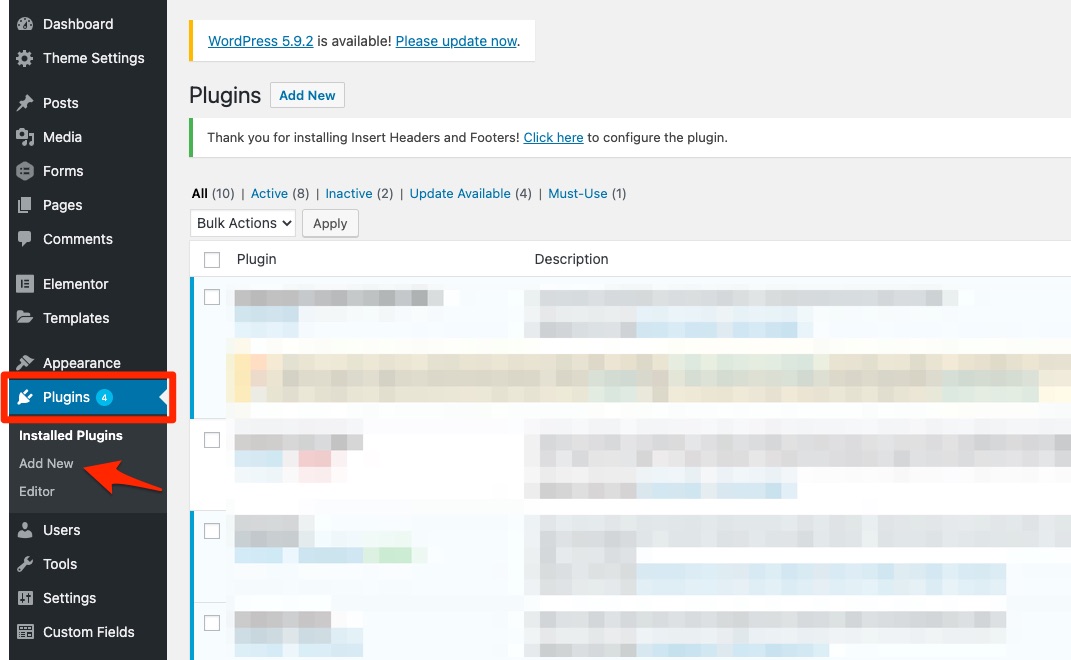
2. Add a New WordPress Plugin
Log into your WordPress admin and click Plugins. In the submenu, click Add New.
If you have a developer on your team, they can paste the PSAI site tool code into the PHP footer file just before the closing </body> tag instead of using a plugin. This is only recommended for those with a technical background.
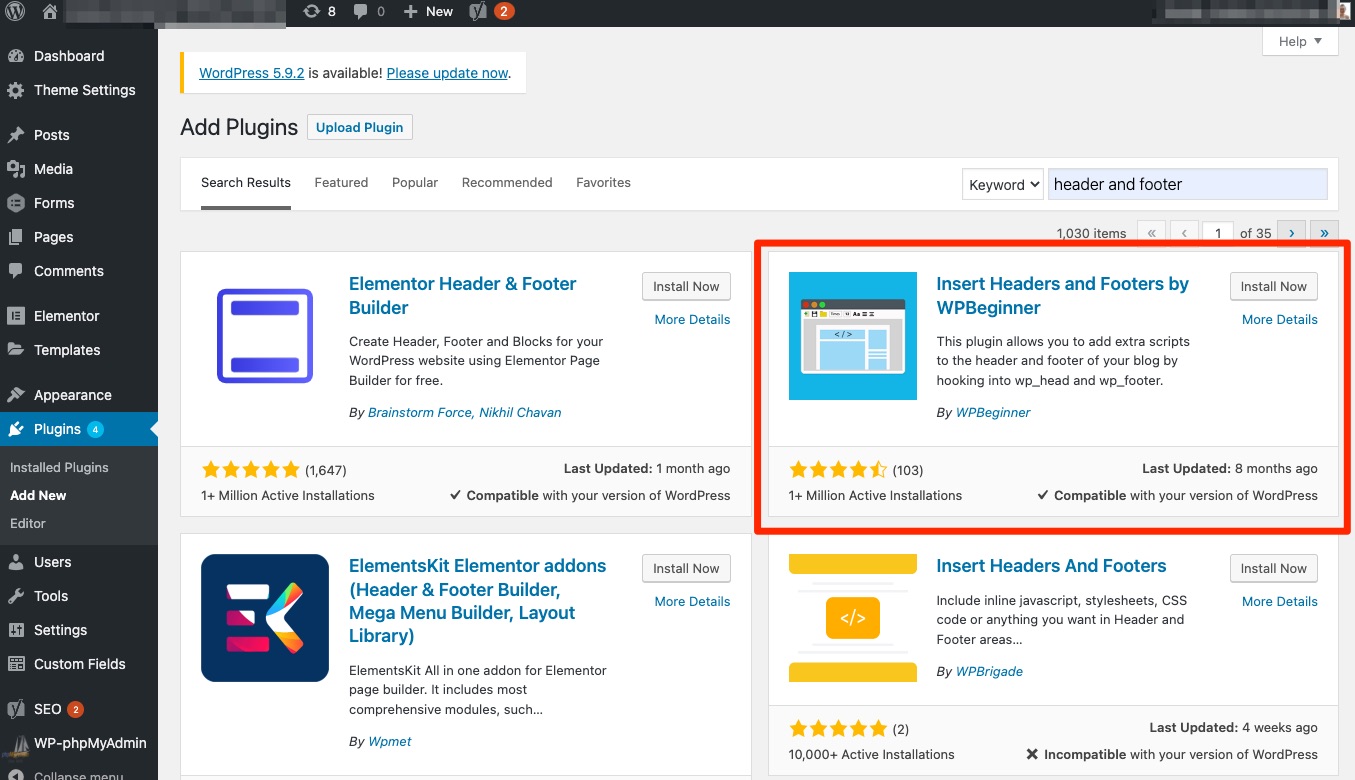
3. Download a Footer Code Plugin
On the Add Plugins page, search for a plugin that allows you to insert footer code. One recommended option is Insert Headers and Footers by WPBeginner. Click Install Now.
Because plugins can affect other parts of your website (and each WordPress site can be customized), there is not necessarily one plugin that is guaranteed to work. Be sure to test your website thoroughly after installing any plugin.
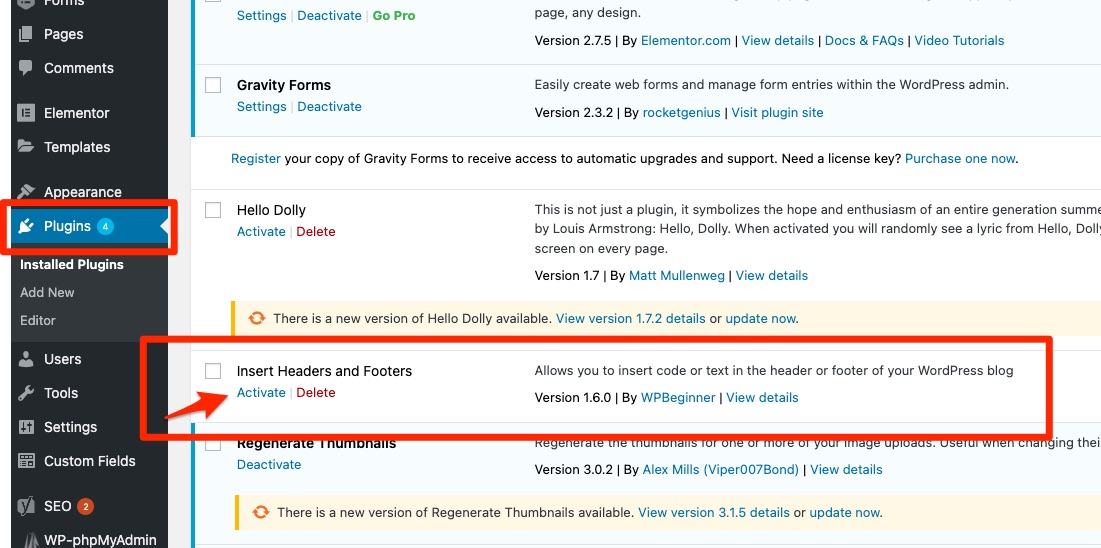
4. Activate the Plugin
Go back to Plugins, find the plugin you just installed, and then click Activate.
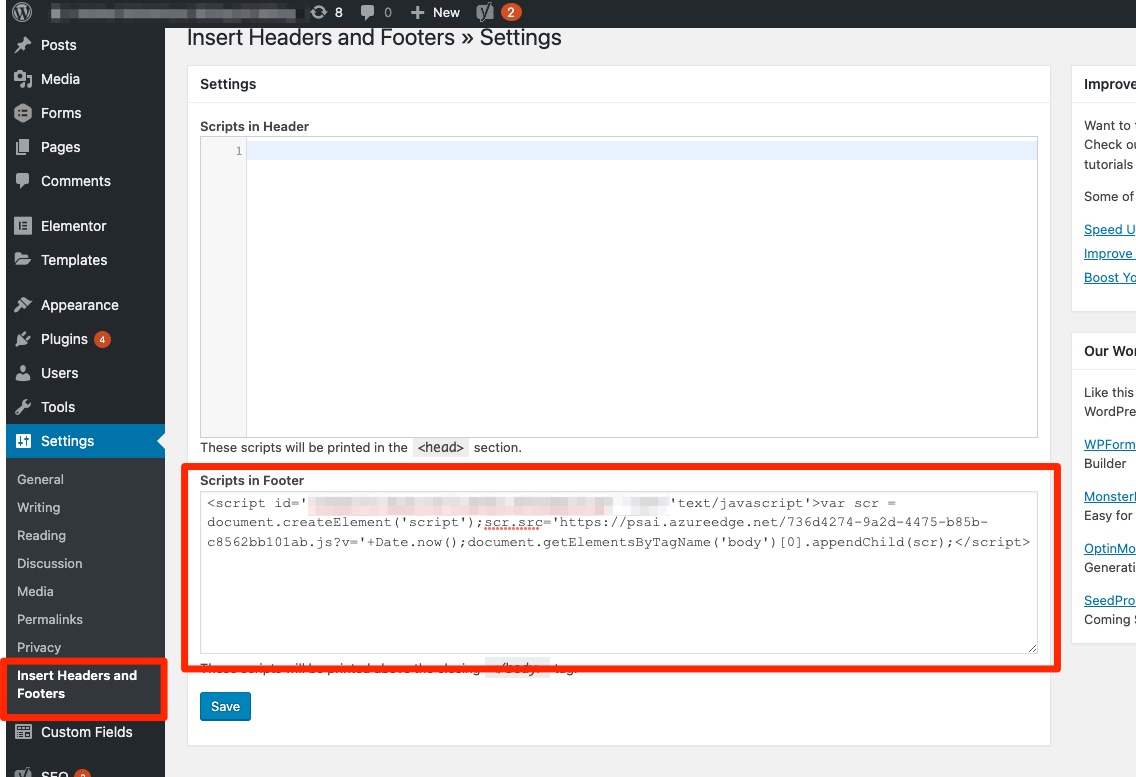
5. Paste the PSAI Code
Now that the plugin is activated, go to Settings > Insert Headers and Footers. Paste the PSAI site tool code into the Scripts in Footer field. Then save.
That's it! Your site tool should now appear on your website.
Troubleshooting
If you've followed the instructions above and your floating element is not appearing on your website, try clearing your WordPress cache. Then hard refresh the page by clicking cmd/ctrl+R.
If the PSAI site tool is still not appearing, please submit a support ticket so that we can assist.