PSAI quote forms can be embedded almost anywhere on a Wix website. The step-by-step instructions below show you how to embed a form onto an existing landing page in Wix.
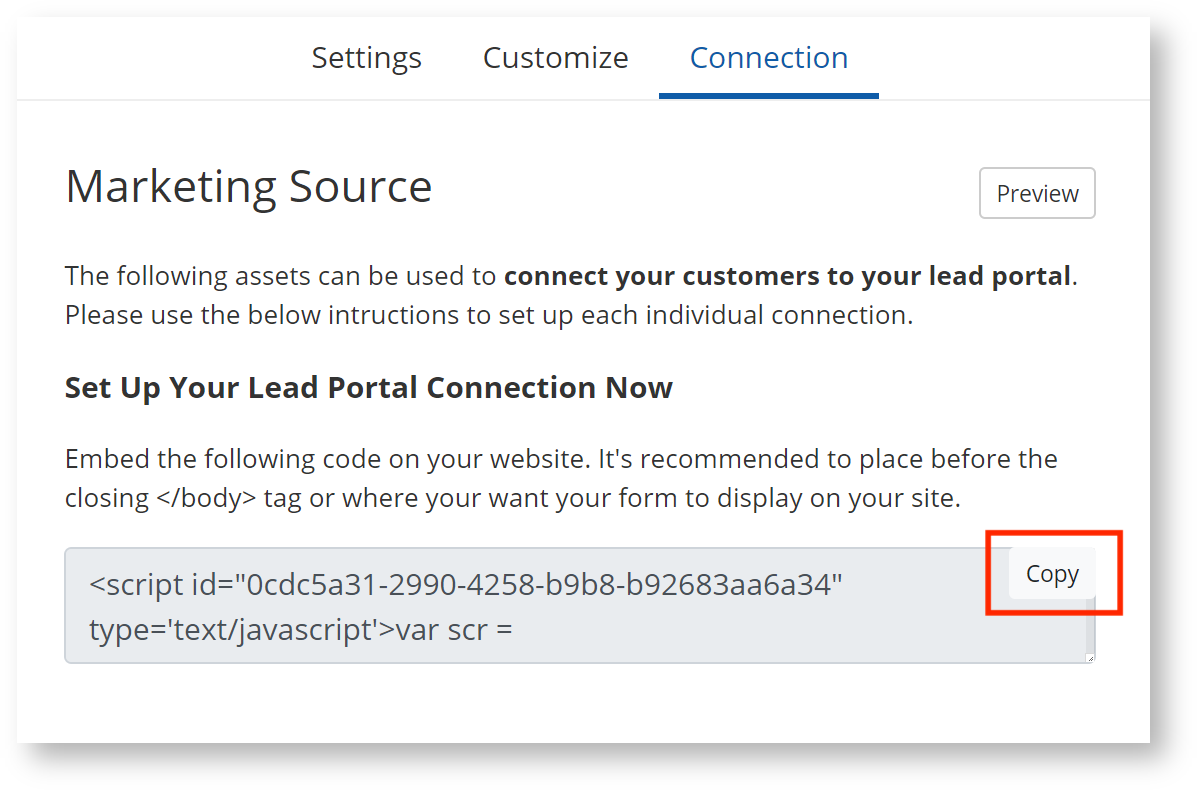
1. Copy the code snippet from PSAI
From the "Manage" tab of your PSAI dashboard, navigate to the quote form that you'd like to embed. Click on it and then go to the "Connection" tab to find the code snippet you need.
Simply click the "Copy" button to copy the code.
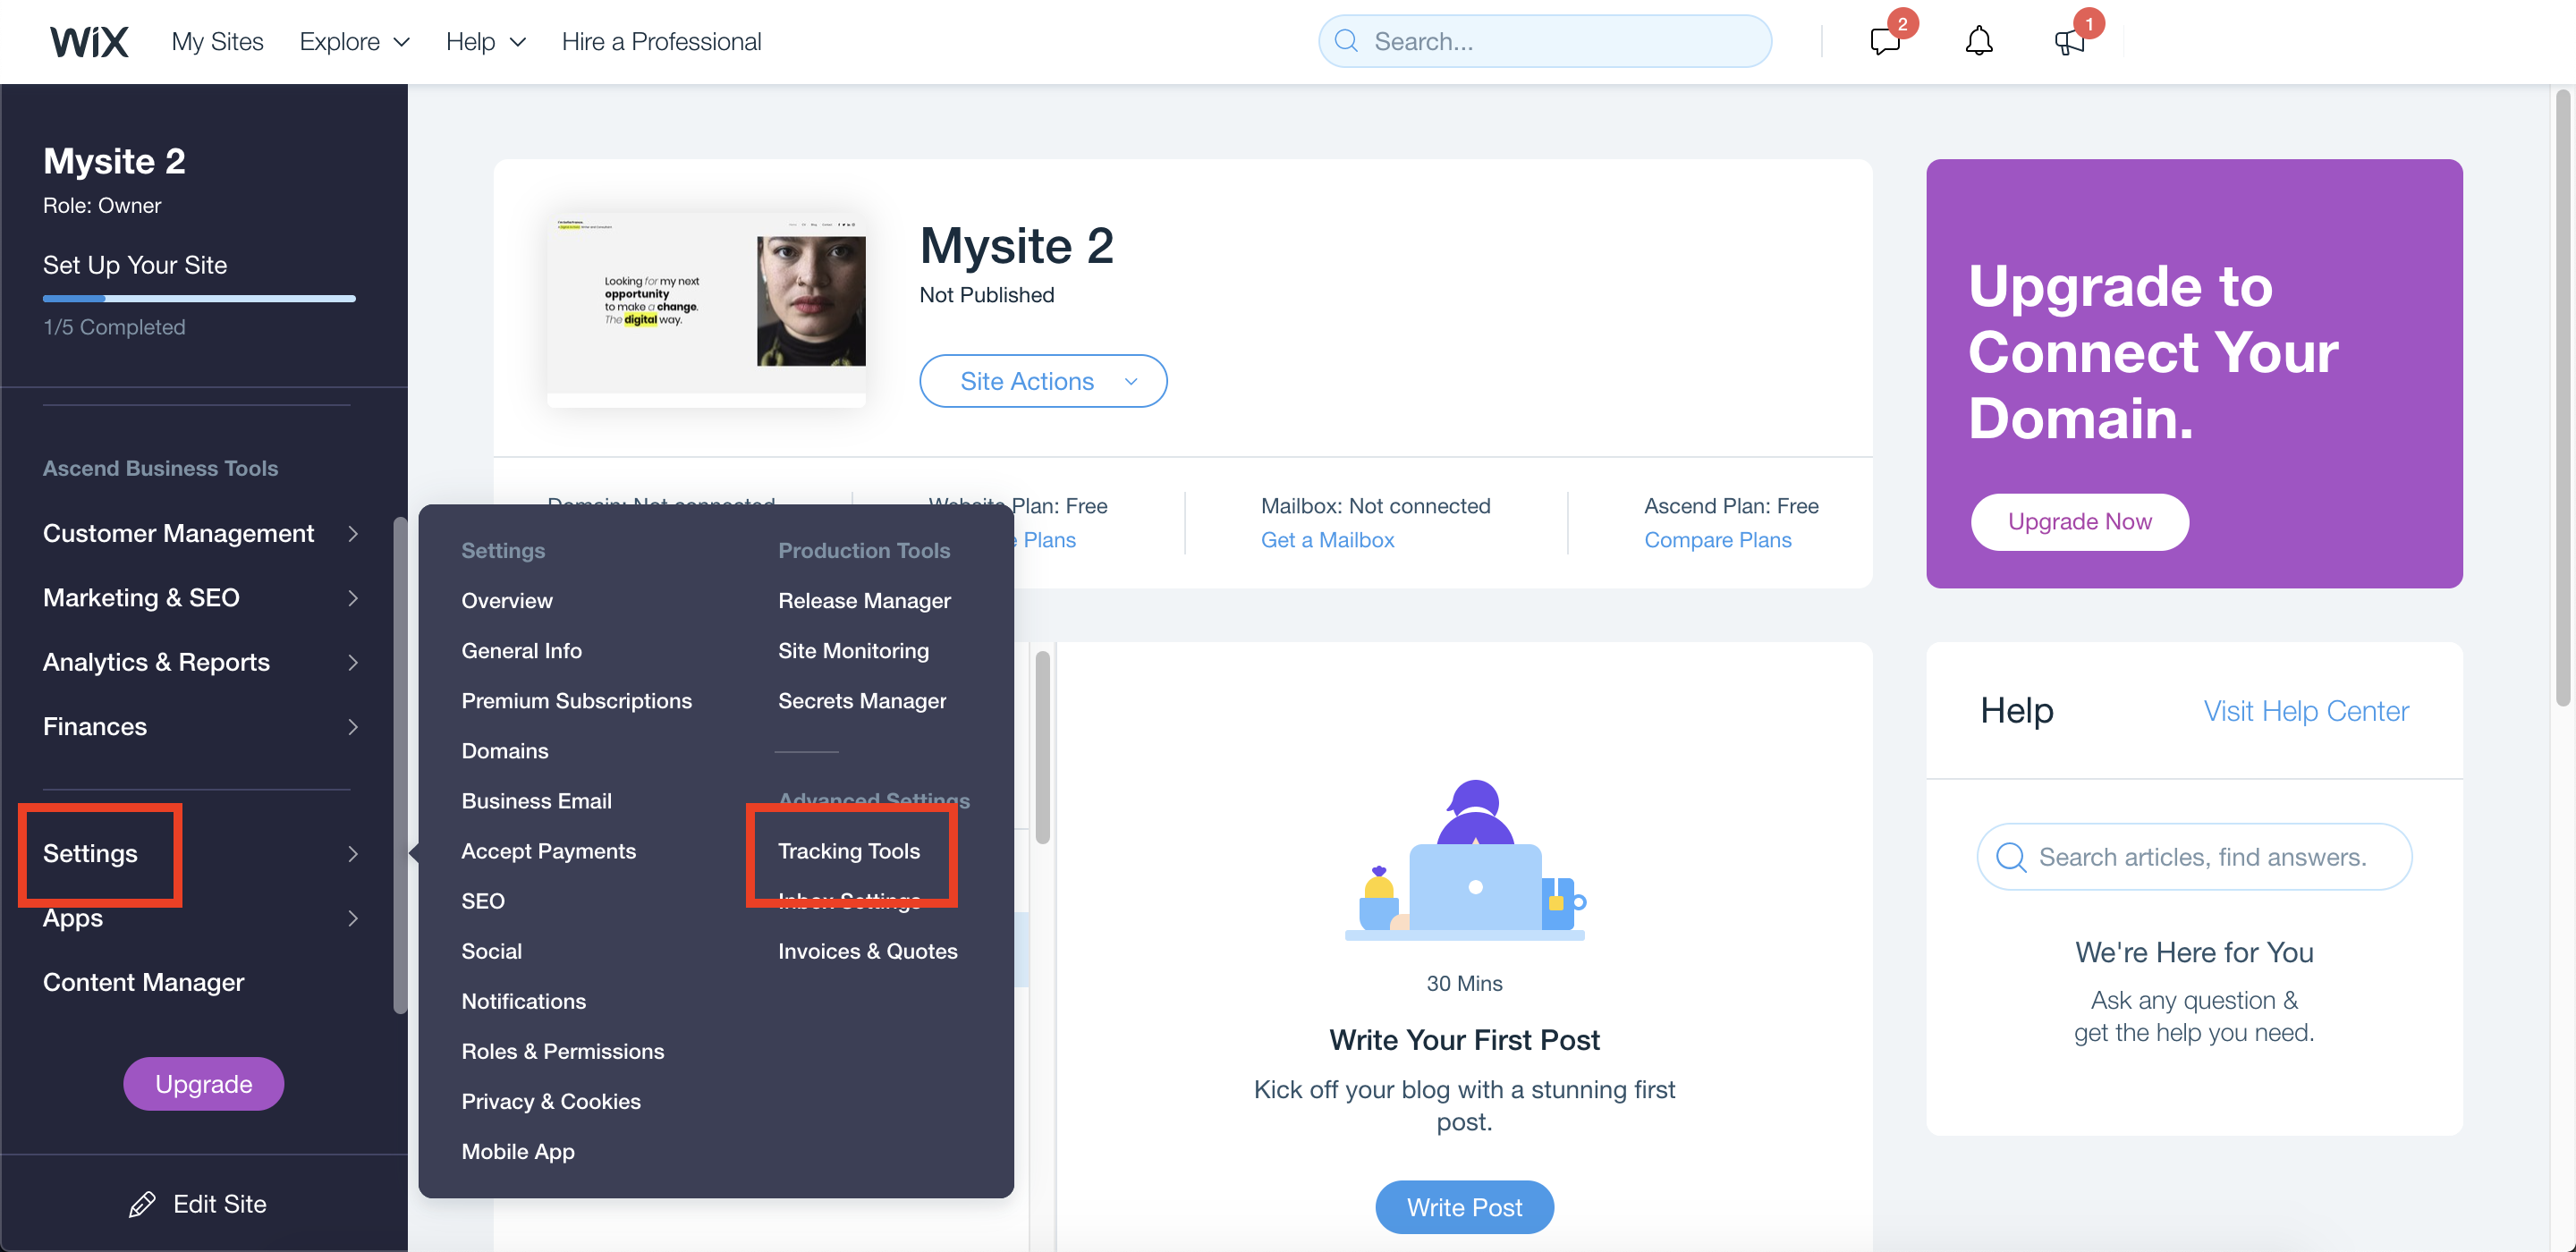
2. Navigate to the Tracking Tools panel in Wix
From your Wix dashboard, navigate to the Tracking Tools panel. You can find this panel under "Settings" in the left-hand toolbar and then under "Advanced Settings" and then "Tracking Tools."
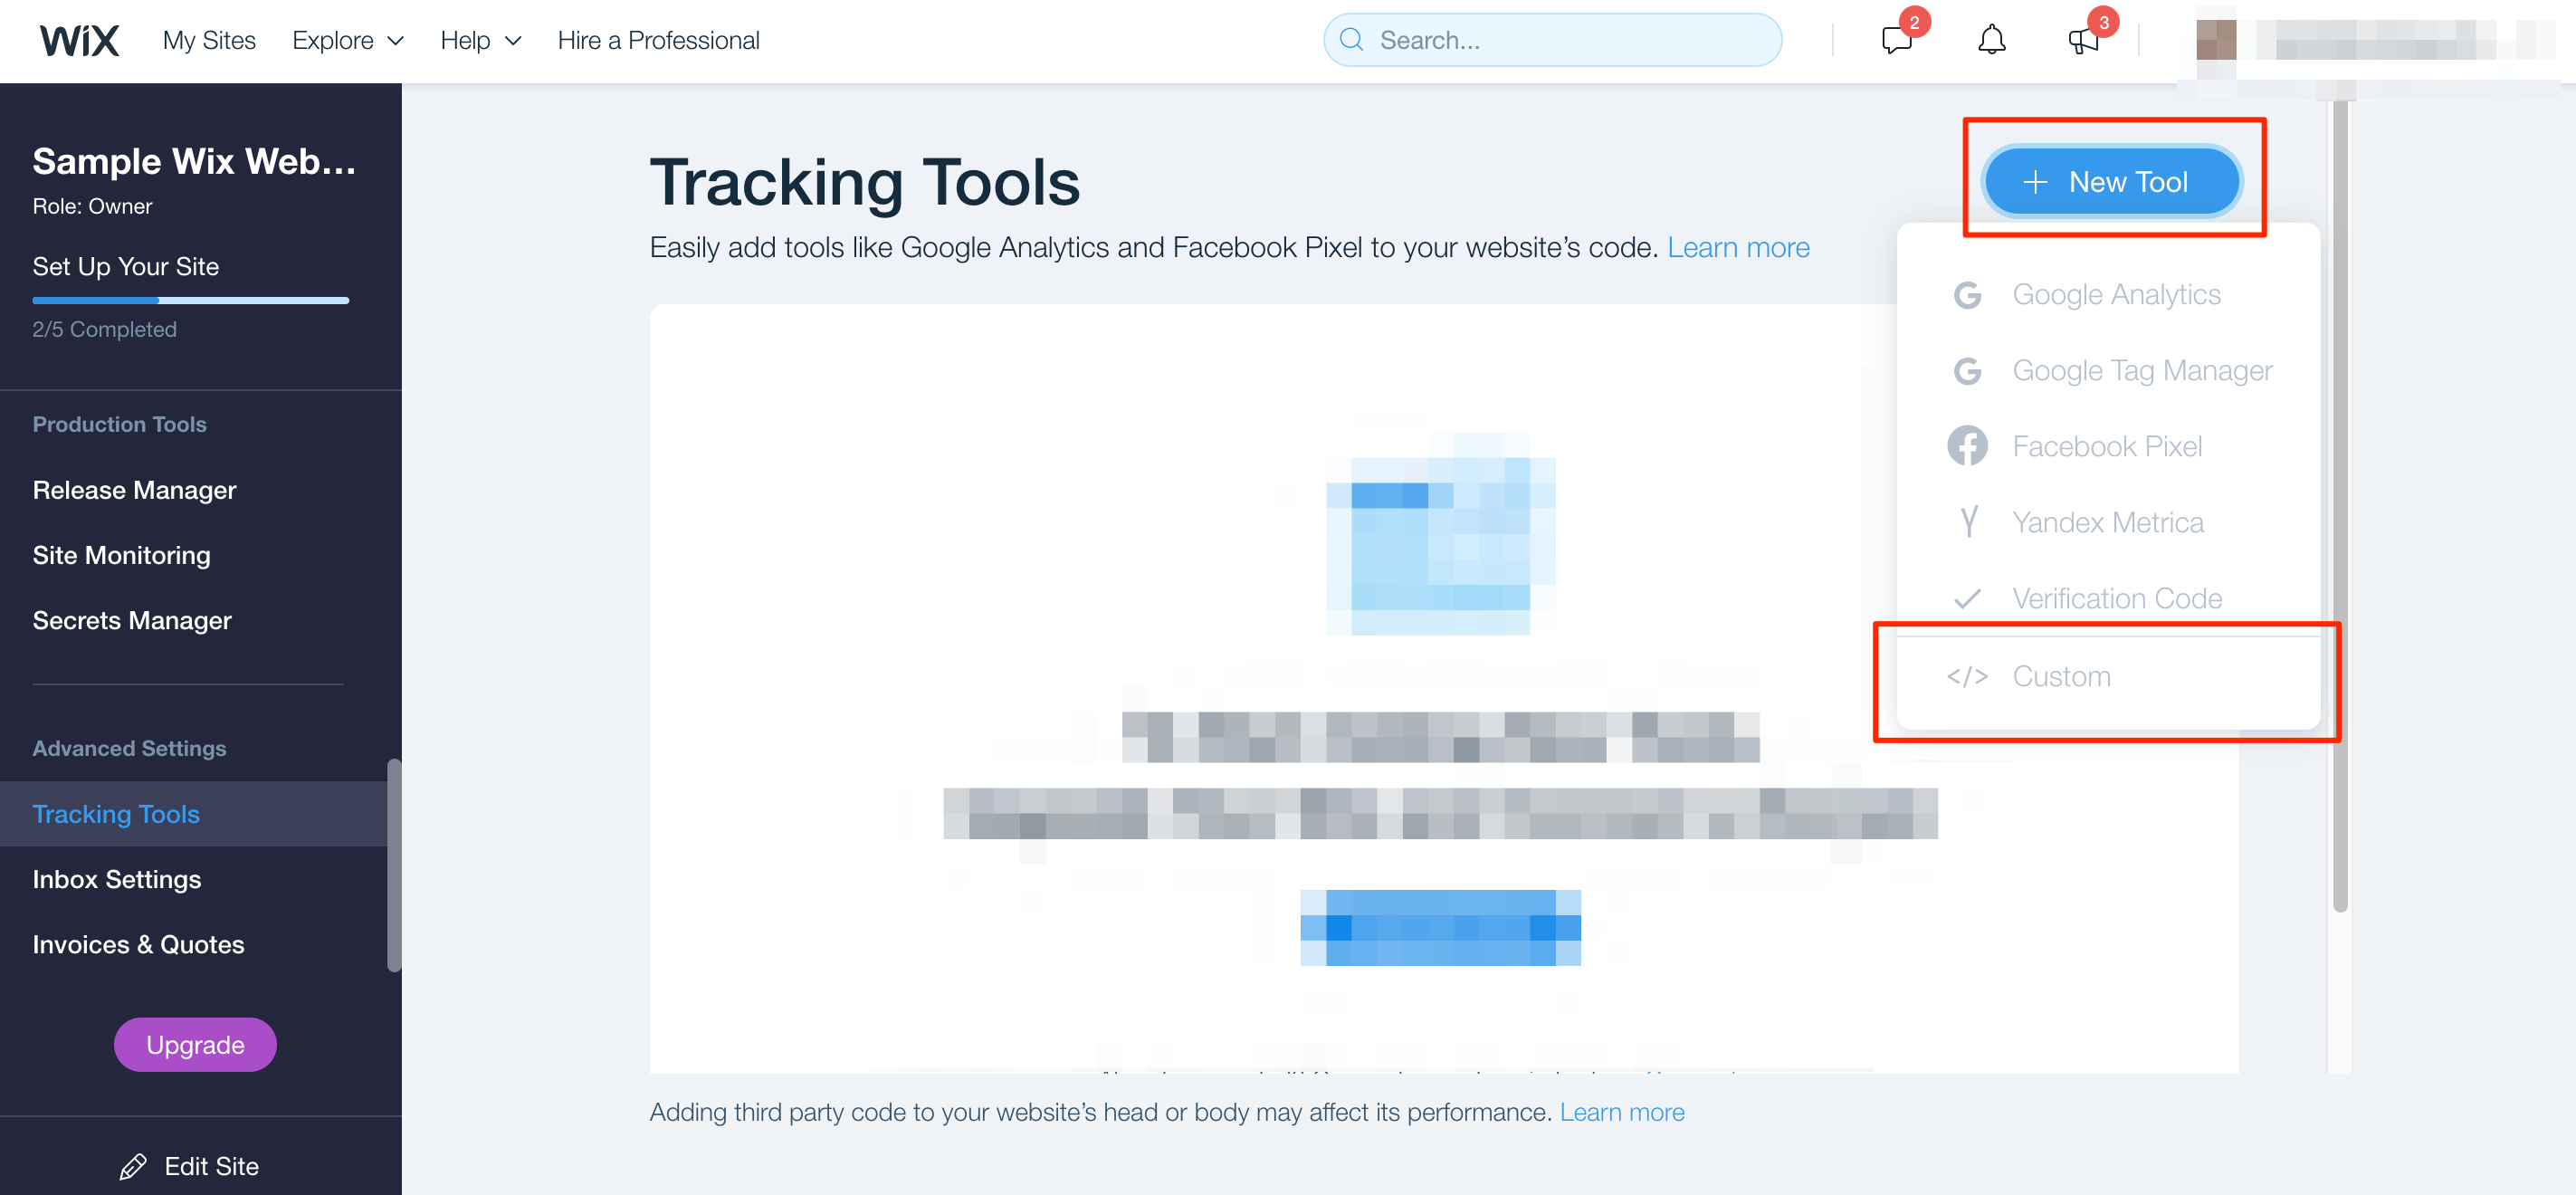
3. Add a custom tracking tool in Wix
From your Tracking Tools page, click the button for "New Tool" and then click "Custom."
4. Paste your code snippet from PSAI into Wix
To create your Custom Code element, paste your code snippet from PSAI into the Custom Code panel.
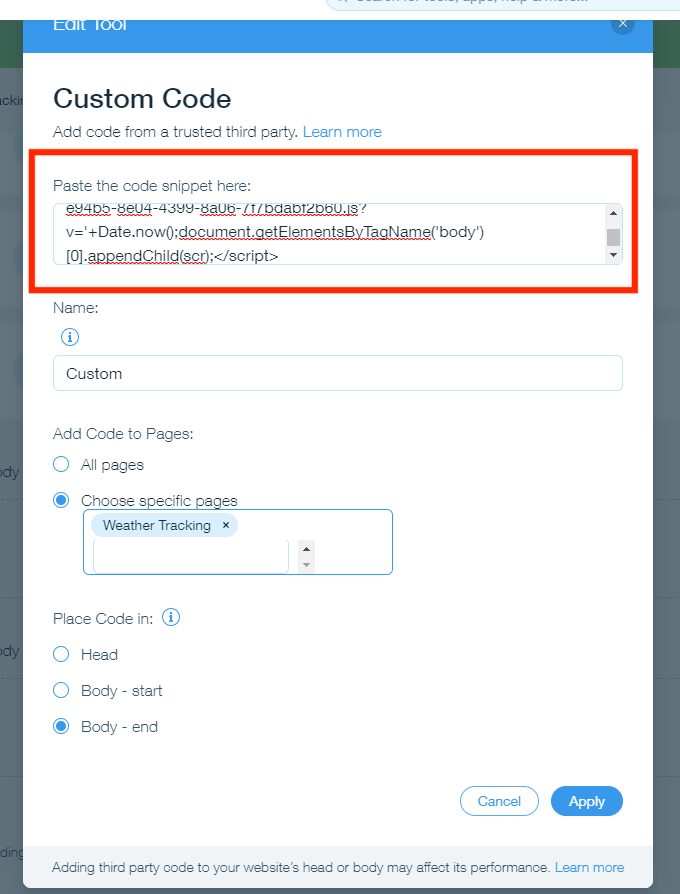
Choose Your Form's Settings
After you paste your code snippet, you can choose your other settings, as shown in the Custom Code panel above:
- Name your element. We recommend choosing a name that is descriptive and clear, so you don't end up wondering what this code snippet does in the future. Try something like "roofing quote form" or "weather report form" as relevant.
- Select the pages where the form will appear. For an embedded form, you will most likely set the form to appear on a dedicated landing page. Choose the correct page from your website's site map. (If you haven't created the landing page where the form will appear, you should go back and do that first.)
- Choose where to "Place Code in." As a best practice, we recommend setting the code snippet to "Body - end." This placement is least likely to interfere with your existing page elements.
- Save. Save your changes by clicking the "Apply" button at the bottom of the Custom Code panel.
5. Verify that the embedded form is working
Once you've saved your Custom Code element, you will see the new element within your Wix Tracking Tools overview, as shown below.
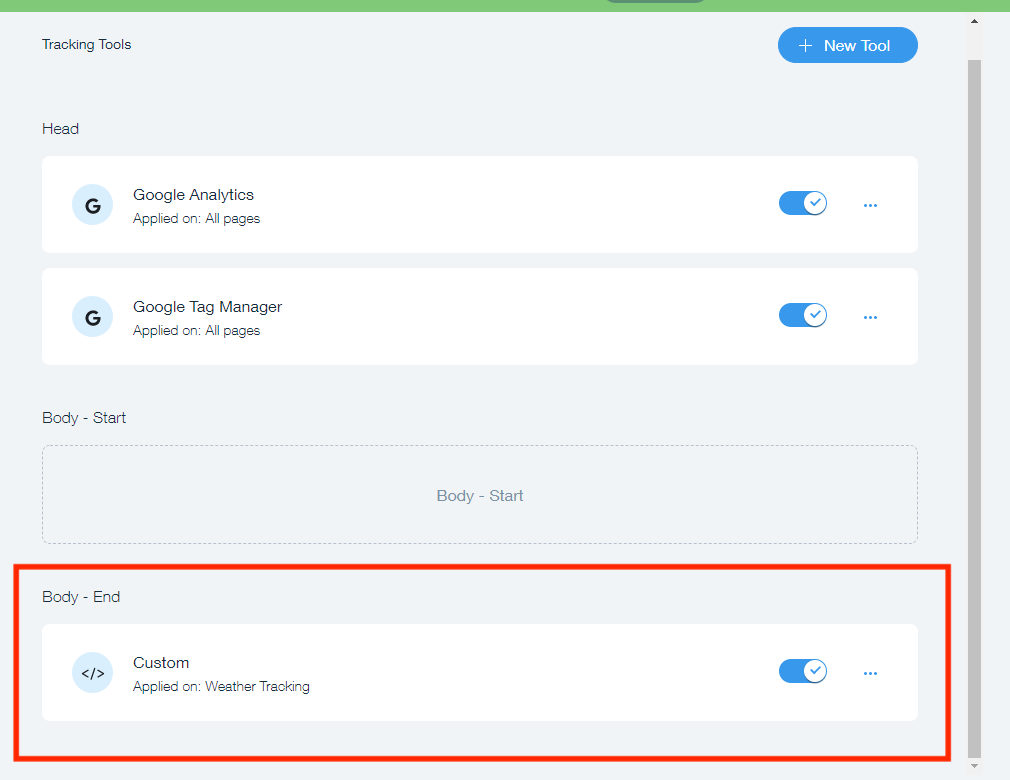
In addition to seeing the custom element in your Tracking Tools overview, it's a good idea to preview the actual page to make sure that the form is working. Navigate to the page where your form is placed and view it there. You can even test out the form to make sure it works.
That's it! Now your form is embedded in Wix and ready to go. All leads collected from this embedded form will go directly to your com portal, where you can track, reply, and manage all communications from one spot. Learn more about the Com Portal here.
Troubleshooting Your Wix Form
Form not looking quite right? Then you may need to adjust some styling settings. (Forms can be embedded anywhere on your site, but your site's overall layout and design settings will affect how the form looks.) See our troubleshooting tips on getting an embedded form to look good on Wix.
If you've followed the steps above and cannot get your form to embed properly, please view common errors with Wix form embedding or submit a ticket so we can help.