PSAI quote forms can be embedded into your Wix website in multiple ways. For non-technical users, the easiest method of embedding a form is through the Wix admin dashboard. However, if you have access to a web developer, then you can also use Wix's Corvid developer mode to embed a form as a Custom Element.
Using Corvid will give you finer control over the placement of your form, but it is not at all necessary to make your form work. For the vast majority of users, we recommend the simpler method of embedding a form through the Wix admin dashboard. (Learn how to embed a form through the Wix admin dashboard here.)
If you do want to use Wix Corvid developer mode to embed a form as Custom Element, then follow the step-by-step instructions below or provide them directly to your web developer.
Step-by-Step Guide for Embedding a Form with Wix Corvid
1. Create a New .js File in Code Files
Open the Wix Editor and click the brackets {} on the right to access Code Files. Next to the "custom-elements" folder, click the ellipsis and choose "New .js file." Name your new file "spectrumform.js."
Copy and paste the following code into "spectrumform.js."
class SpectrumForm extends HTMLElement {
connectedCallback() {
let range = document.createRange();
range.setStart(this, 0);
this.appendChild(range.createContextualFragment("#enter your script code from PSAI here#"));
}
}
customElements.define('spectrum-form', SpectrumForm);
In the code block above, you must add your form's unique script code where it says "#enter your script code from PSAI here#". Copy your code snippet from your PSAI Marketing Sources panel and paste it into this spot. Be sure to remove the hashtags from each side.
2. Add a Custom Element Through the Wix Editor
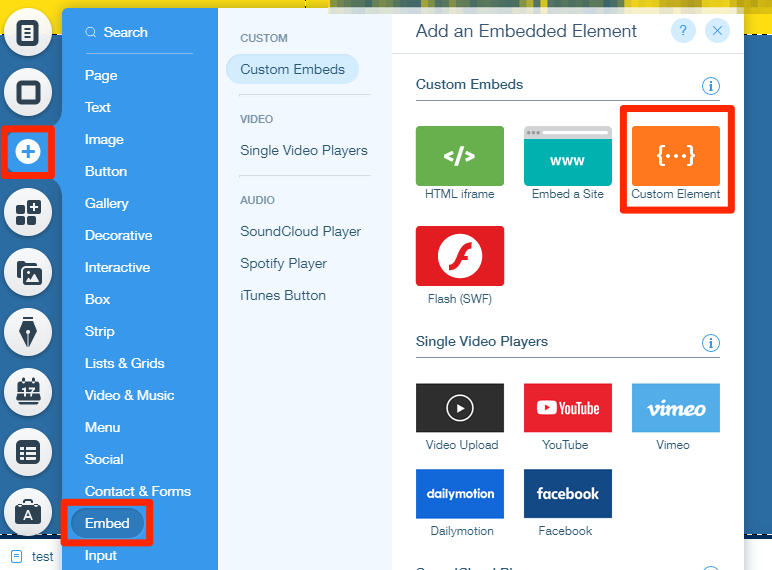
Once your code has been entered as a new .js file, go back to the normal Wix Editor. From the left-hand toolbar, click the plus sign (+) and then "Embed." Then choose "Custom Element."
3. Set the Custom Element Settings
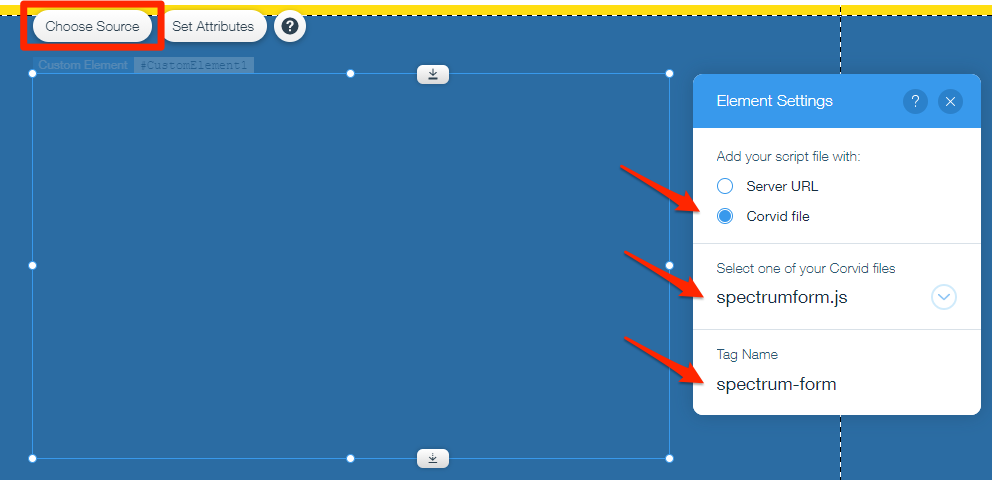
On the Custom Element you've just added, click "Choose Source." From this panel, select the settings described in the list (and shown in the screenshot) below:
4. Save and Publish Your Site
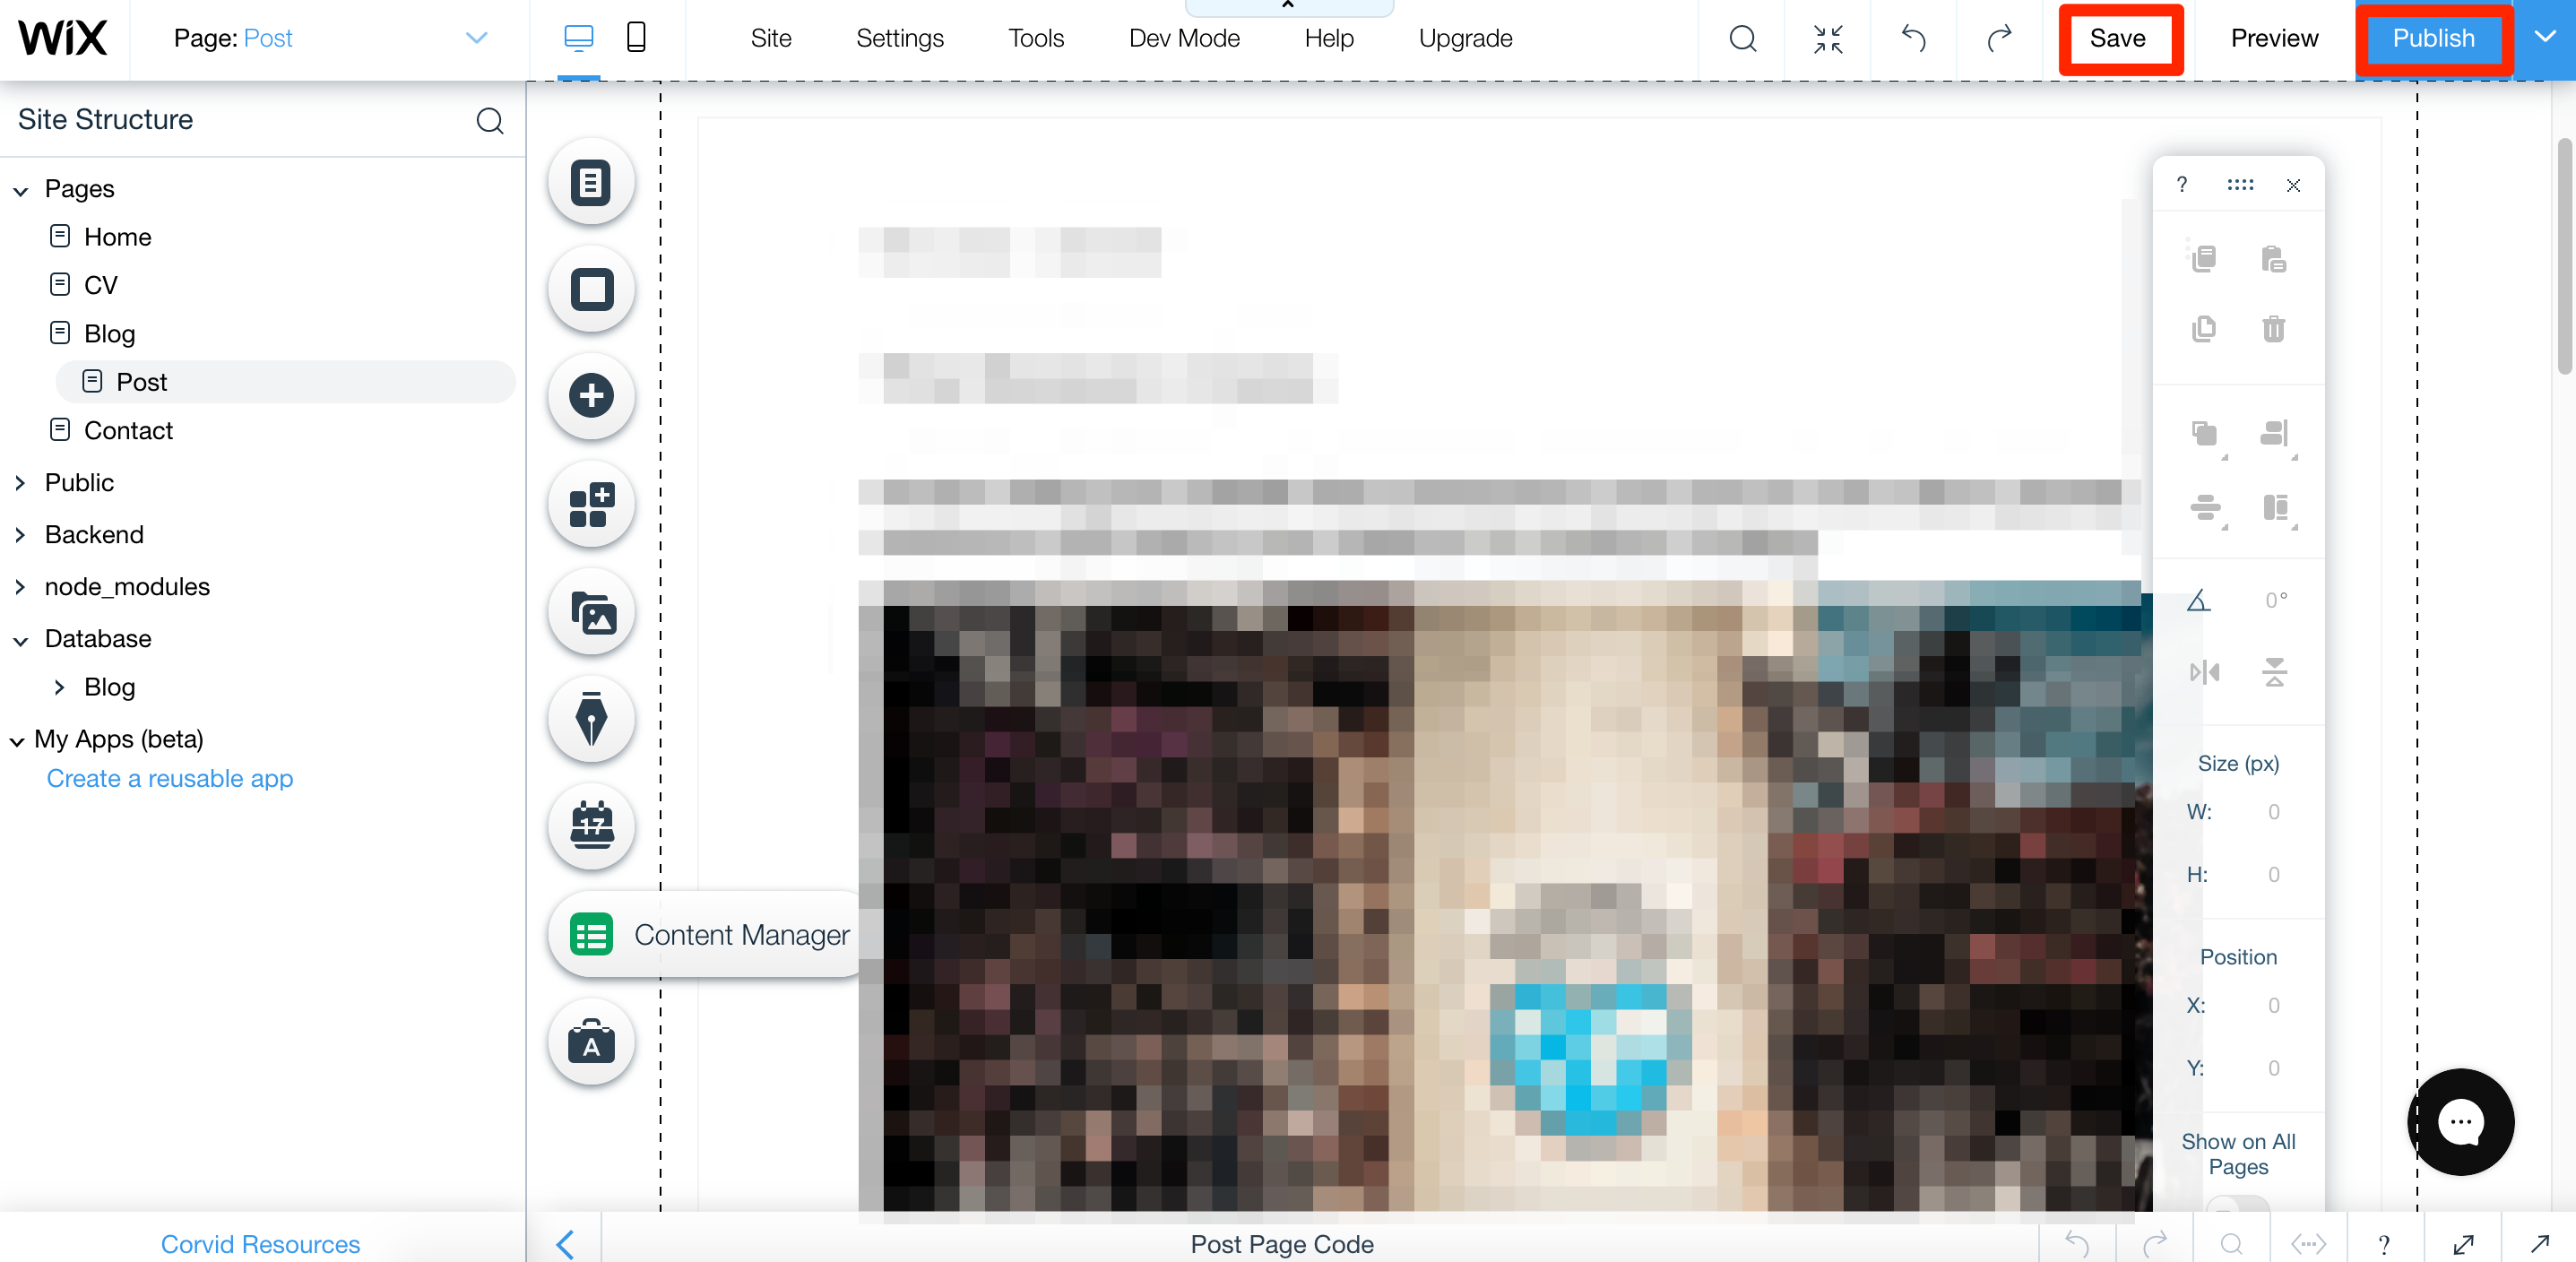
To make sure your form shows up on your live site, you'll need to republish your Wix website. To do so, click "Save" and then "Publish" in the upper righthand corner of the Wix Editor screen.
Troubleshooting
If you've followed the instructions above and cannot get your form to work, please submit a ticket for Support or use the Help widget in the bottom right-hand corner of the screen. We will be happy to assist you.
If you're in a hurry to get your form added to your website, you can instead use our standard instructions for embedding a form through Wix Tracking Tools. Unlike the Corvid method described above, the Wix admin dashboard does not require input from a professional web developer.