PSAI Ads Manager makes it easy to design custom ads, launch them on Facebook, and monitor their performance—without ever having to leave the PSAI dashboard. Follow the instructions below to create a new ad in just a few minutes.
This article explains how to create a new ad from scratch, but there are other ways to generate ads, too, including choosing an AI Recommended ad or duplicating an existing ad.
1. Go to Ads Manager
Start by logging into PSAI and clicking Manage from the left-hand toolbar. If you're using Ads Manager for the first time, we recommend going through the guided tour to get your account set up. Read more about the set-up tour here.
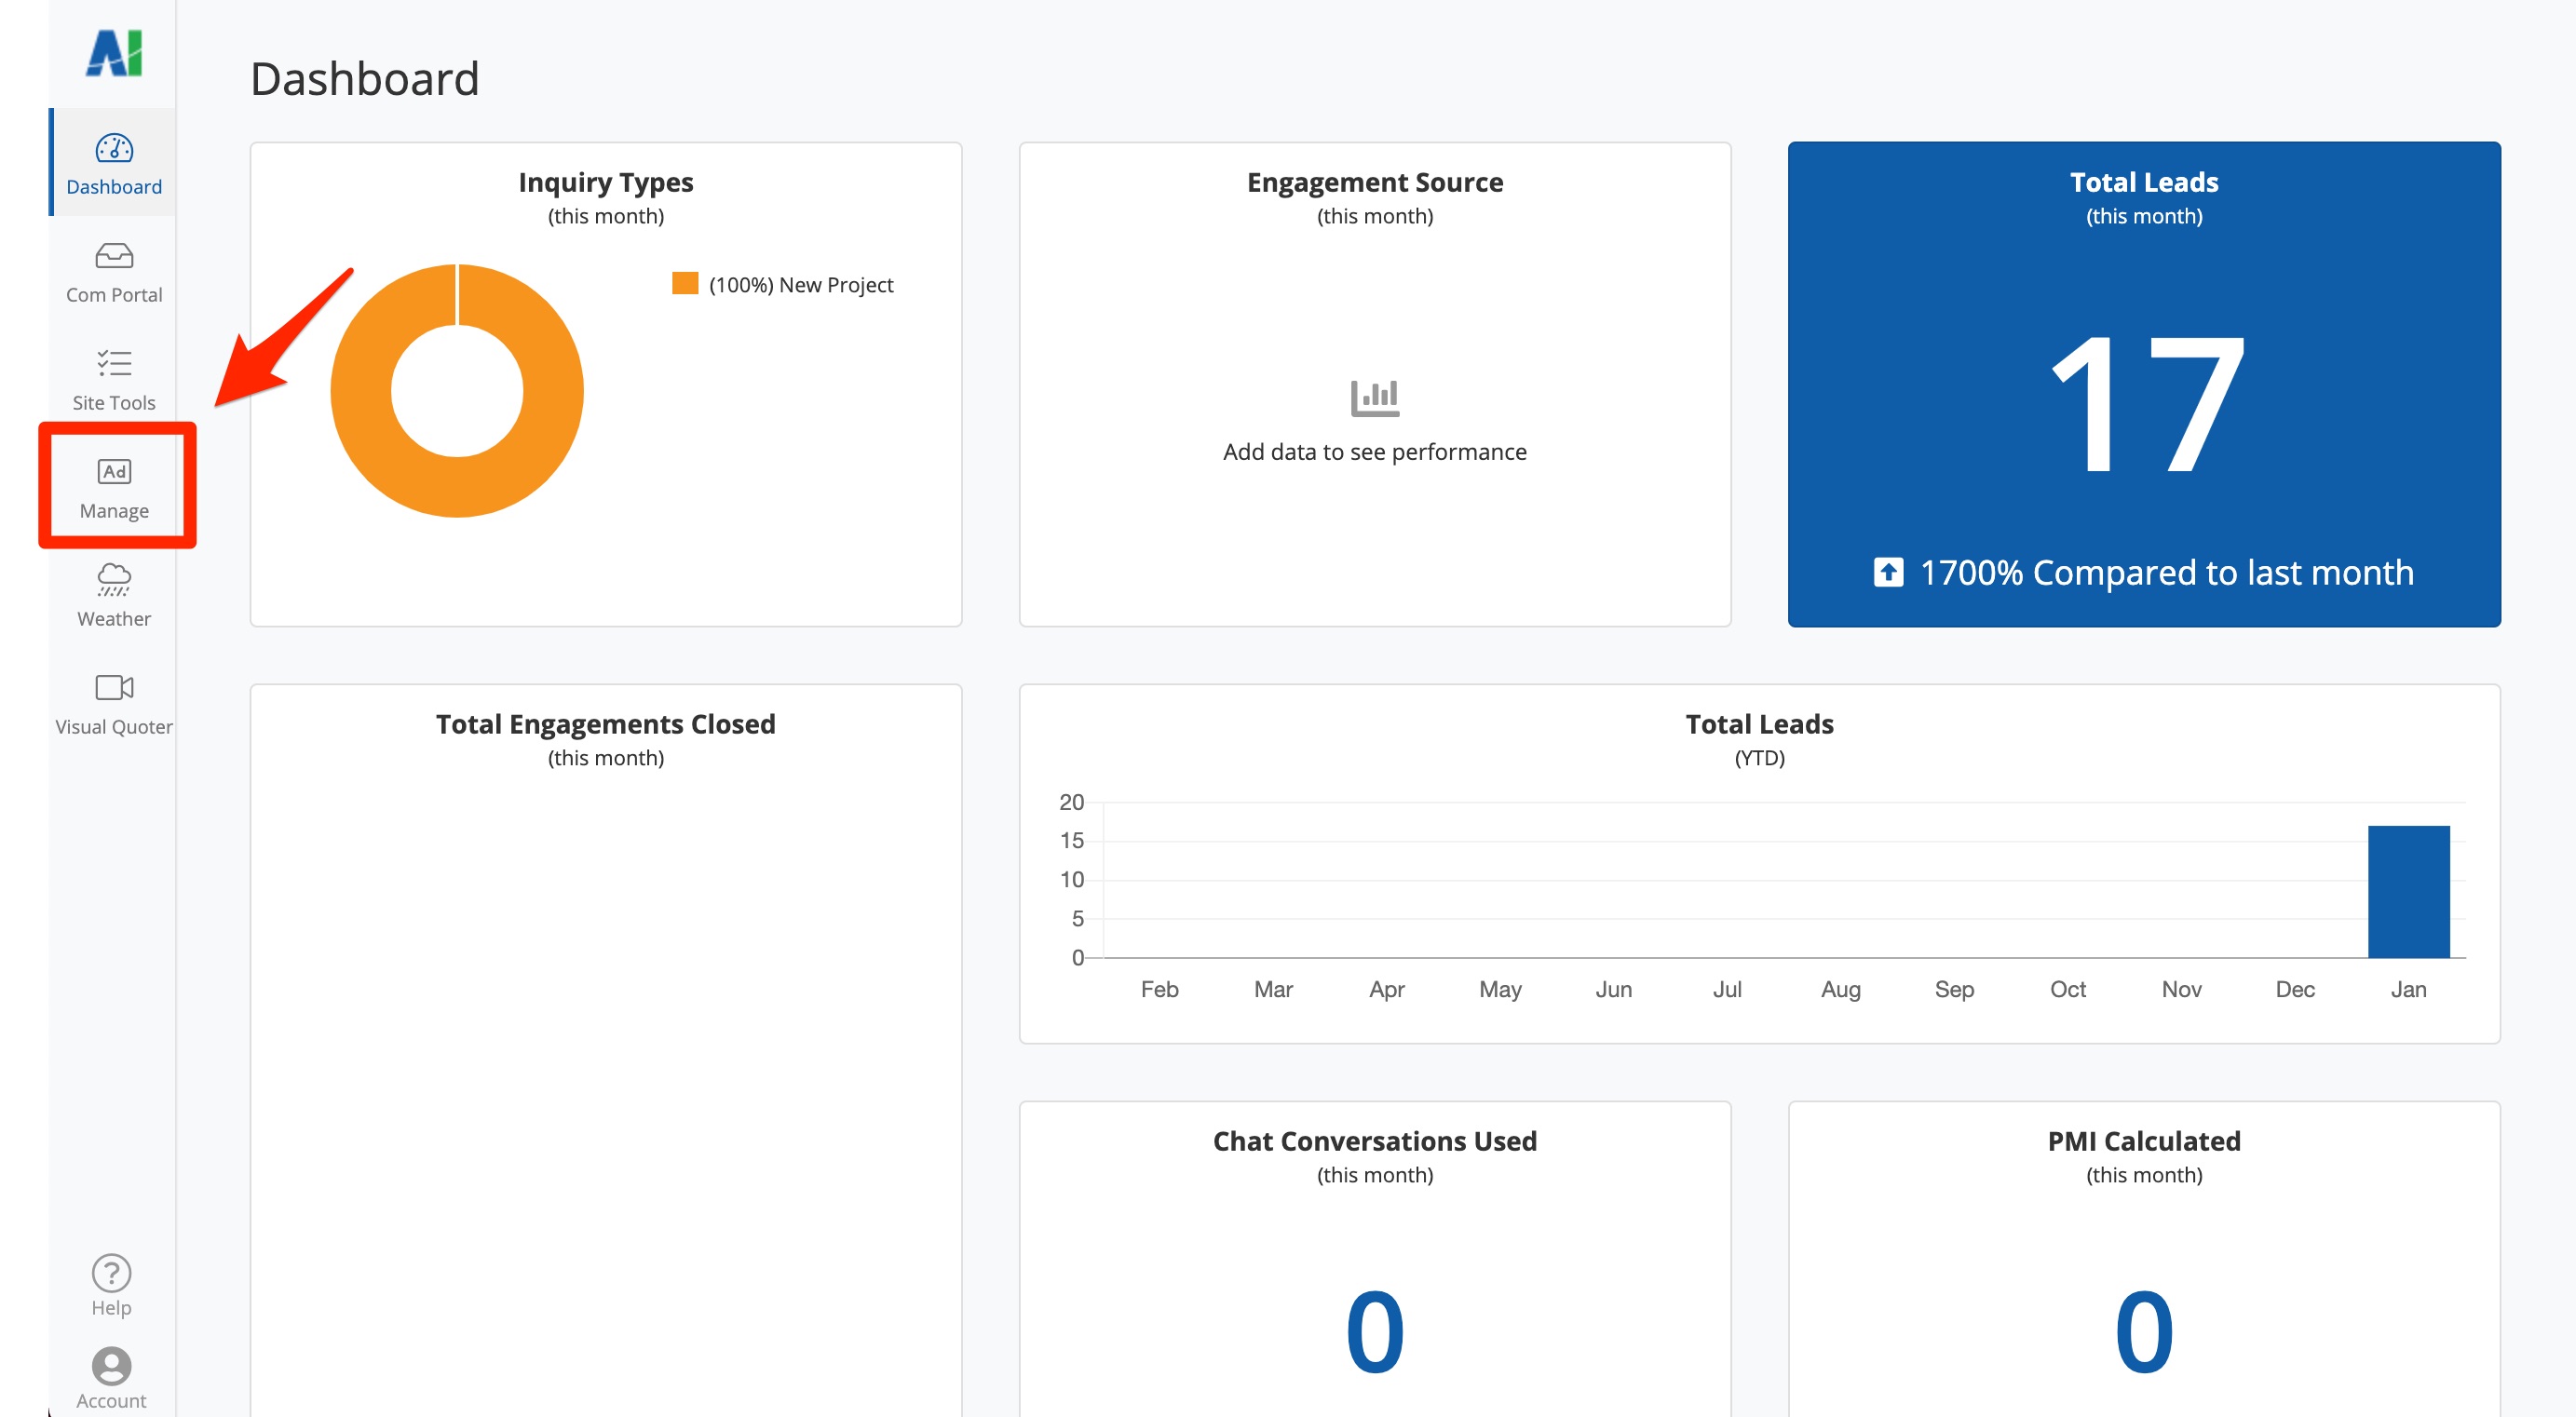
Don't see Ads Manager in the left-hand toolbar? Then you likely do not have access. Speak with your PSAI administrator about granting you the correct User permissions for Ads Manager.
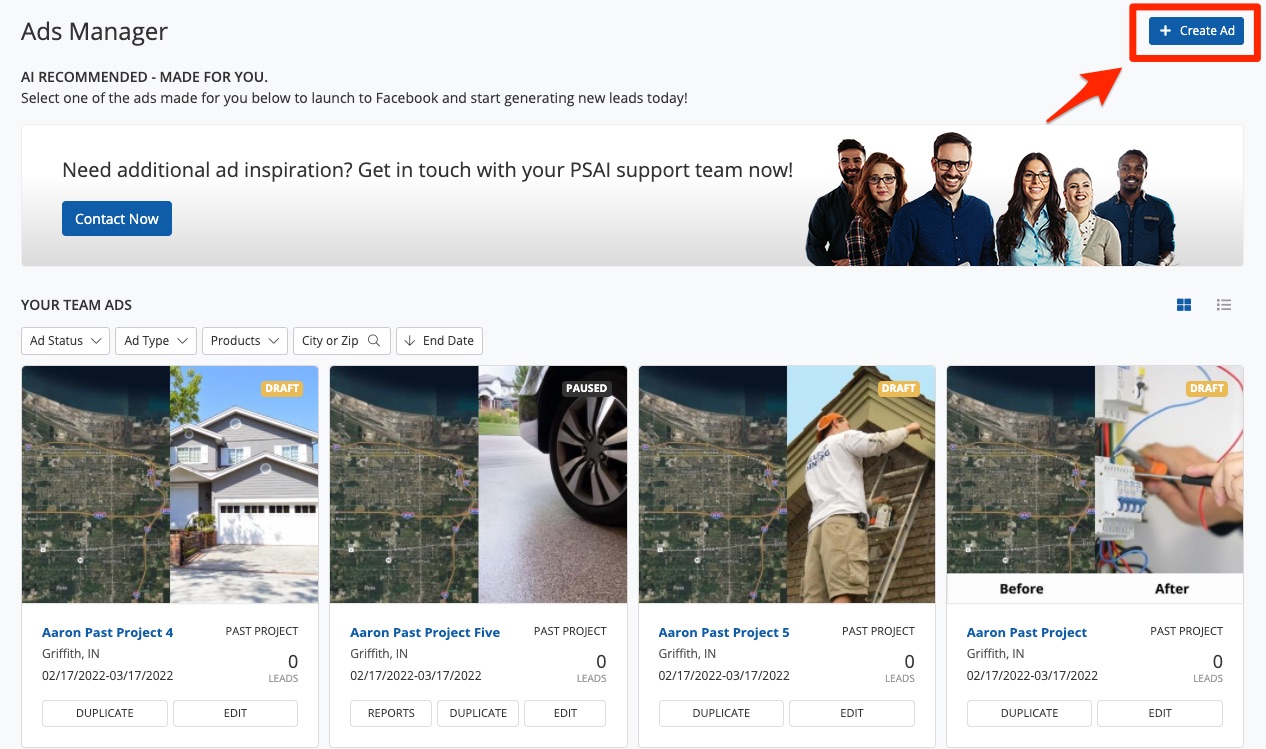
2. Create an Ad
From your Ads Manager page, click the blue plus sign (+) in the upper right corner.
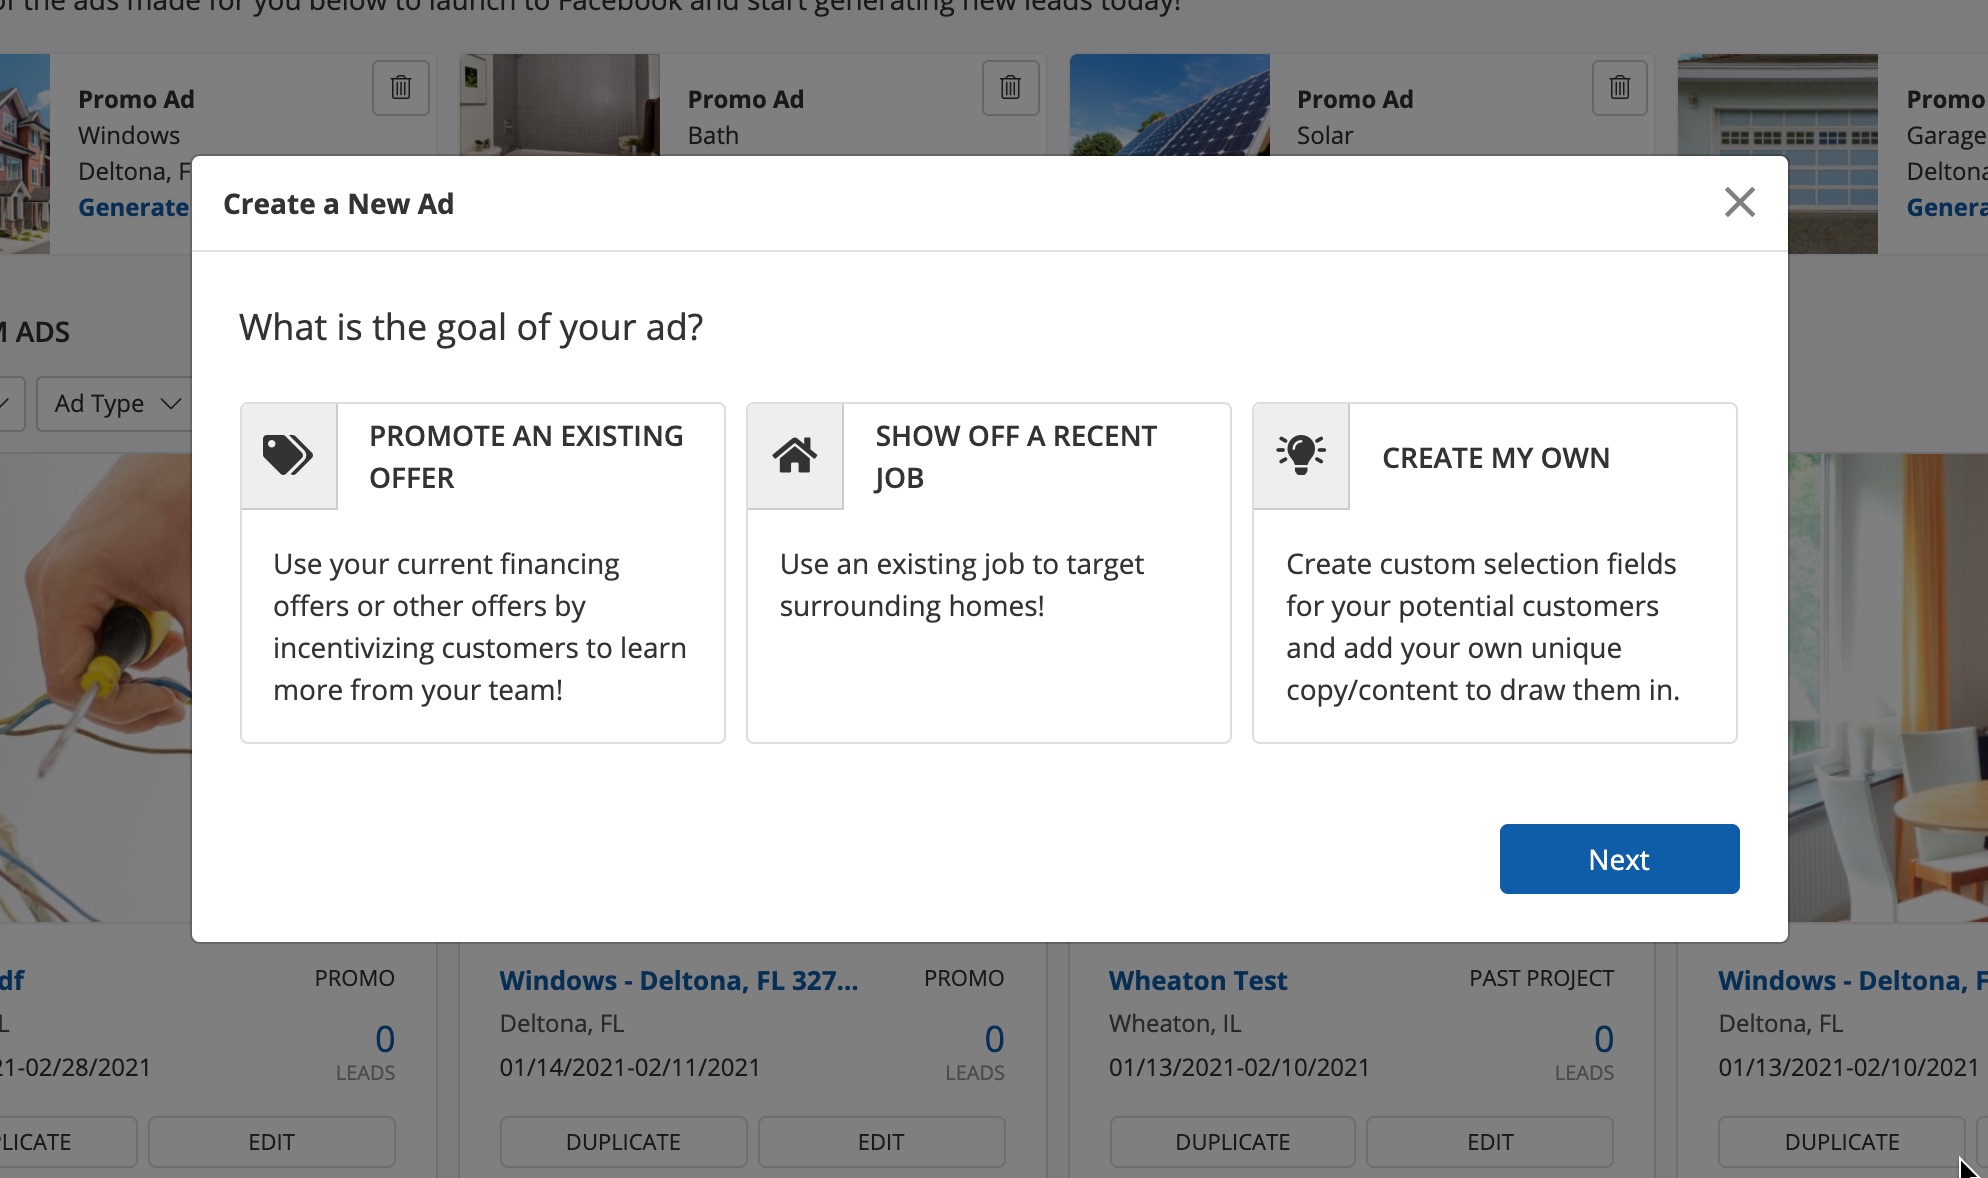
3. Choose Your Ad Type
From the Create a New Ad panel, you'll start by choosing one of three different types of ads:
4. Choose Your Product Type
The first screen that appears next, regardless of your ad type, will be the product selection. Click to choose the product you're featuring for this Facebook ad.
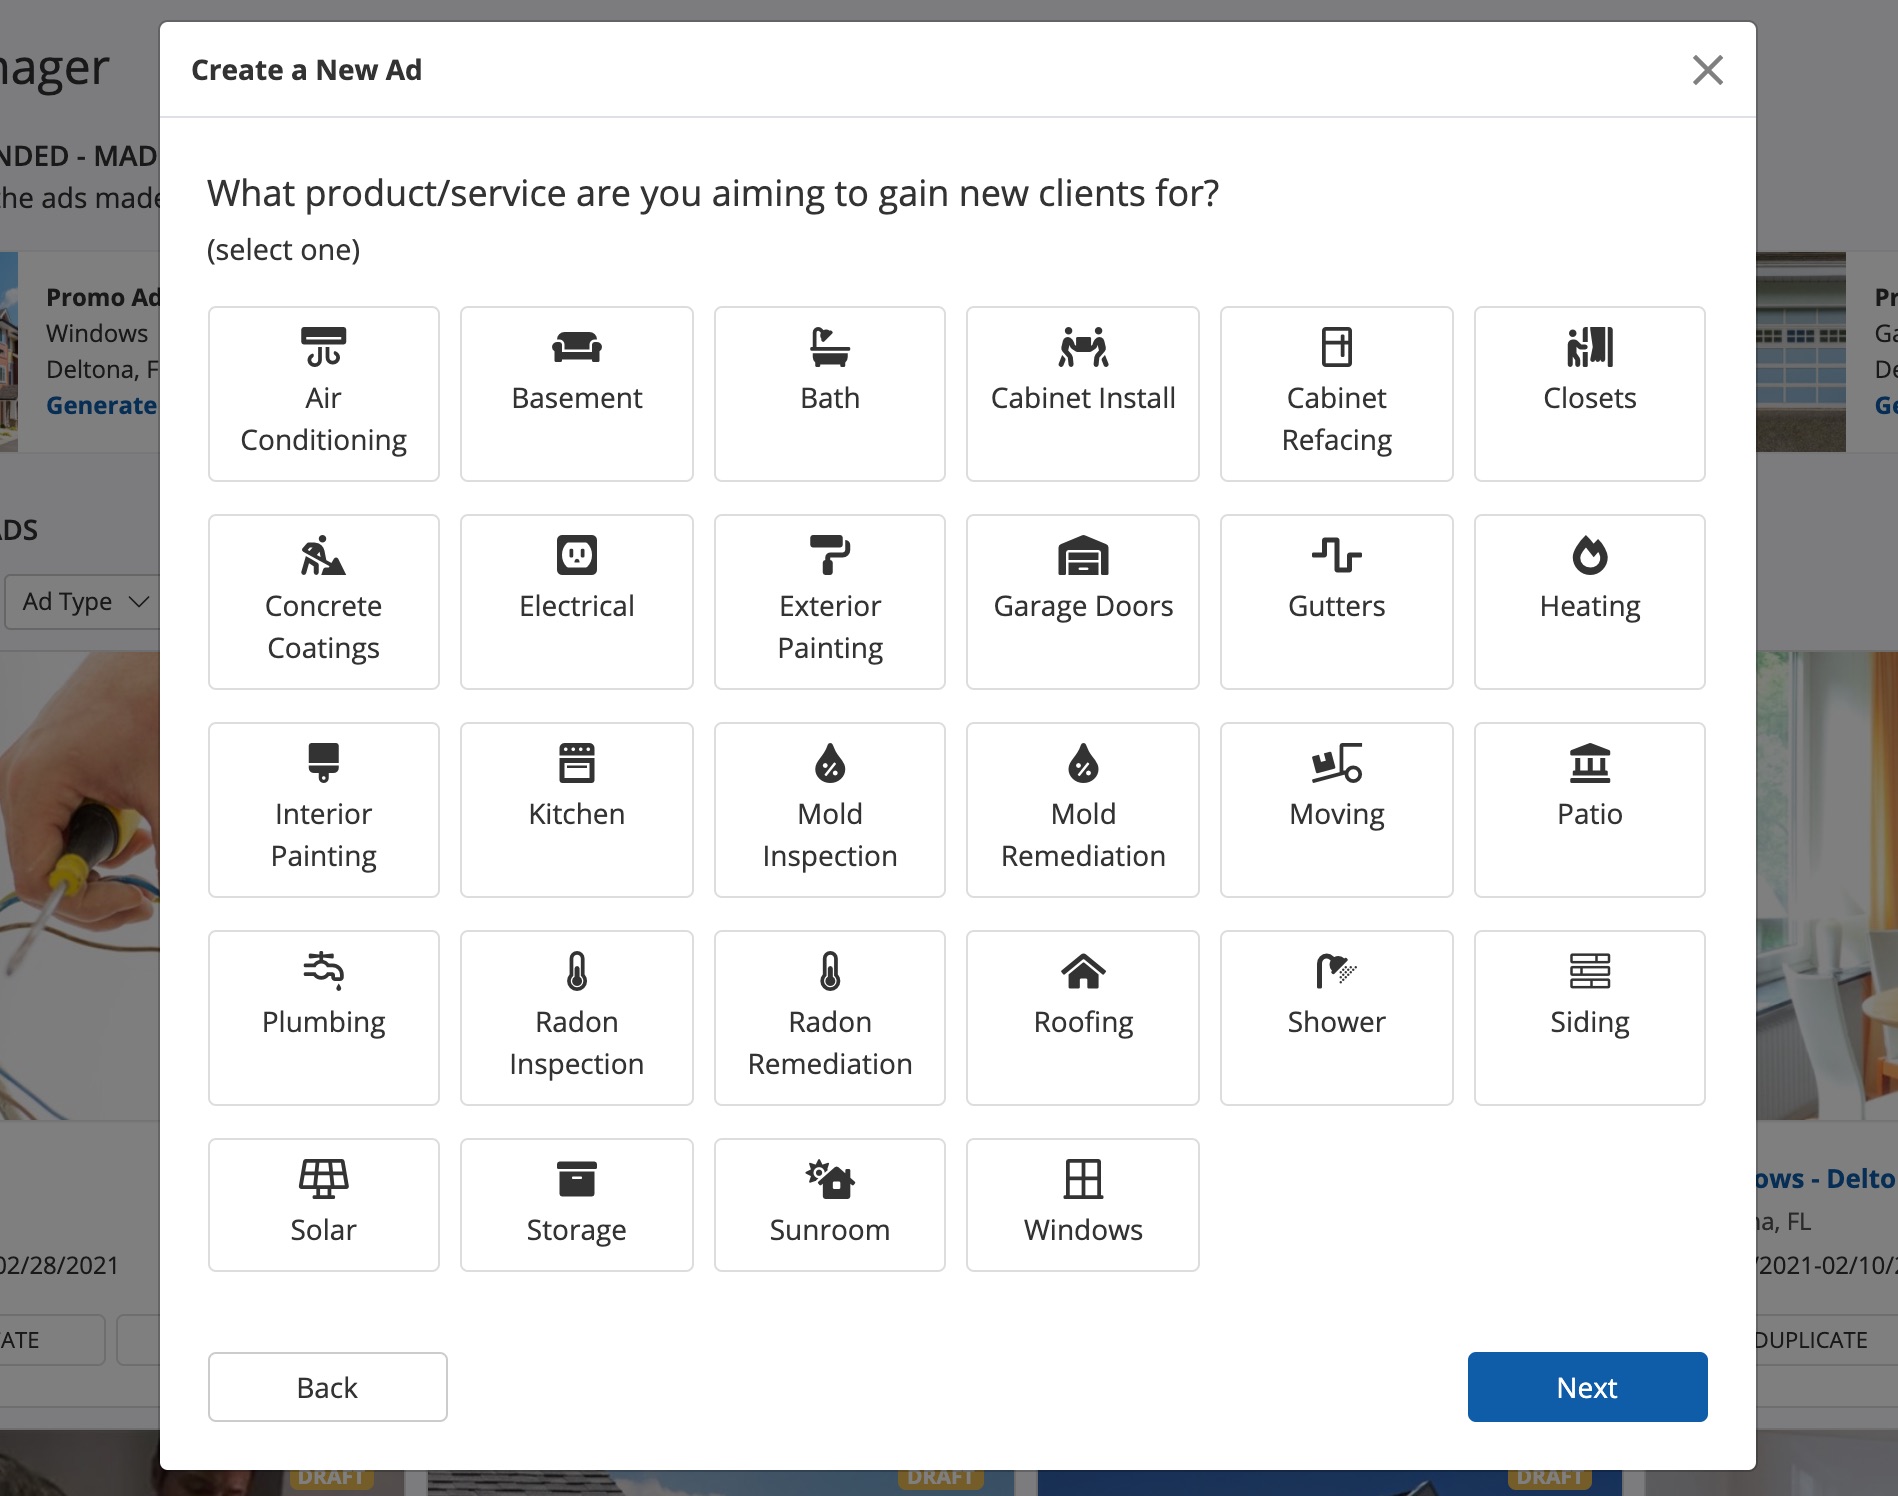
In order to create a focused ad that encourages Facebook users to engage, you can only choose one product per ad.
5. Complete Basic Information
In the following panels, you'll be guided through the ad generation process, step by step. The exact steps will vary slightly depending on which type of ad you chose in step #2, but in general, these steps may include:
- Promote an Existing Offer
- Show Off a Recent Job
- Create My Own
- Uploading an image or images
- Linking to a video (hosted on YouTube or Vimeo)
- Opting for PSAI to populate your ad with an AI-recommended image
- Entering a specific dollar ($) or percent (%) discount
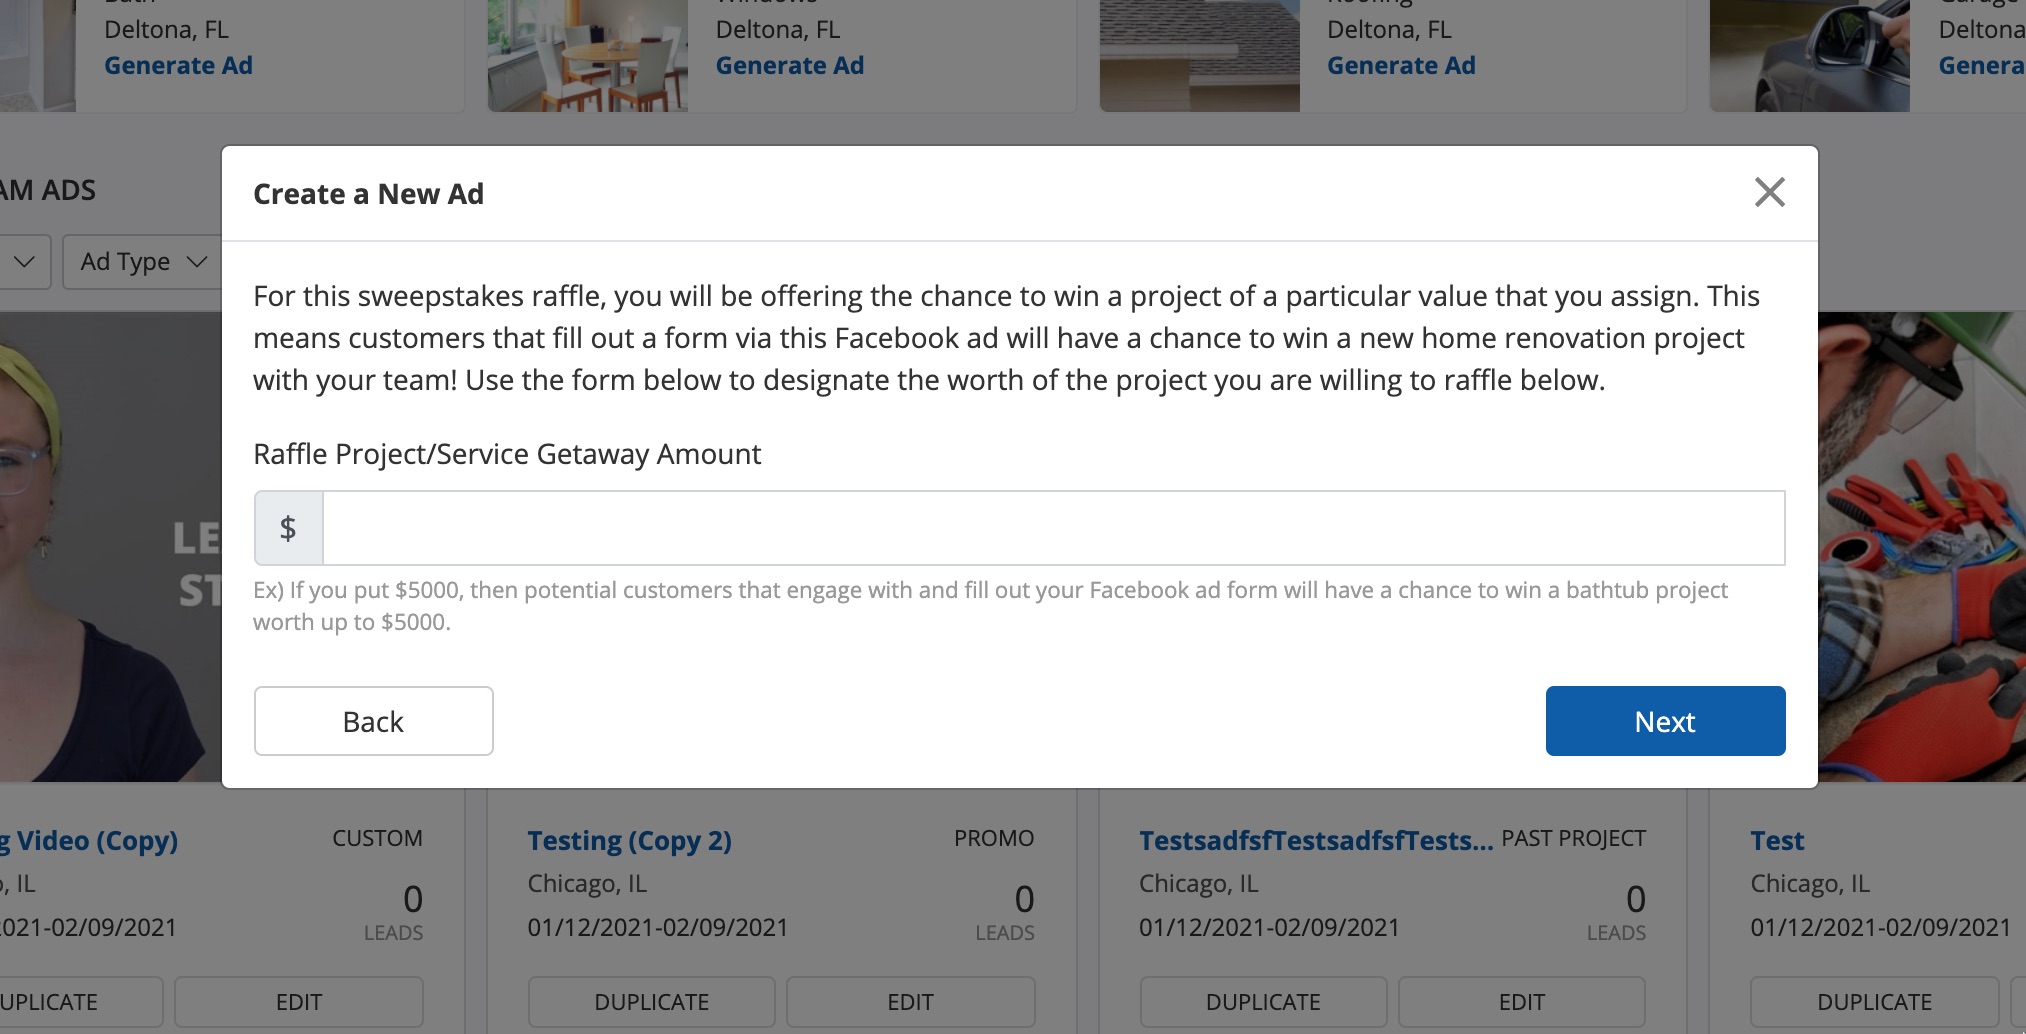
For example, a raffle/sweepstakes ad will include a screen like this. Other ad types are similar, prompting you to enter a specific piece of information to help you generate an effective ad.
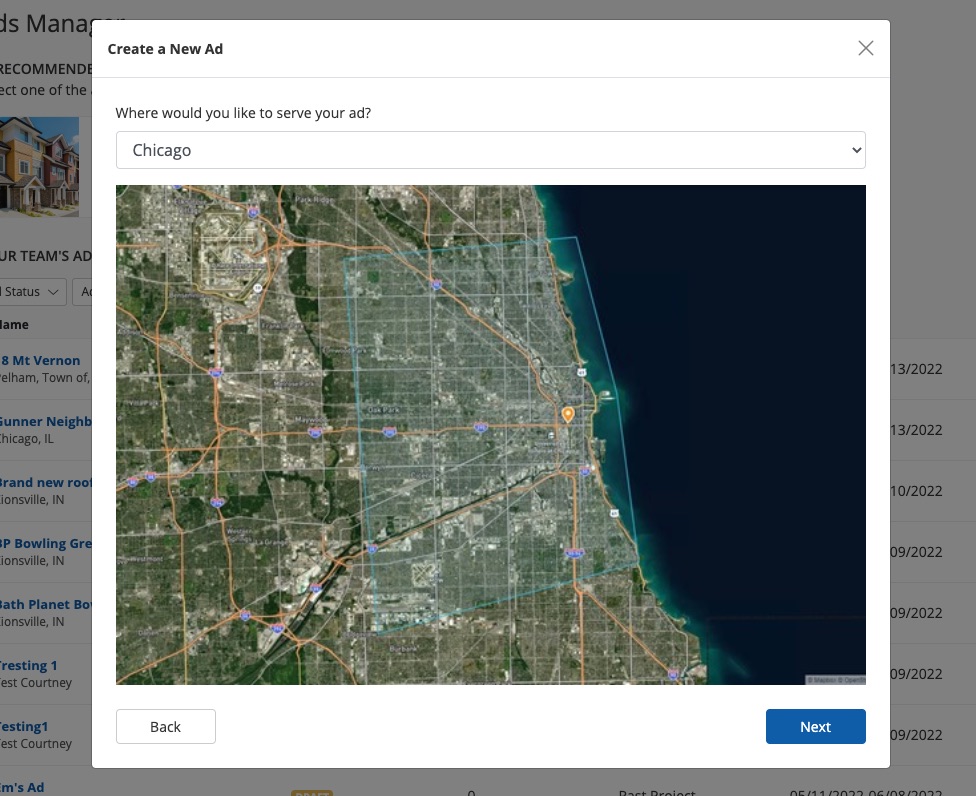
6. Choose a Location
Next you'll be prompted to select a location where you'd like to serve this ad. (These locations are set up under your company settings. Learn how to add a new location.)
7. Name Your Ad
Name your ad, keeping in mind that the name you select here will appear in the Com Portal as a lead source label.
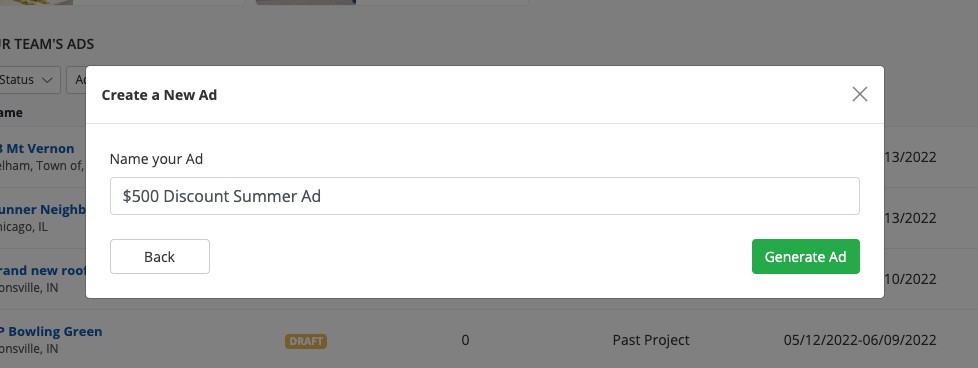
Once you've finished all of the design panels, click Generate Ad.
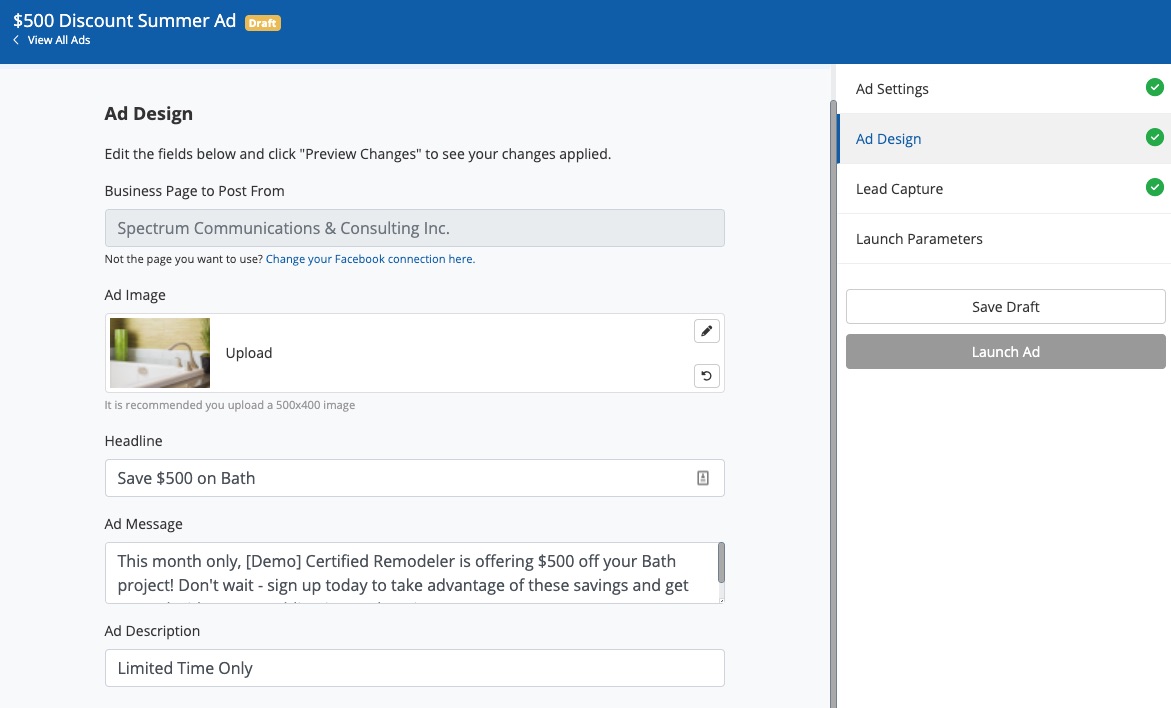
8. Edit Your Ad Design
On the next screen, you can edit your ad design. Click the pencil to upload a new photo, or click directly in the text boxes to update the ad copy. You can also click into the dropdown menu to choose the call-to-action that appears on the ad button.
Learn more about your options for editing your ad design here.
9. Edit Your Lead Capture Form
Similar to the Ad Design page in the previous step, you'll next be shown a preview of your Facebook lead capture form.
Click "Save & Next" to accept the form exactly as it appears now, or click "Change" if you'd like to make some edits. (You can learn more about editing your lead capture form here.)

The lead capture form displays directly in Facebook, and any Facebook user who fills out the form will automatically enter your Com Portal as a new lead.
10. Set Your Launch Parameters
This is the final screen to complete, and then you'll be ready to launch your ad on Facebook!
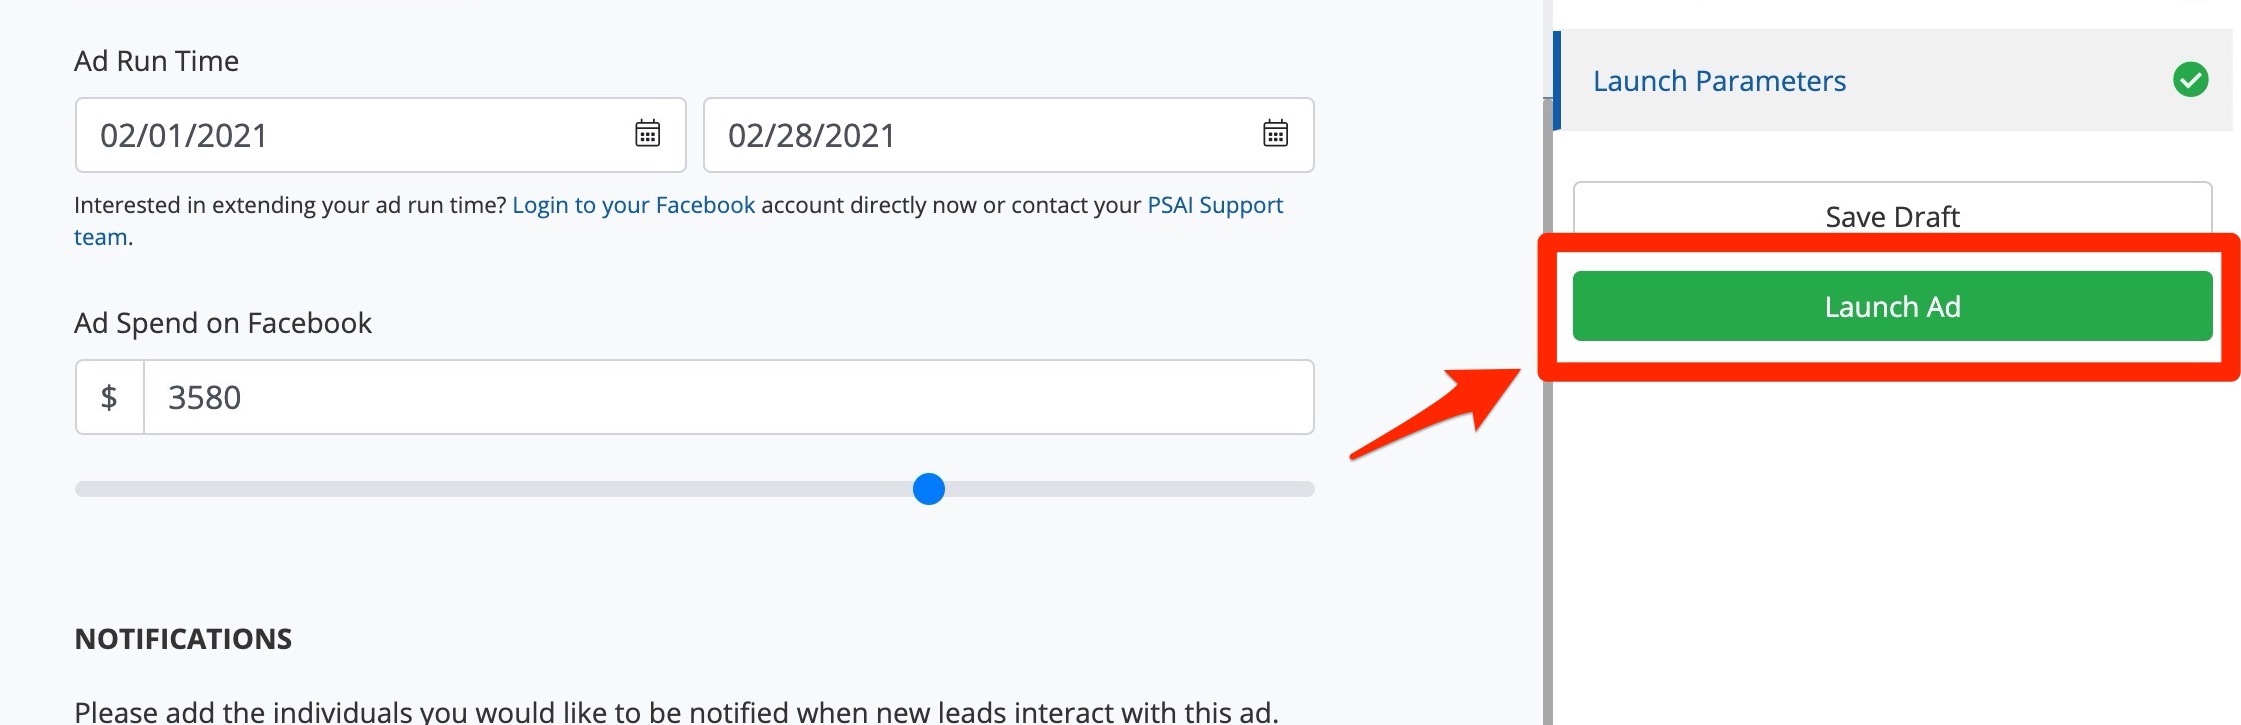
As shown in the screenshot below, this page is where you'll set your ad's run time and total budget, as well as the individual email addresses and/or texting phone numbers to be notified whenever a Facebook user fills out your form.

We'll automatically populate these fields with our suggested dates and spend, but you are welcome to adjust as needed. Learn more about the launch parameters here.
11. Launch Your Ad
Once you've set your launch parameters, all you have to do is click "Launch Ad"!
Please note that this button will only become active (and green) once all required fields are complete. If the button remains gray, that indicates that something is missing. Click into Ad Design, Lead Capture, and Launch Parameters to make sure everything is filled in.
Once you've launched your ad, you won't be able to make changes to it in Ads Manager, so we recommend doublechecking that everything looks good before clicking Launch Ad.
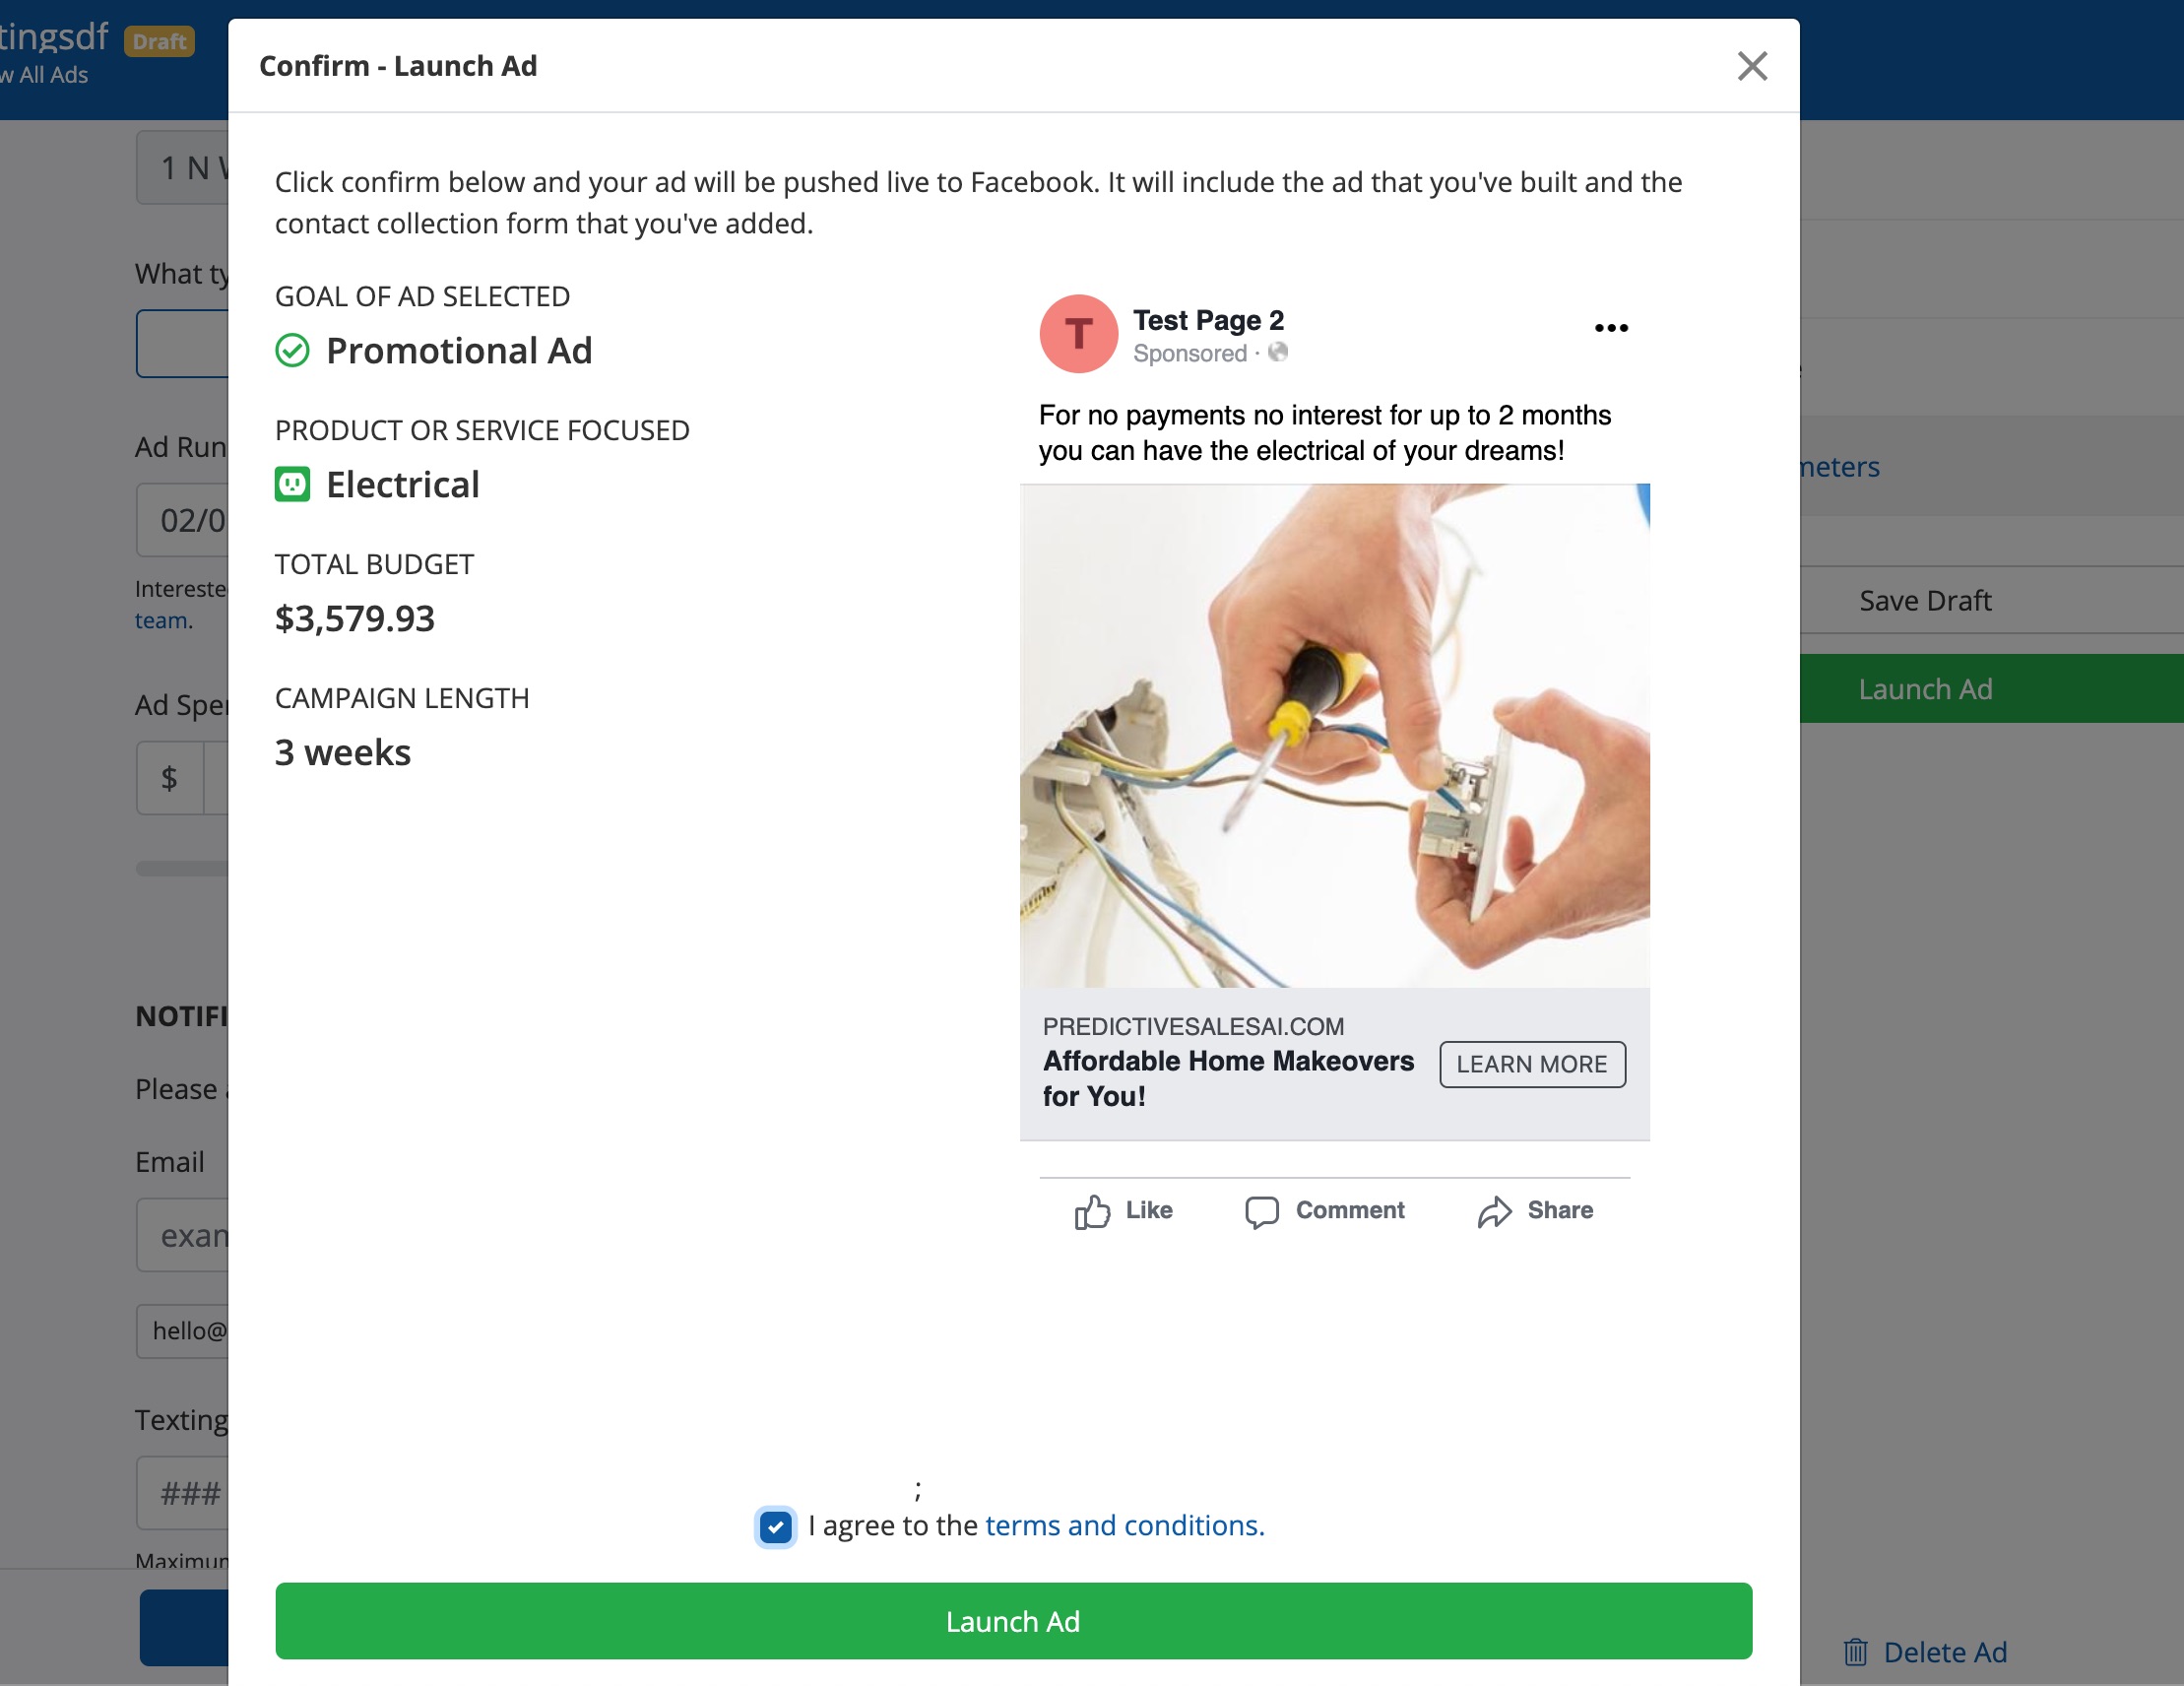
That's it! Check that you agree to the terms and conditions and then click Launch Ad to launch to Facebook straight away.
Now that you've launched your ad campaign on Facebook, learn what you need to know to monitor its performance and nurture the resulting leads: