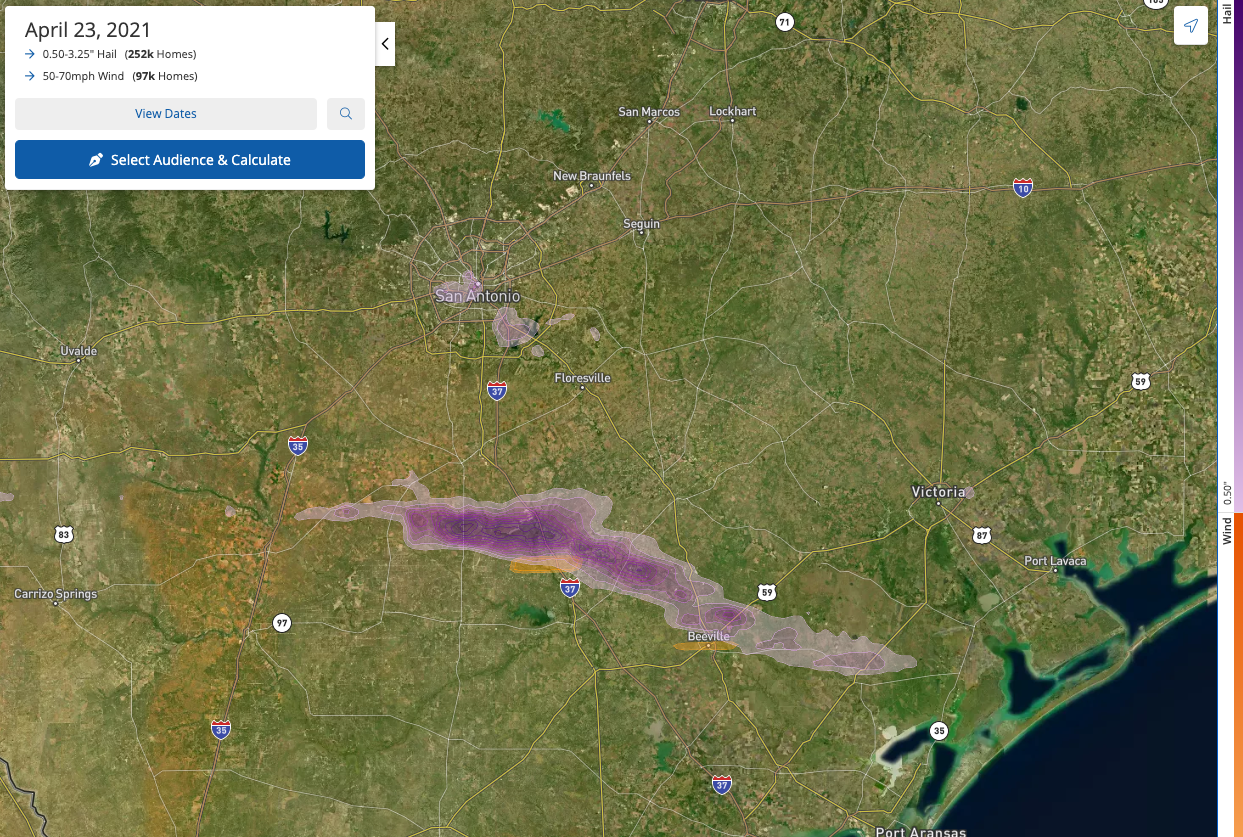
Whenever you find a storm on the PSAI Weather map—whether you search by a specific address or browse nationwide storms happening right now—you'll see storm swaths laid over the map to indicate the affected areas. These swaths are colored based on the type of storm damage:
- Purple for hail
- Yellow for wind
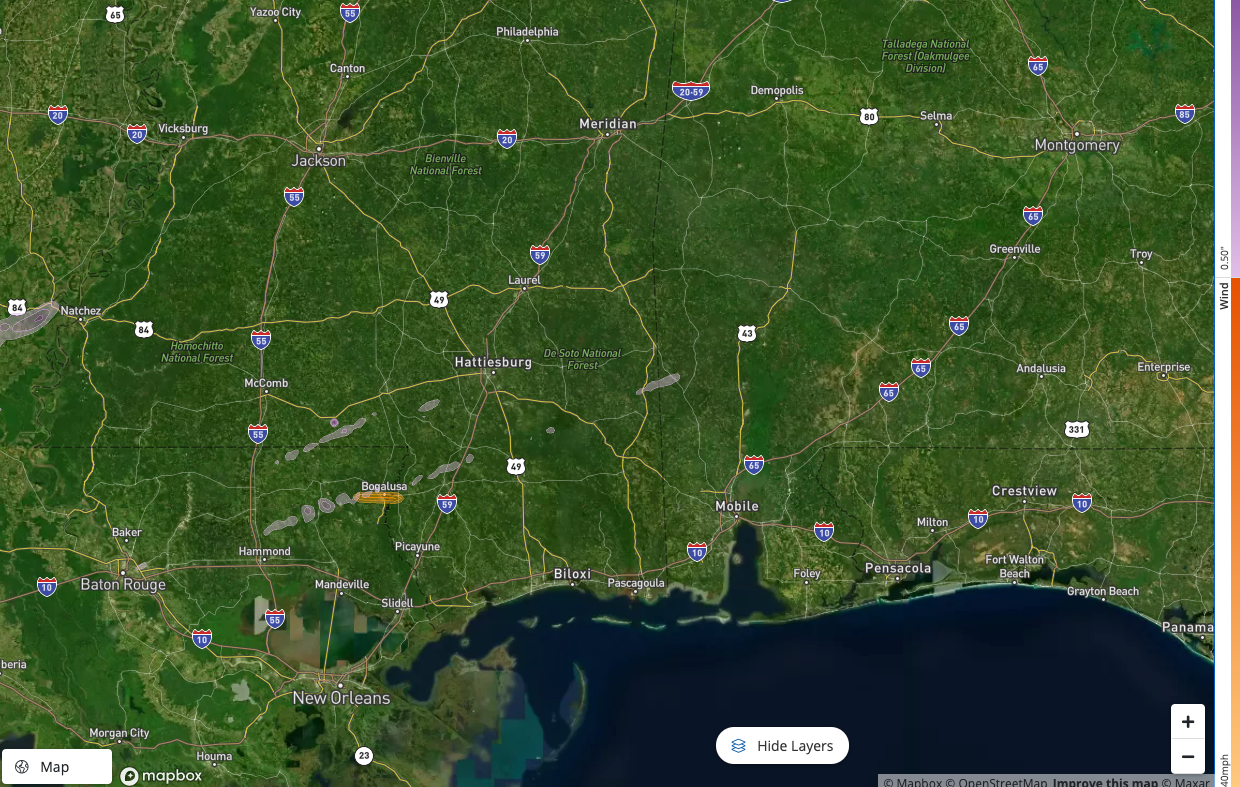
However, depending on several factors—like the size of the storm, the intensity of the hail or wind, and the zoom of your map view—the swaths may or may not be very easy to see at first glance.
For example, the swaths in this storm are very easy to see, thanks to their size and intensity.
The ones in the image below, on the other hand, are much more difficult to spot.
If you're having trouble finding the swaths on your Weather Map, you can easily adjust their visibility. Follow the instructions below.
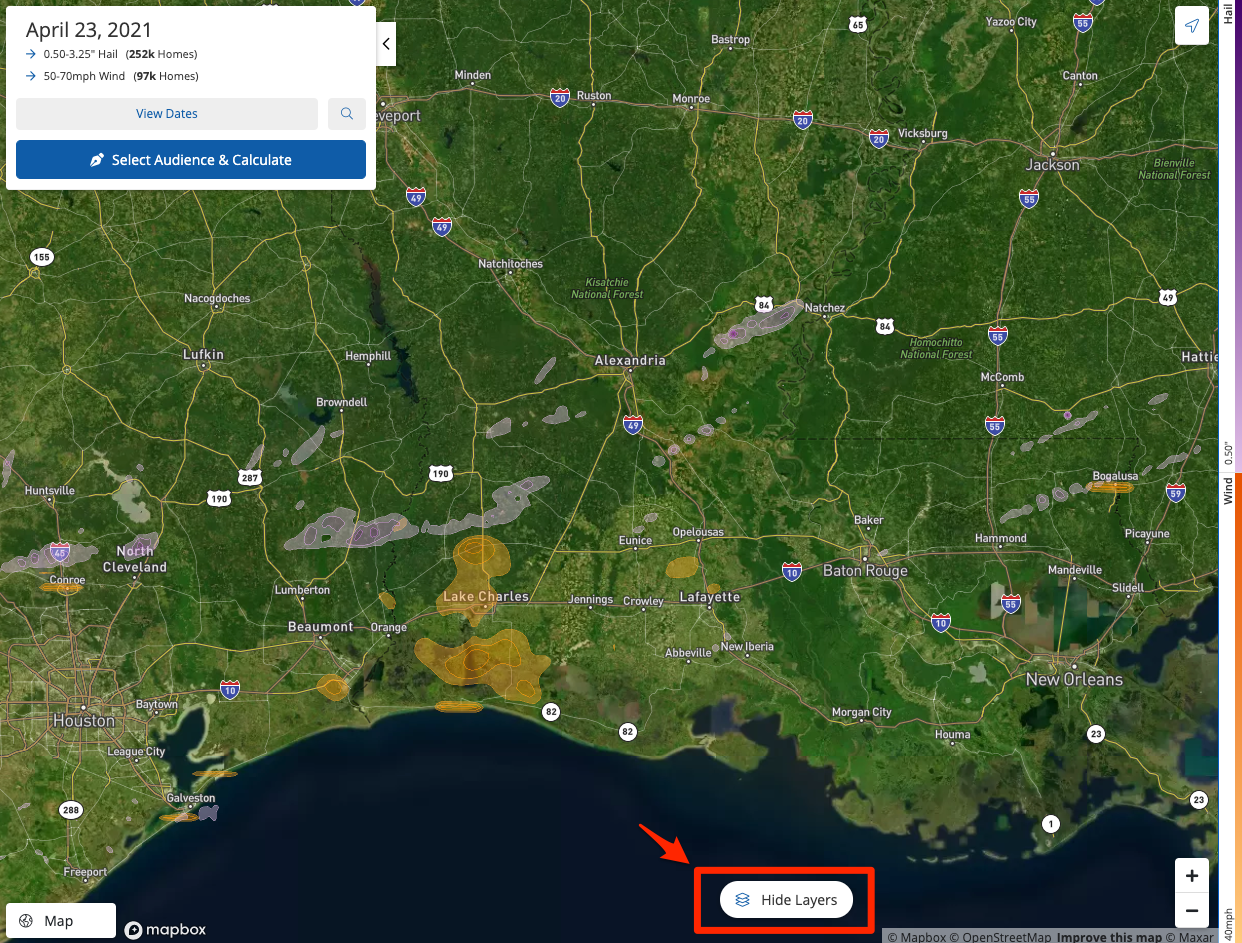
1. Click "Hide Layers"
At the bottom of the map view, click the button that says "Hide Layers."
2. Adjust the Opacity Slider
In the pop-up panel that comes up from "Hide Layers," use the Opacity slider to adjust the opacity of your wind and hail swaths.
Note that the Opacity slider is global, so all swaths—including both wind and hail—will be adjusted to the same level of transparency.
Wondering what the other sliders mean? Learn about the Hail and Wind sliders in the "Hide Layers" panel here.
One of the most important reasons to make your wind and hail swaths more visible is to help you draw more precise polygons. For best results, we recommend drawing your polygon closely around your swath of interest—and using multiple polygons when shapes are not continuous.
Get more tips in our best practices for drawing on the map.