Any time after you've created a new site tool (such as a Form, Chat, or Weather Widget), you can customize where and how it appears on your website. The exact customization options will vary based on the specific tool but generally include things like button color, form fields, header text, and more.
Follow the instructions below to learn how to customize your site conversion tools.
New to site tools? Learn how to create a new site conversion tool.
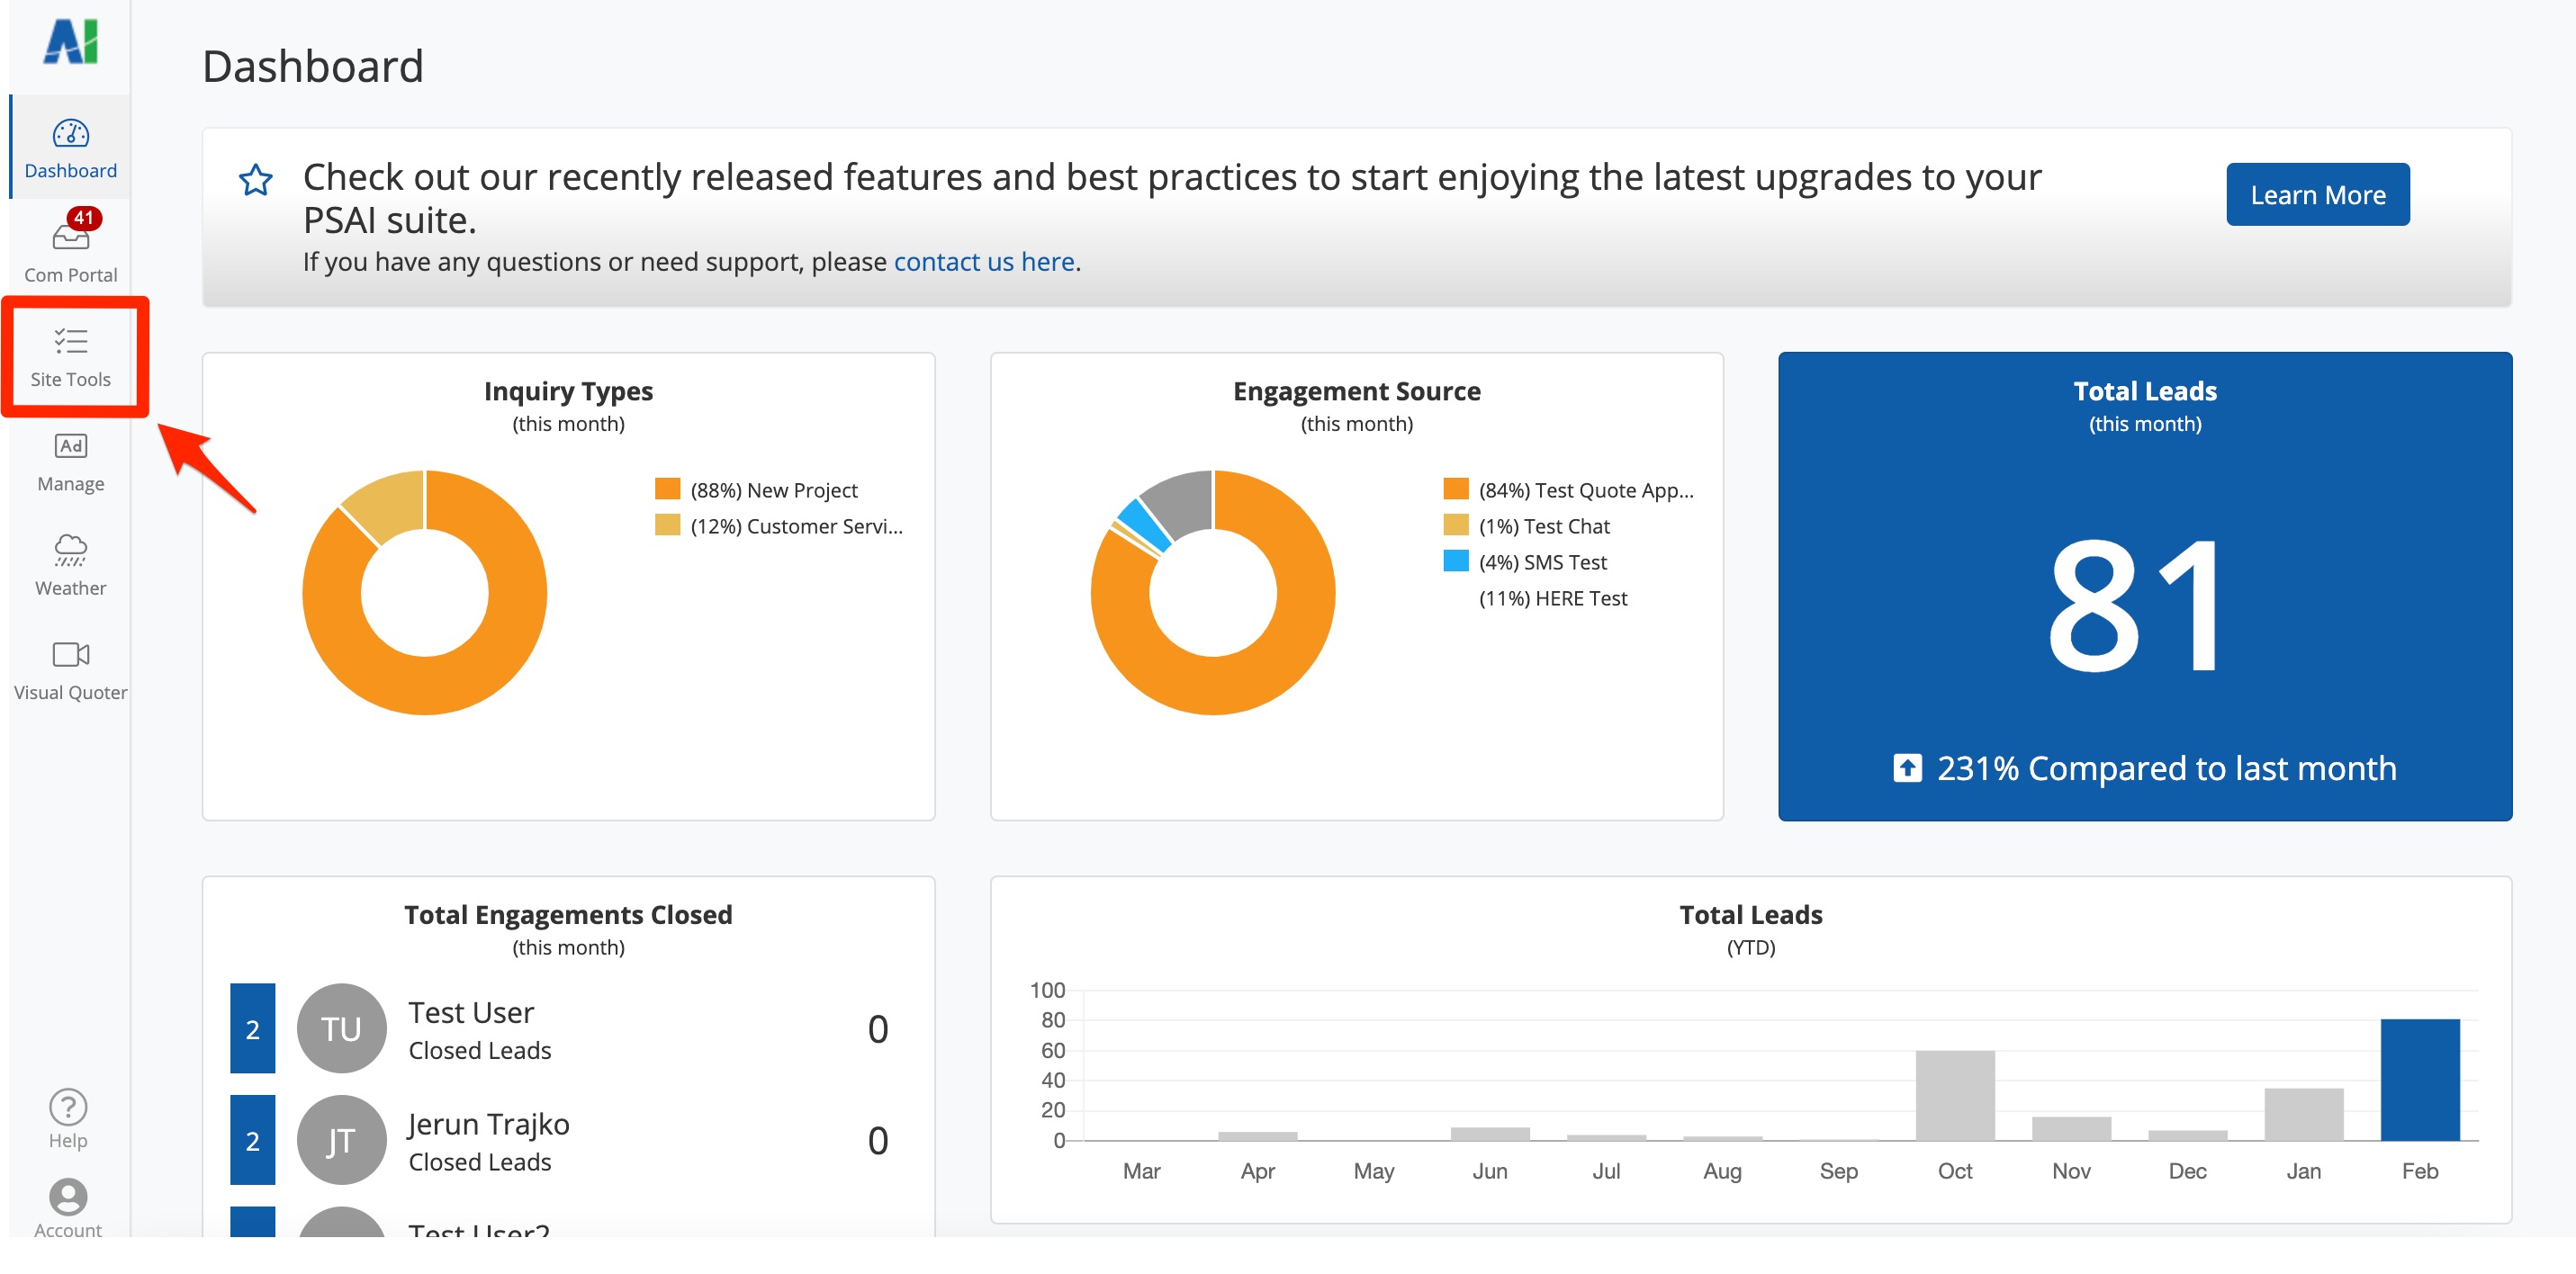
1. Go to the Site Tools Dashboard
After logging into PSAI, click Site Tools from the left-hand toolbar.
2. Find the Tool You Want to Customize
On the Site Conversion Tools page, find the tool that you'd like to customize. You can use the filters or the search bar to make it easier to find your app.
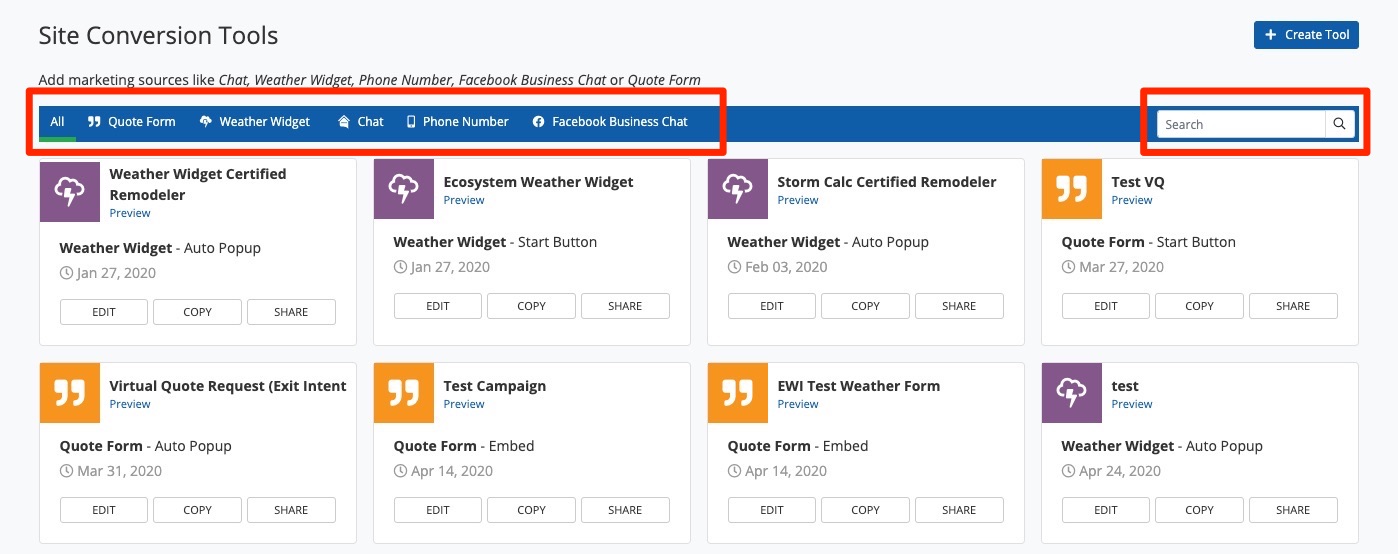
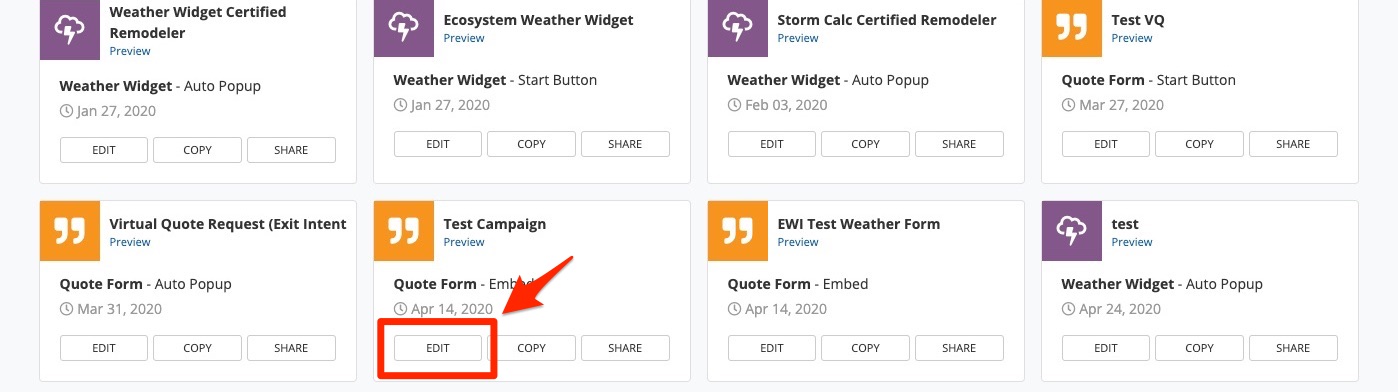
Once you've located the tool, click the button for "Edit."
3. Go to the Customize Tab
To view the customization options available for this specific tool, click into the Customize tab.

Don't see the "Customize" tab? That's probably because this site tool cannot be customized. Neither Facebook Business Chat nor Phone Numbers can be customized.
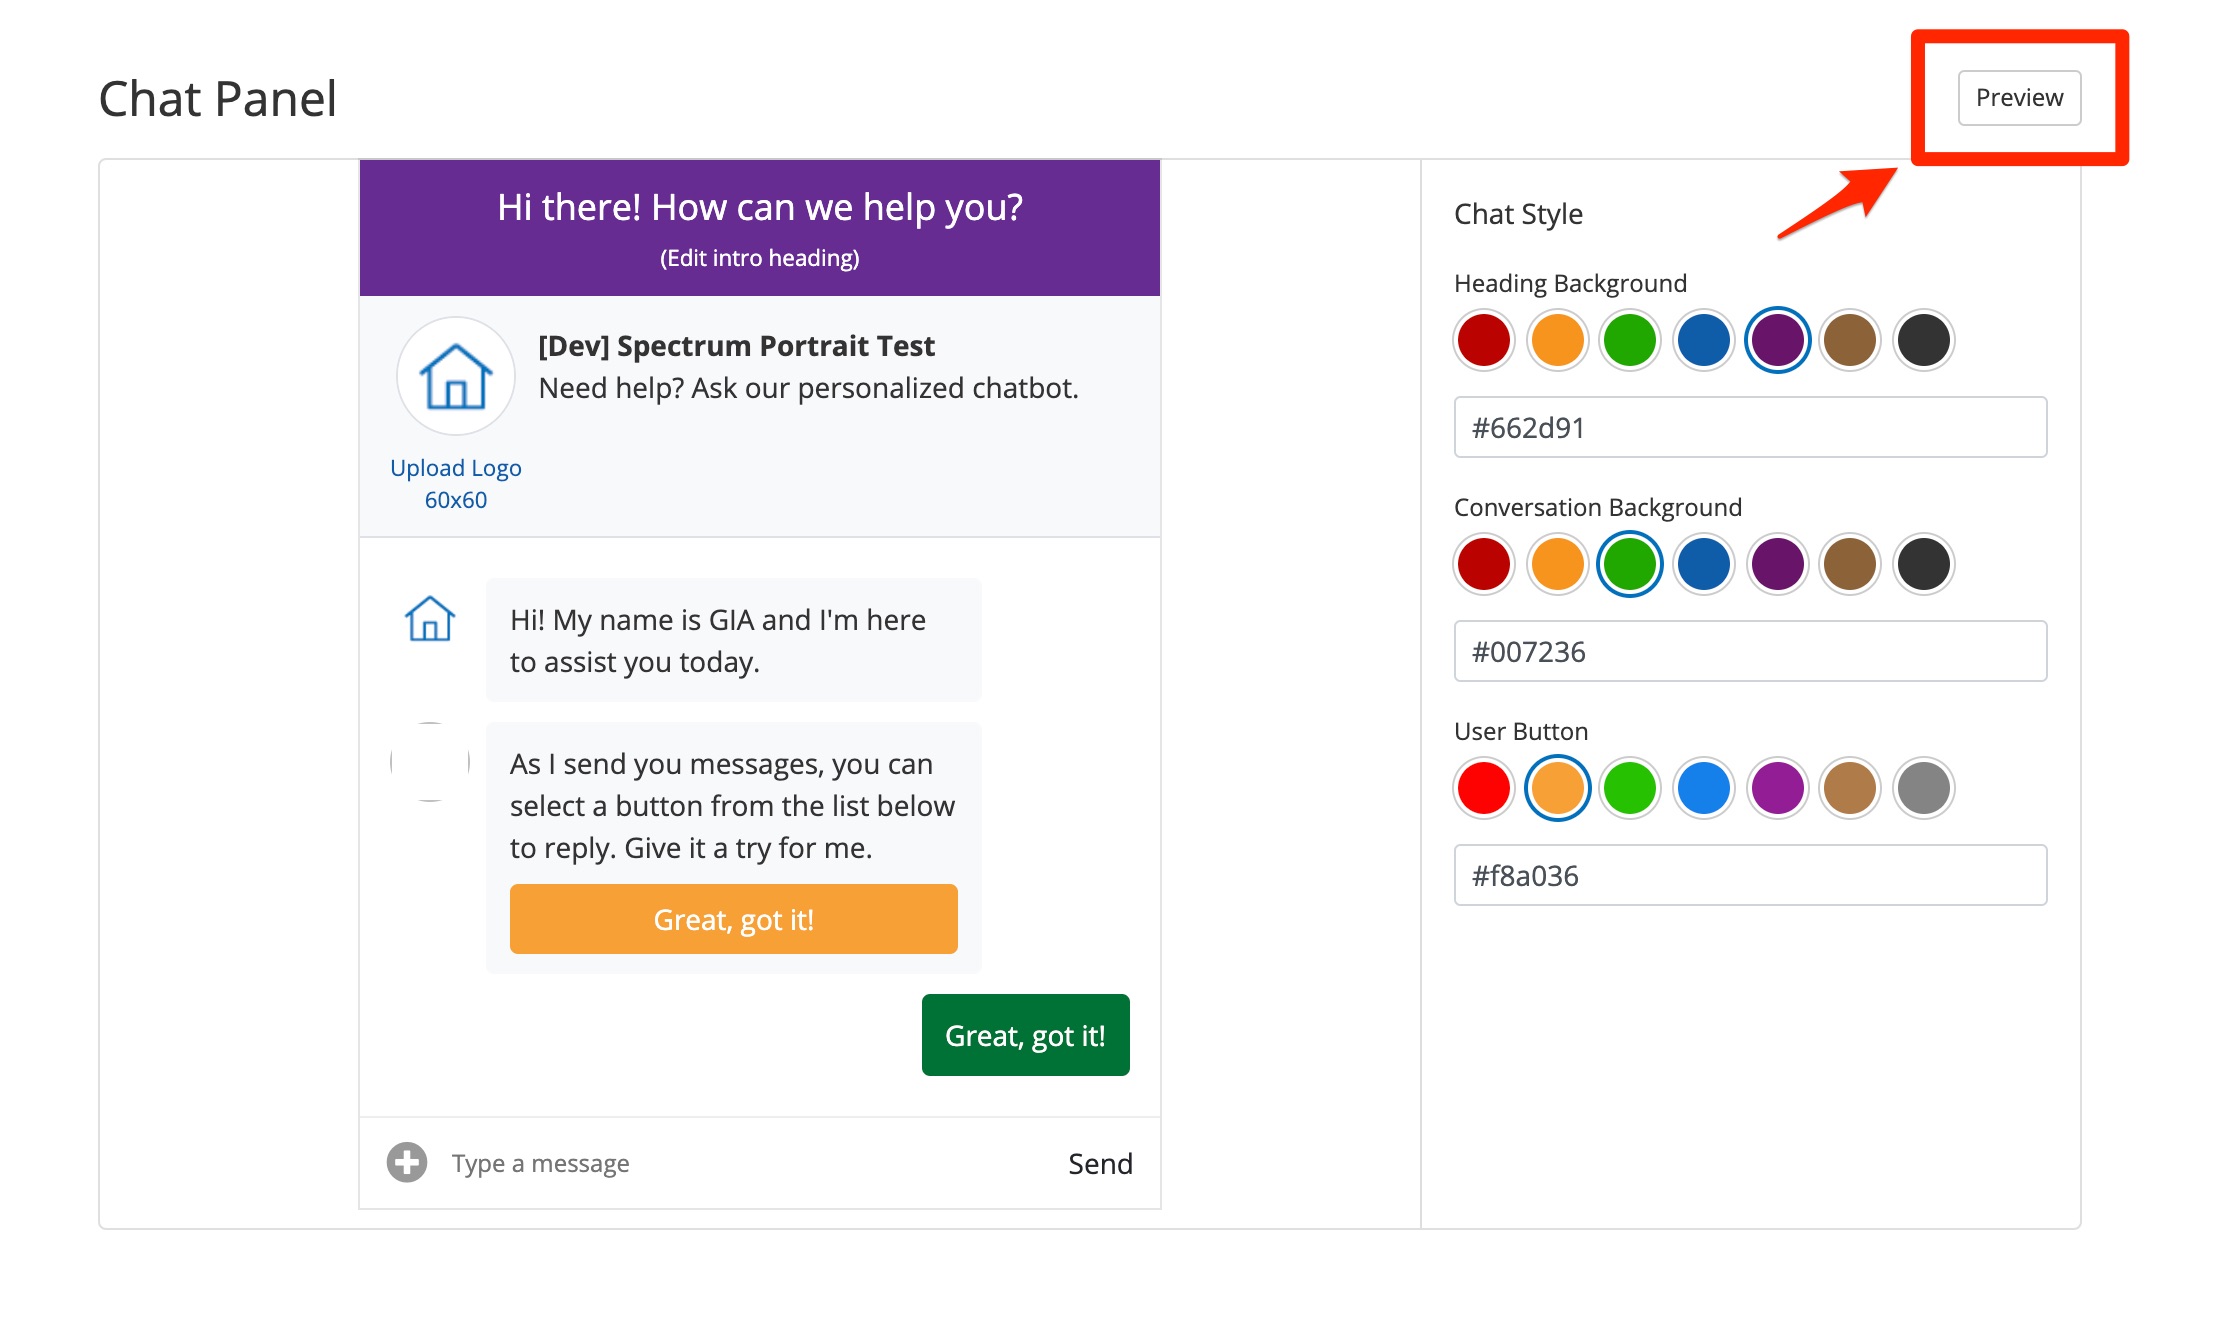
4. Make Your Edits
All of the edits and customizations you can make for this specific site tool will be located here on the Customize tab. For any type of site tool, there are two main sections that you can customize, as shown below.
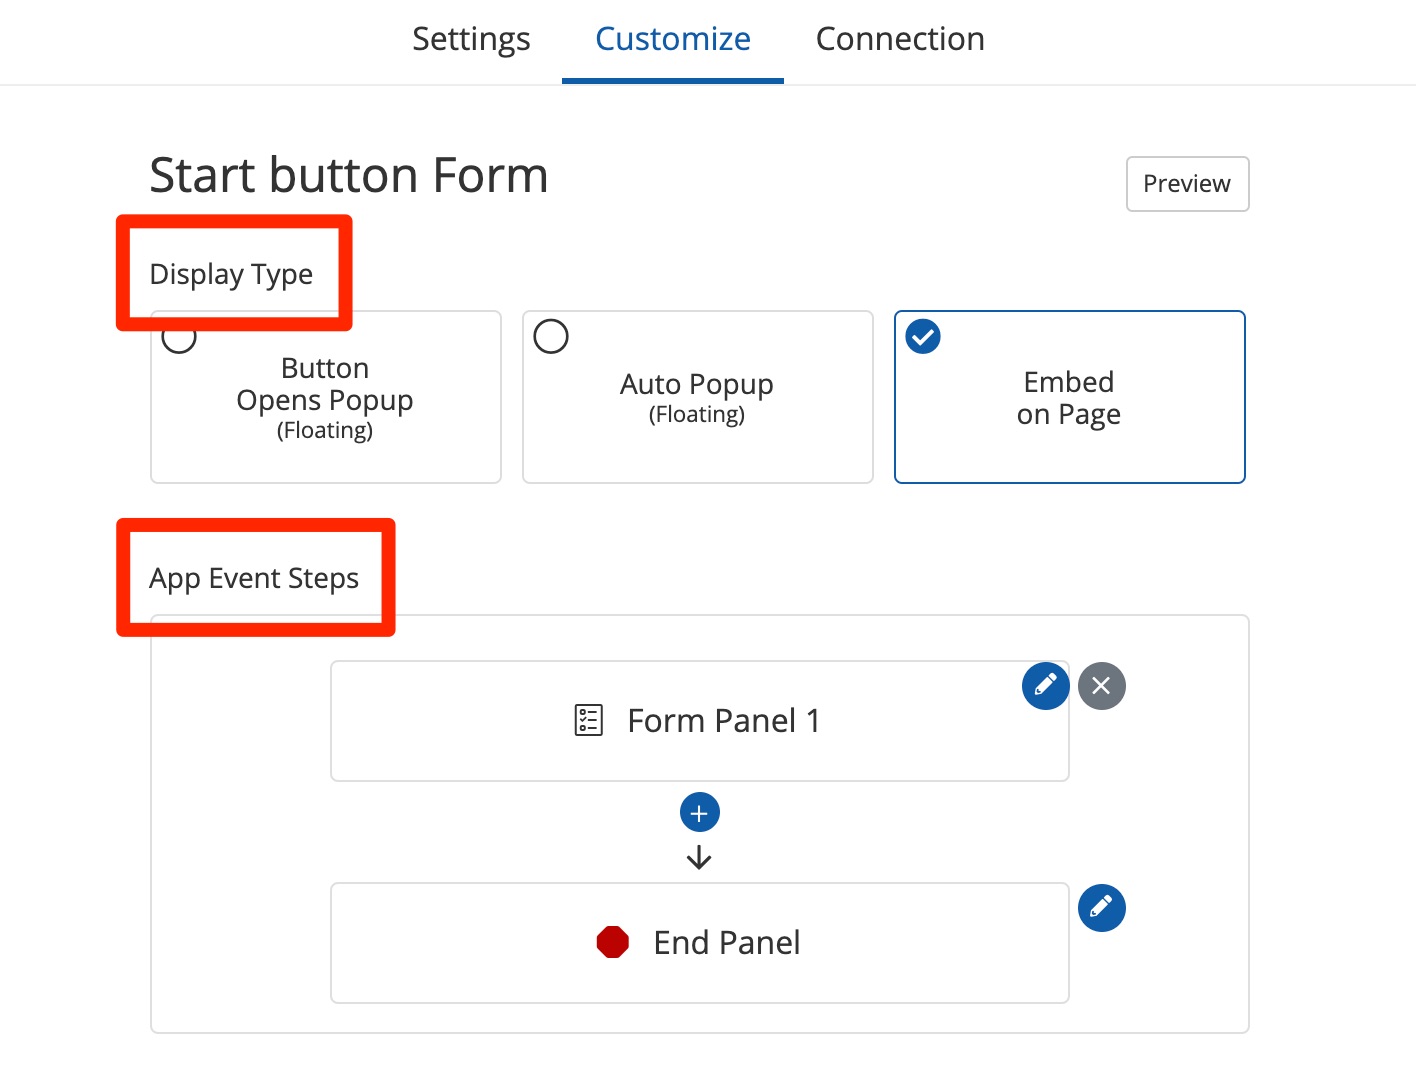
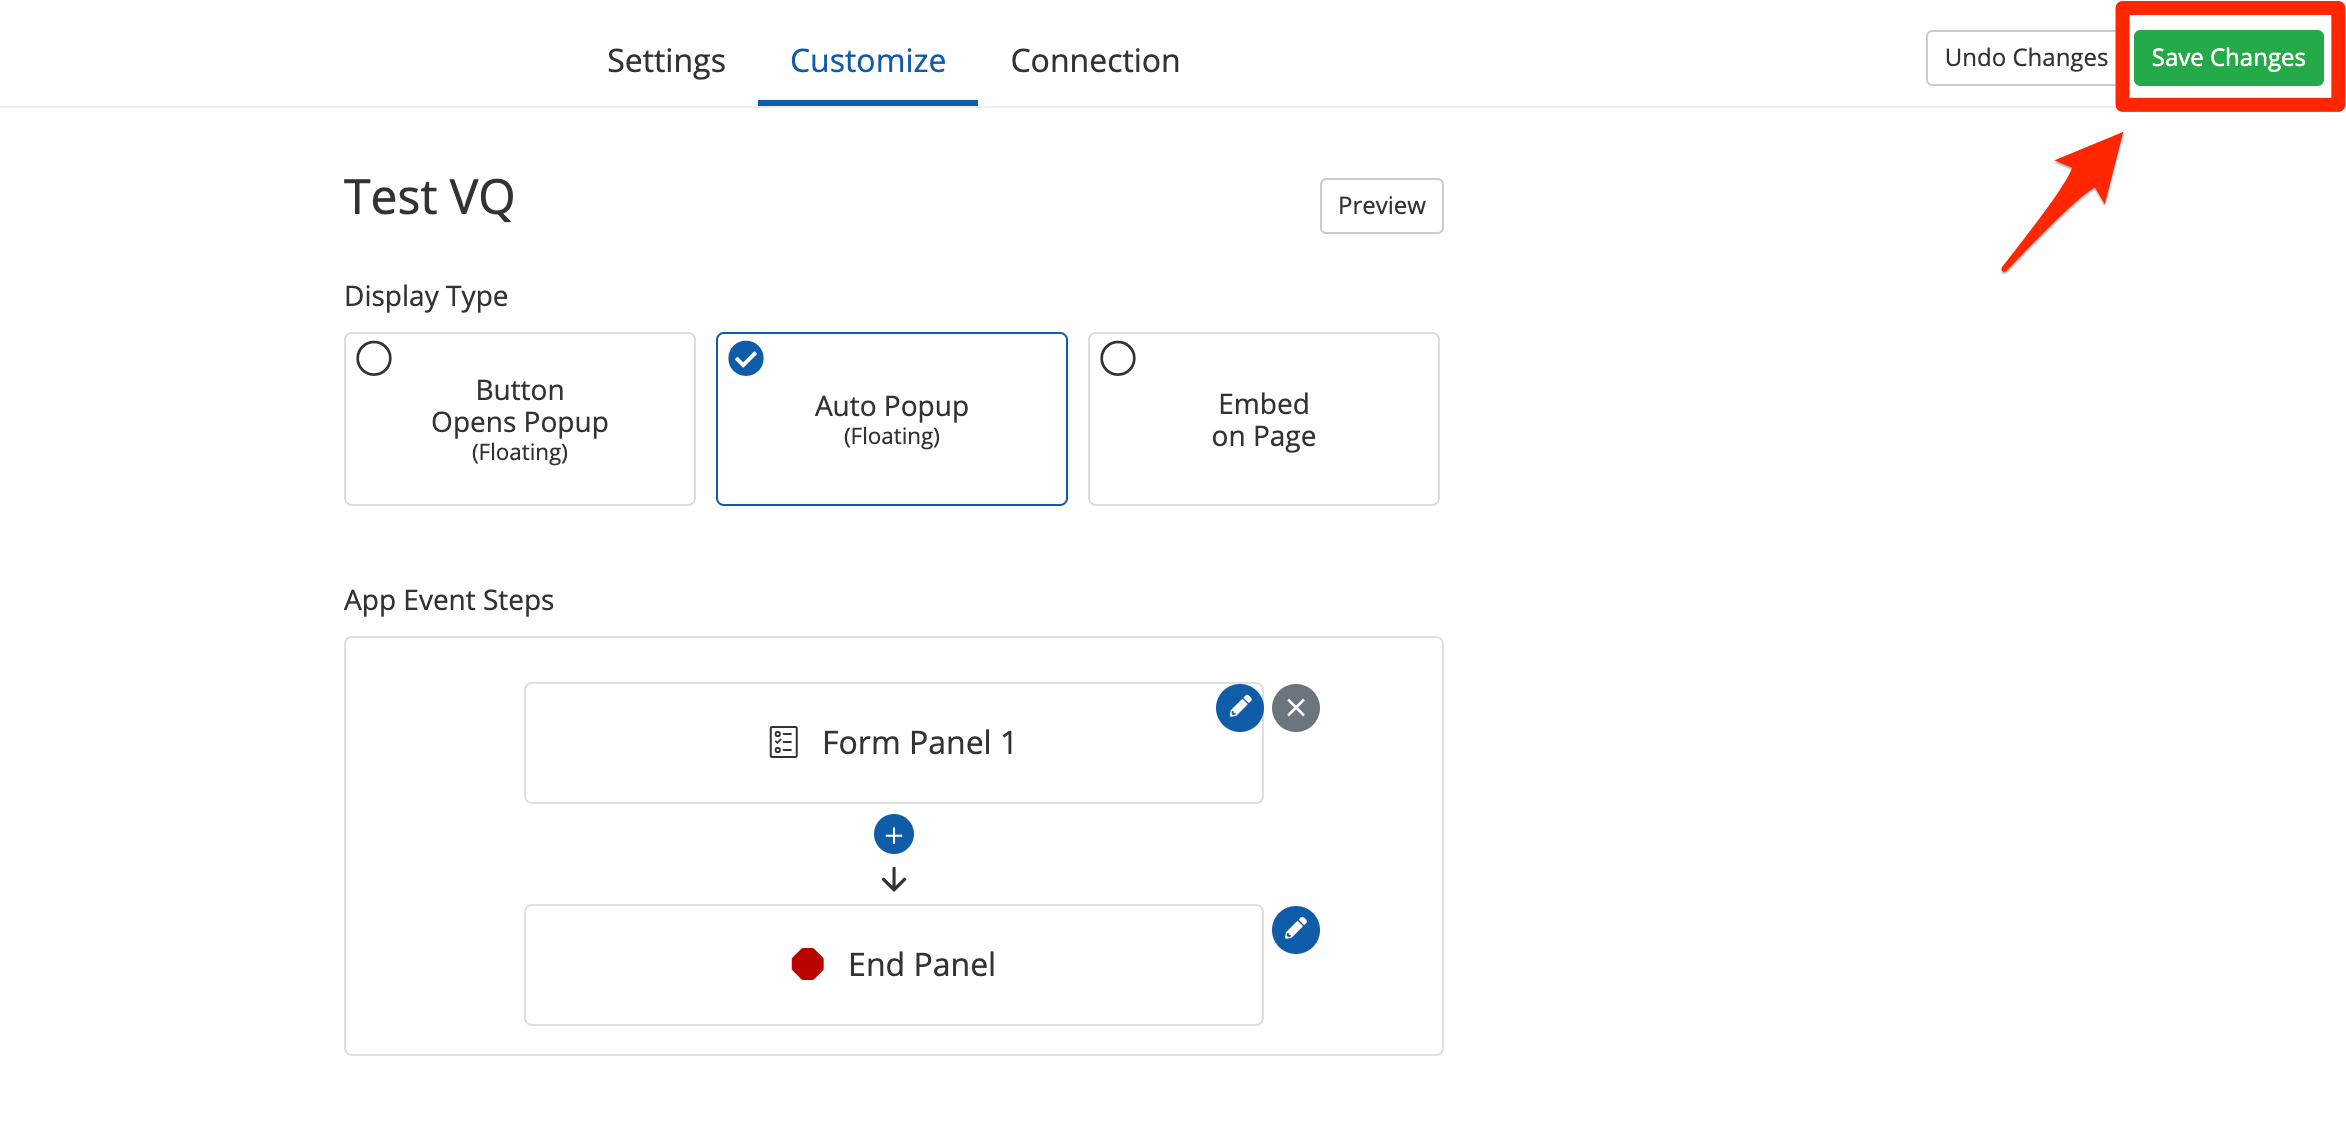
- Display Type dictates how your site tool appears on your website. Does it float in the bottom corner? Does it pop up when a user goes to leave your site? Does it sit within the content of a page? Learn more about the 3 site tool display options here.
- App Event Steps allows you to fine-tune your tool's appearance—including text, colors, form fields, and so on. These options vary depending on the type of site tool you are customizing.
How to Customize Different Types of Site Tools
Get much more detail on how to customize the different types of PSAI site tools (including both Display Type and App Event Steps) in these resources:
5. Save Your Changes
Once you've made changes to your site tool, the system will automatically detect them and prompt you to either "Undo Changes" or "Save Changes."
Remember that you can click "Preview" at any time to review the customizations you've made before saving.
Once you've viewed the preview of your app and are pleased with your customizations, click "Save Changes."
That's it! If the tool is already on your website (or does not need to be added anywhere), then your changes will be reflected immediately and you do not have to do anything else.
If this is a new site conversion tool, then the next step will probably be to add the tool to your website.
This article is part of a guide to PSAI site conversion tools. Learn more in the related resources below:
- Overview: What Is a Site Conversion Tool in PSAI?
- How to Create a New Site Tool
- How to Customize a Site Tool (this article)
- How to Add a Site Tool to Your Website
- Interacting with Leads from Your Site Tools