Even though external users of PSAI do not have log-in access, it's still easy for them to take advantage of PSAI's detailed lead information—including household contacts, weather reports, Predictive Insights™, and more. All you need to do is share the lead from the Com Portal.
Follow the instructions below to share a PSAI lead with any external user.
To share lead data, you must first add the recipient as an external user. If you aren't sure about the benefits of doing so, read more about why you should share lead data directly.
1. Find the Contact to Share
Go to the Com Portal and locate the lead that you'd like to share. You can browse the lead queue manually, type into the search bar at the top, or use the filter tool.
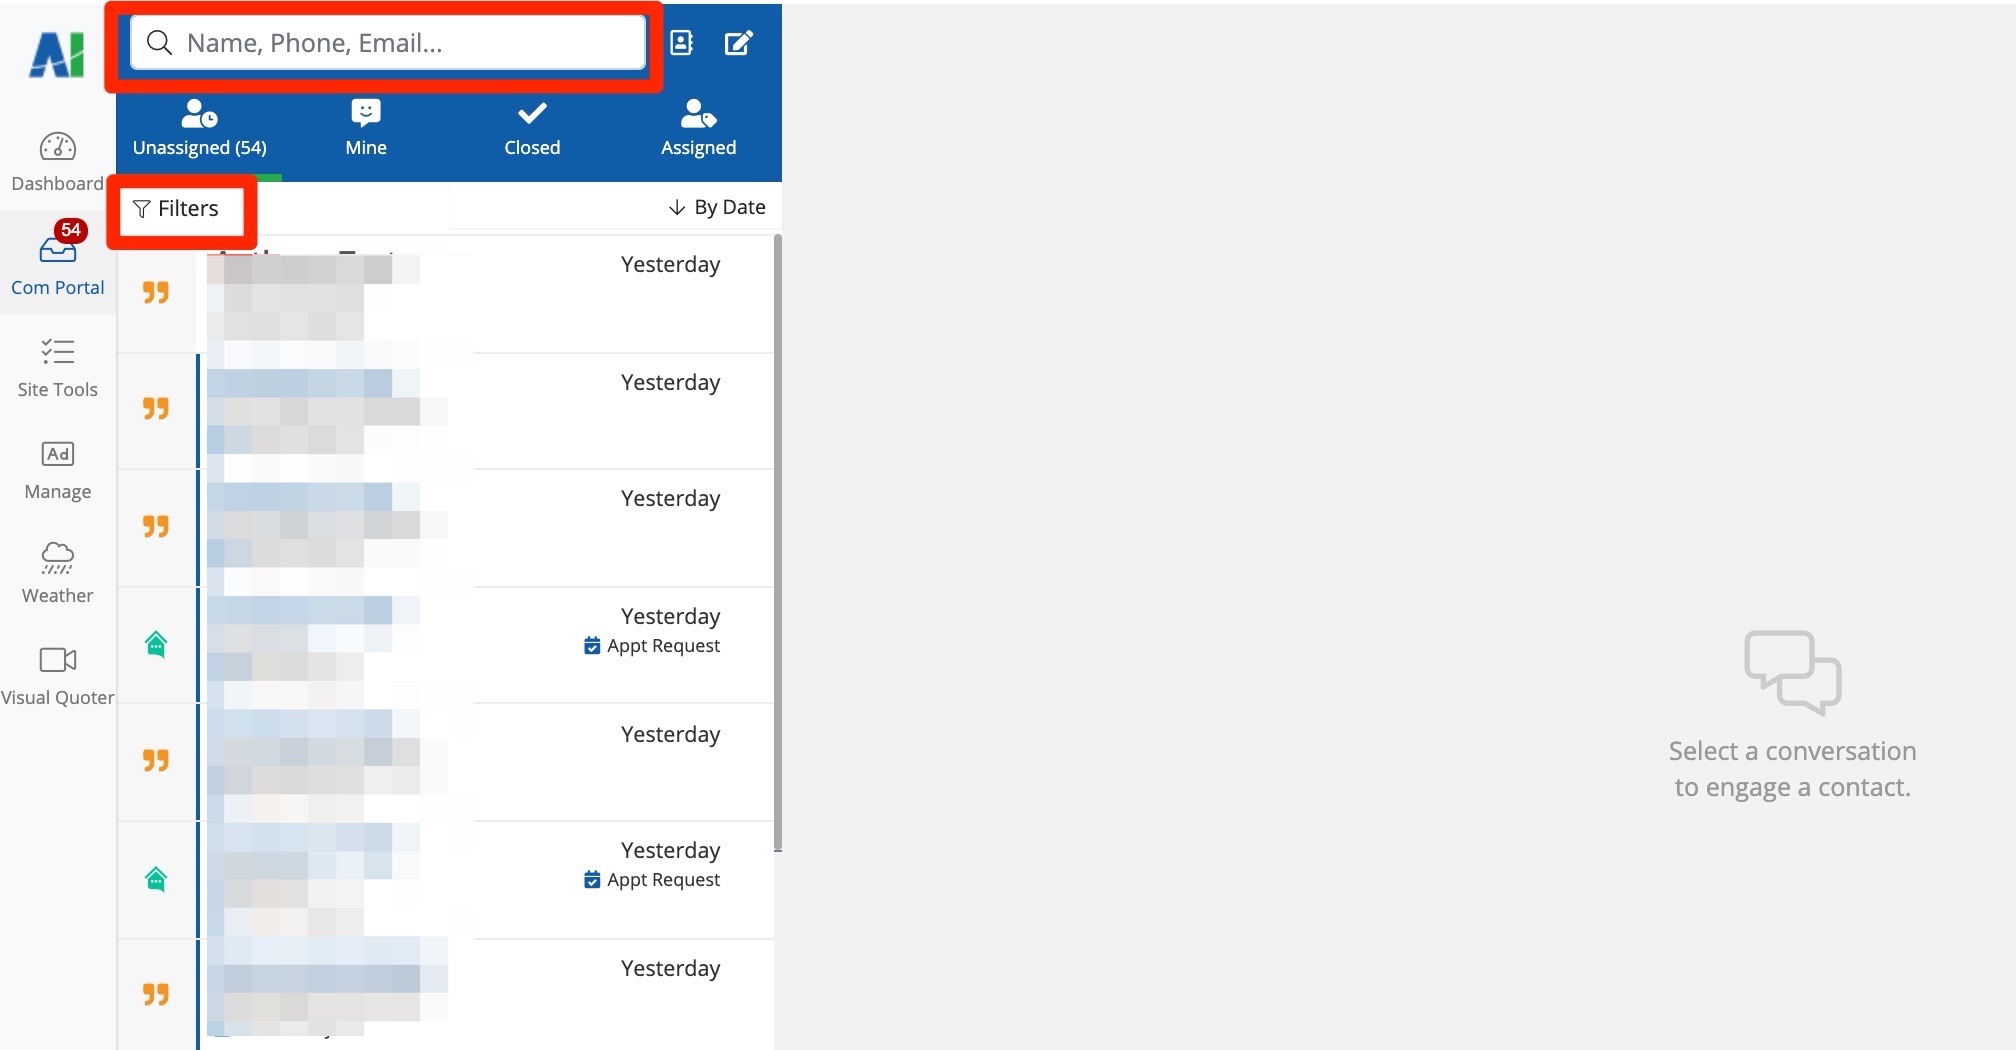
For much more detail, check out our guide to navigating the Com Portal.
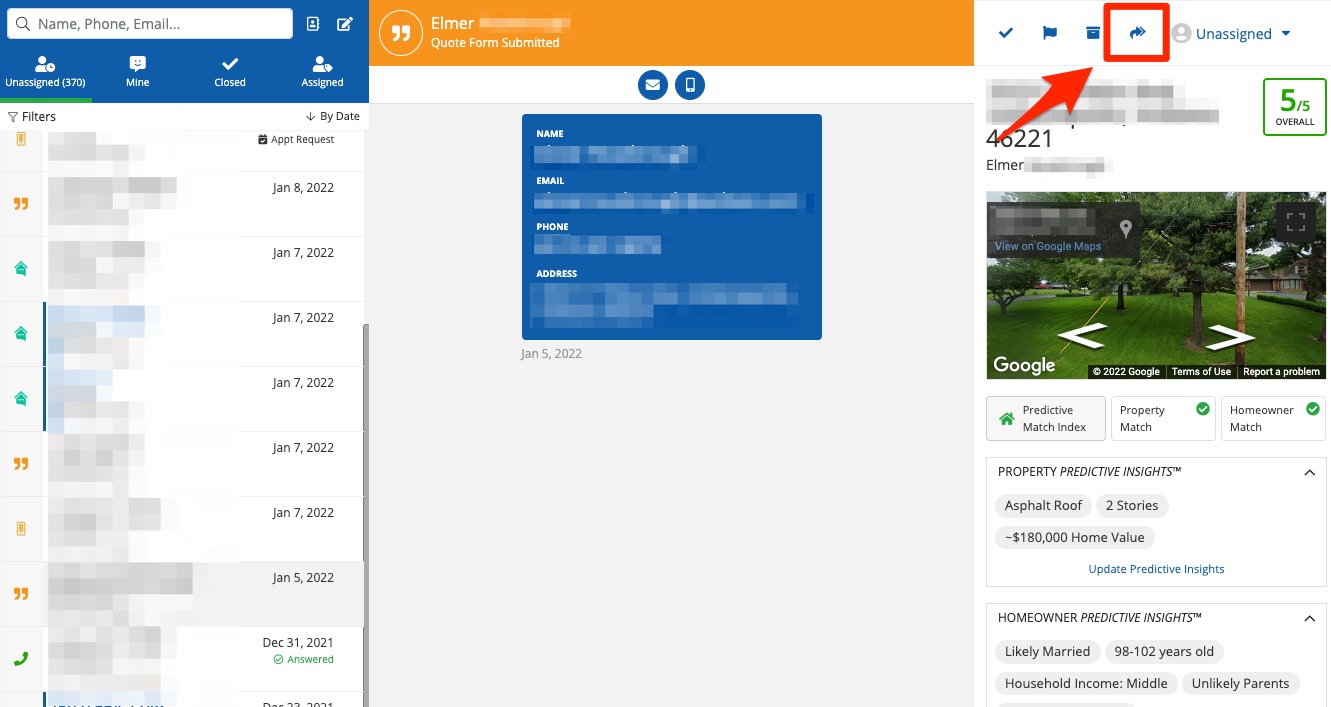
2. Click the Arrow Icon
Once you have found the lead you'd like to share, click the arrow at the top of the right-hand column.
3. Choose Who and What to Share
Next, you'll choose who to share the contact with, how to share it, and which specific data points you'd like to include.
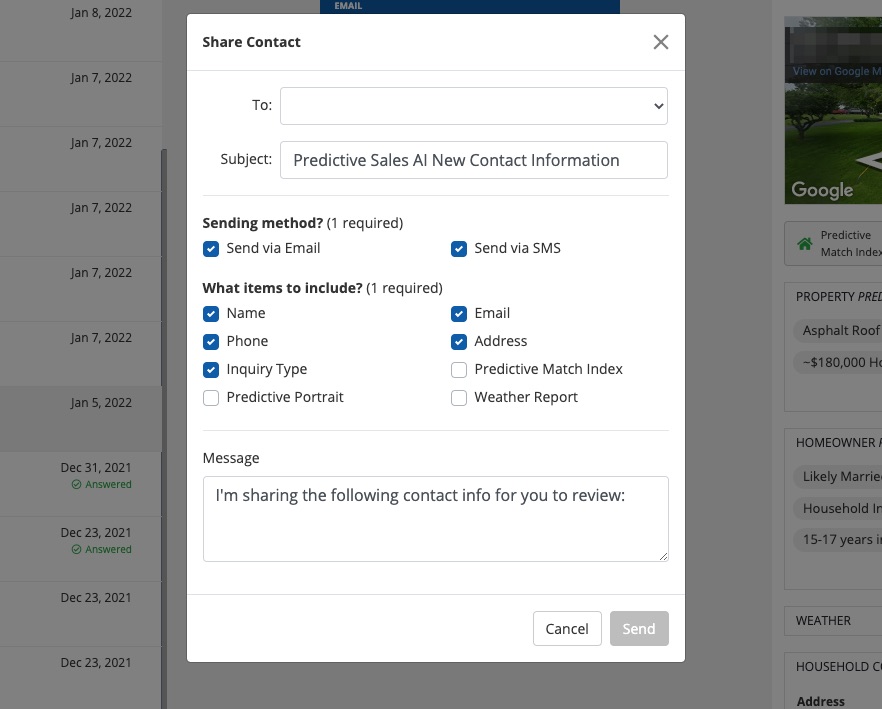
First click into the To field to choose the recipient. (Note that only external users will appear in this dropdown menu.) Then choose the sending method and the items you'd like to include.
The options presented here will automatically update based on how you've engaged with this lead. For example, if you haven't generated a weather return or if Predictive Insights™ are unavailable, then you won't be able to share those pieces of information.
4. Optional: Type a Message
Along with the specific data points you've selected, you can send a customized message to the recipient if you'd like to provide more information. If you have no specific message to send, feel free to leave our default message.

5. Send
To complete the sharing process, click Send.
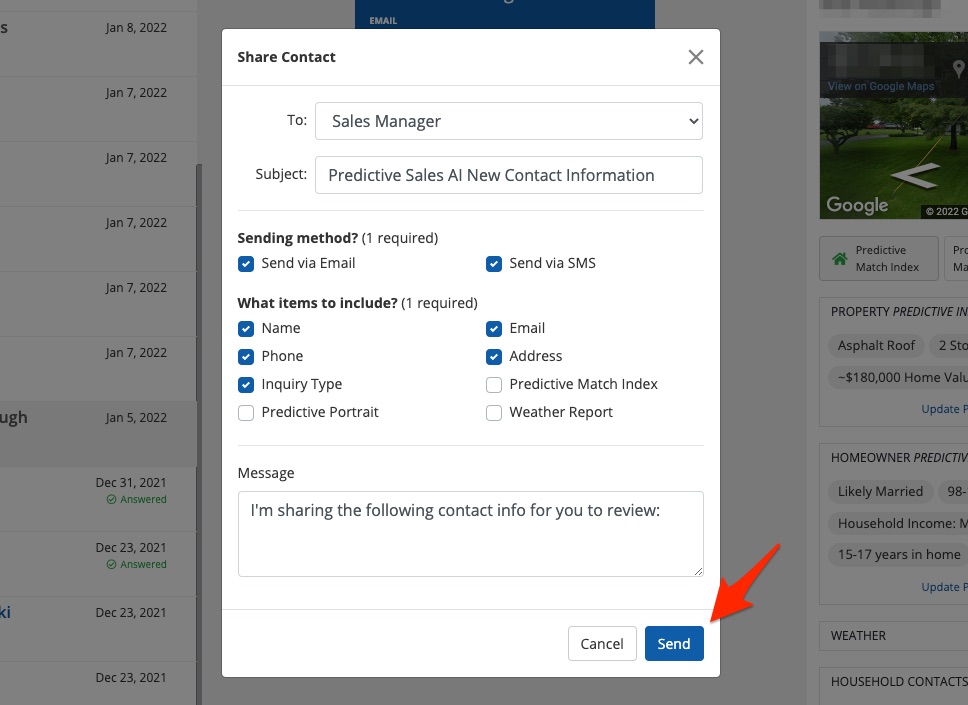
Can't click "Send"? The button will be grayed out and inactive until all required fields are selected. Be sure that you've selected a recipient in the "To" field at the top.
Learn more about the various ways you can communicate through the Com Portal.