New to Predictive Sales AI? We’ll help you get started with our training webinars.
Learn More
In This Article
How to Add an Embedded Form Using Divi (WordPress Page Builder)
PSAI Quote Forms can be added almost anywhere on a WordPress website. If you're using the page builder plugin Divi, then the process is simple and straightforward. Follow the instructions below to add an embedded form using the Divi interface.
How to Embed a Form Using Divi Page Builder in WordPress
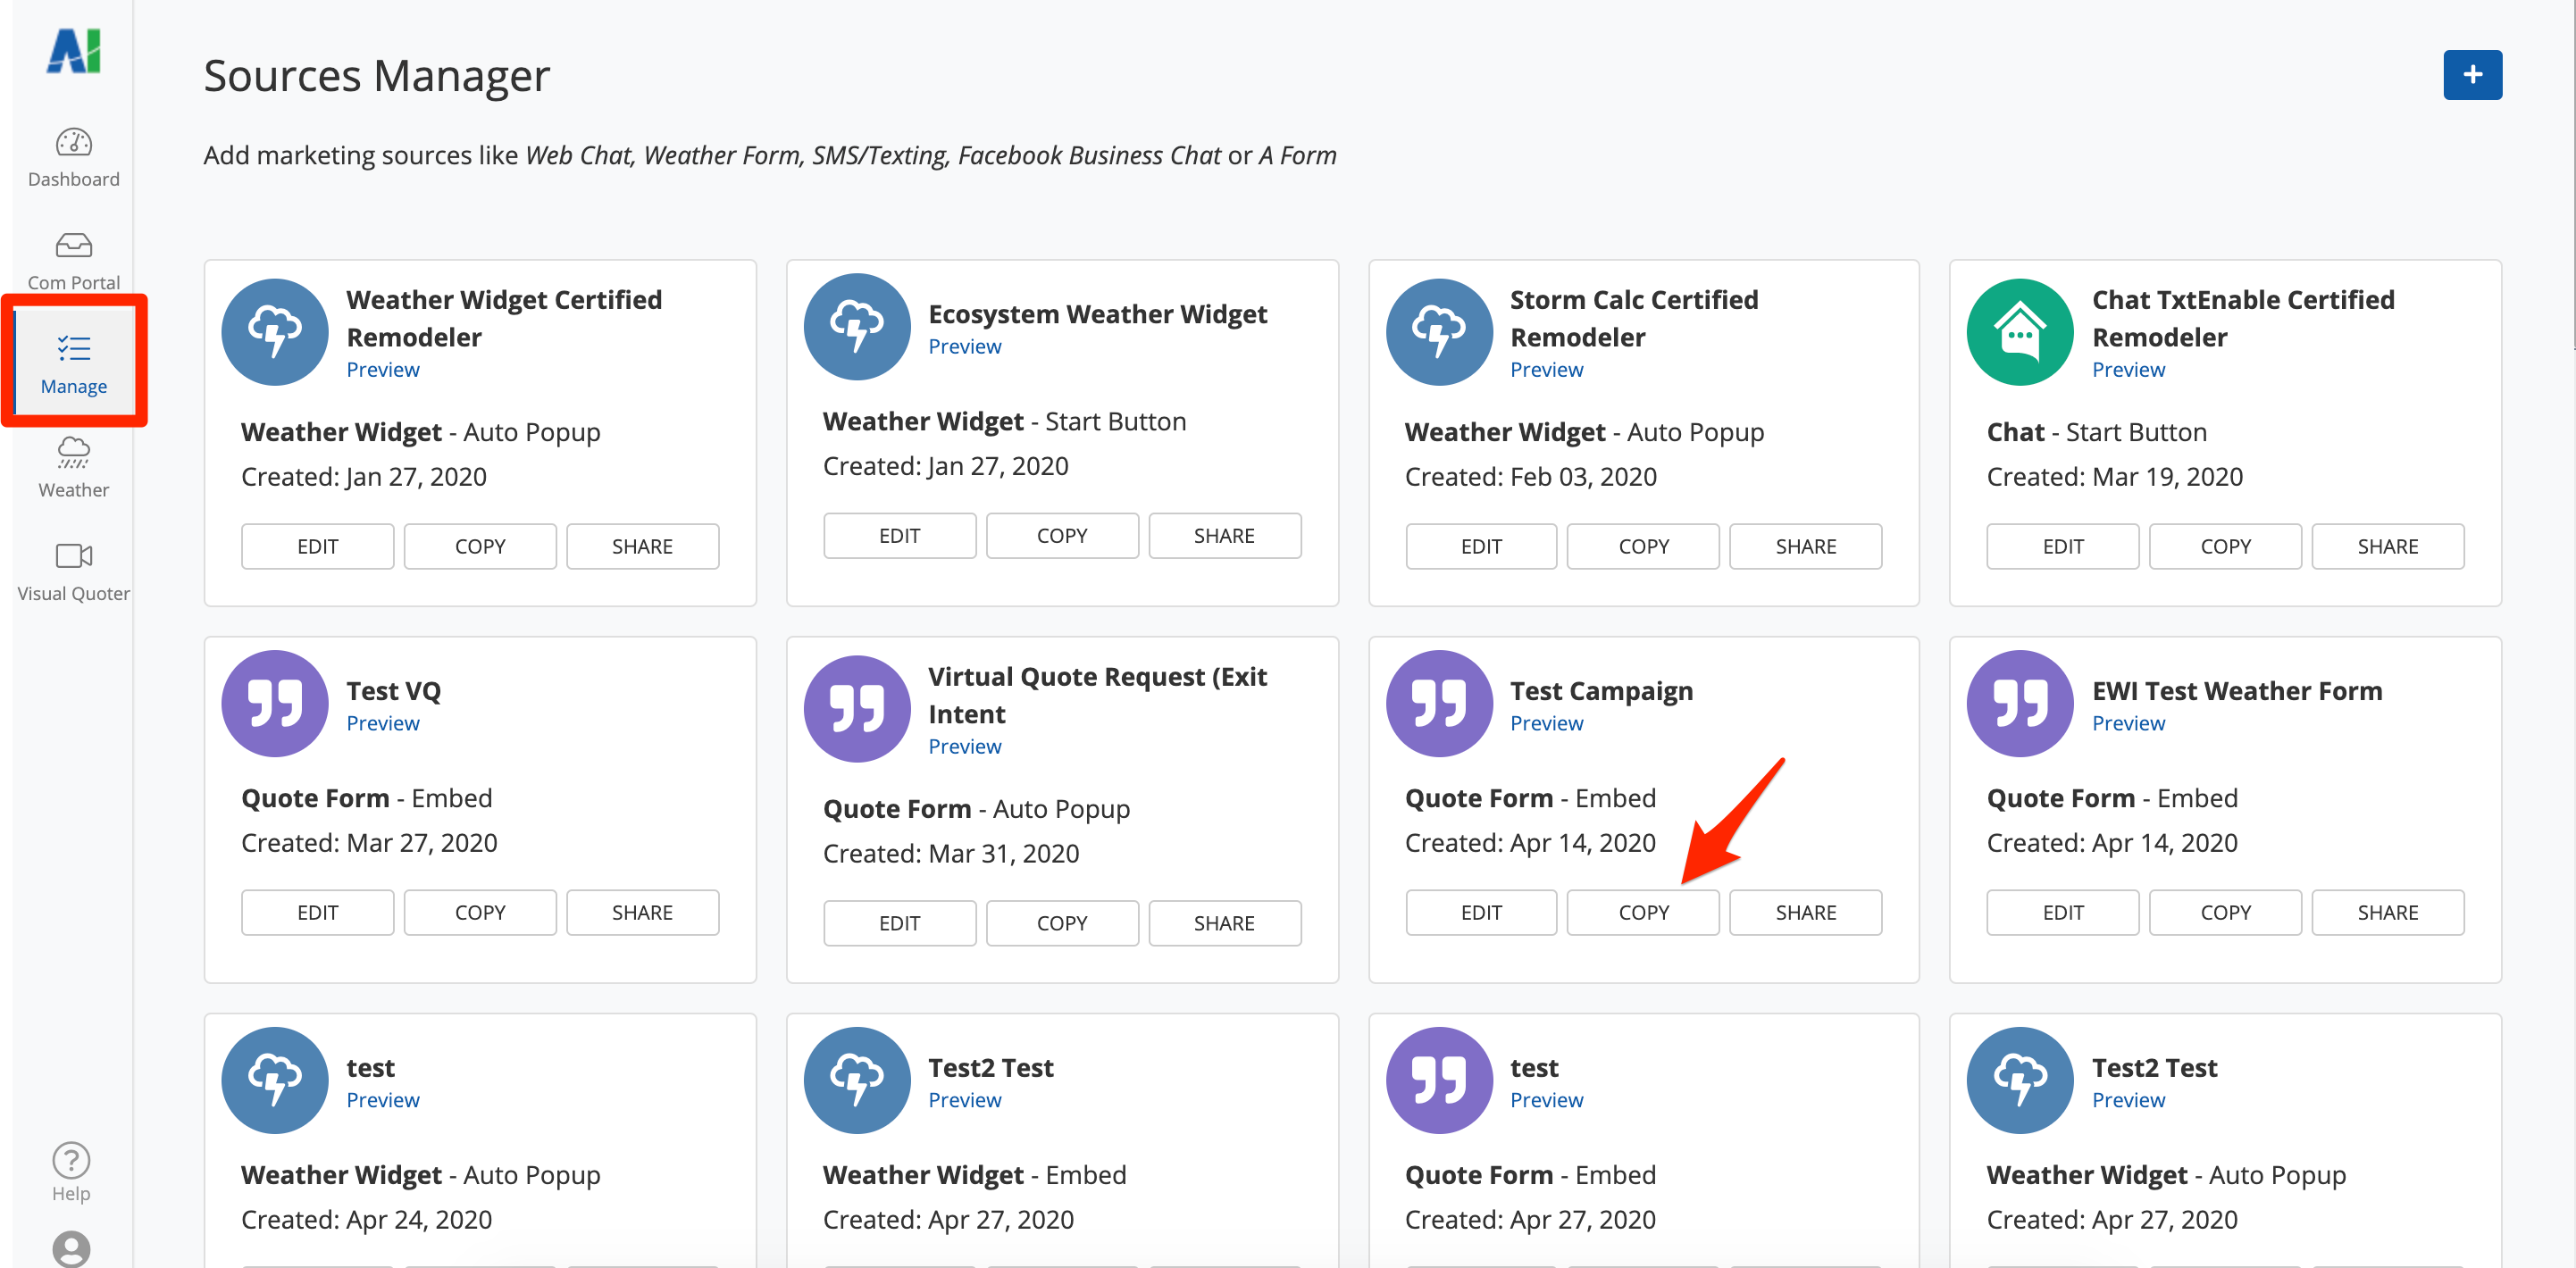
1. Copy your Quote Form code from PSAI
Go to your Sources Manager page in PSAI by clicking "Manage" from the left-hand toolbar. Then find the Quote Form you'd like to embed and click "Copy."
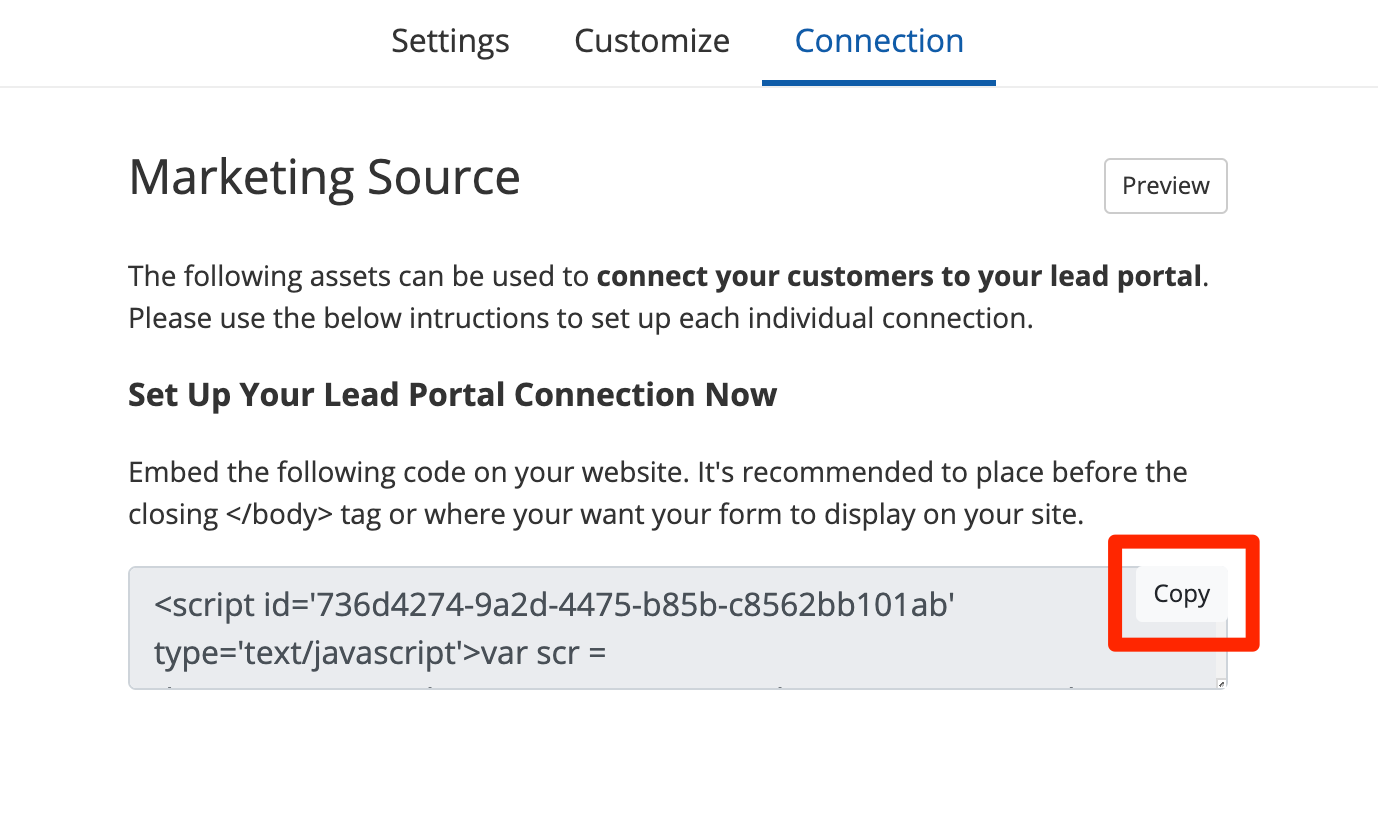
Alternatively, if you're already within the marketing source itself, you can navigate to the "Connection" tab and click "Copy" from there.
2. Go to WordPress and find the page where the form will appear
Log into WordPress, click Pages from the lefthand toolbar, and then click "Edit with Divi."
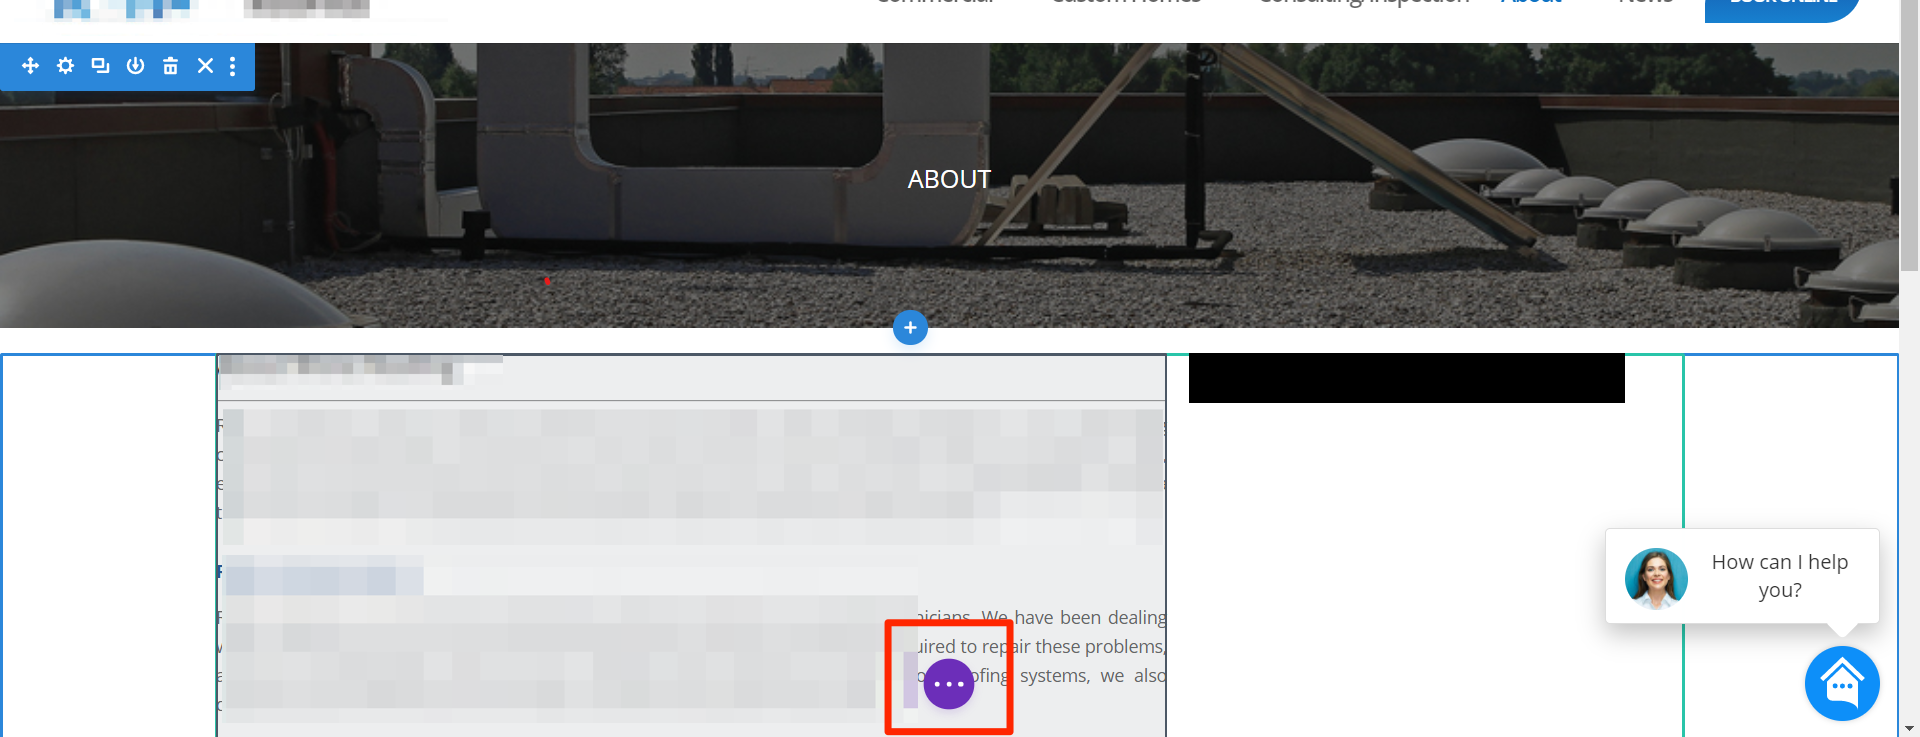
3. Click the purple circle to view edit options
Once the Divi editor is open for the page, click the purple circle in the bottom middle to expand the editing options.
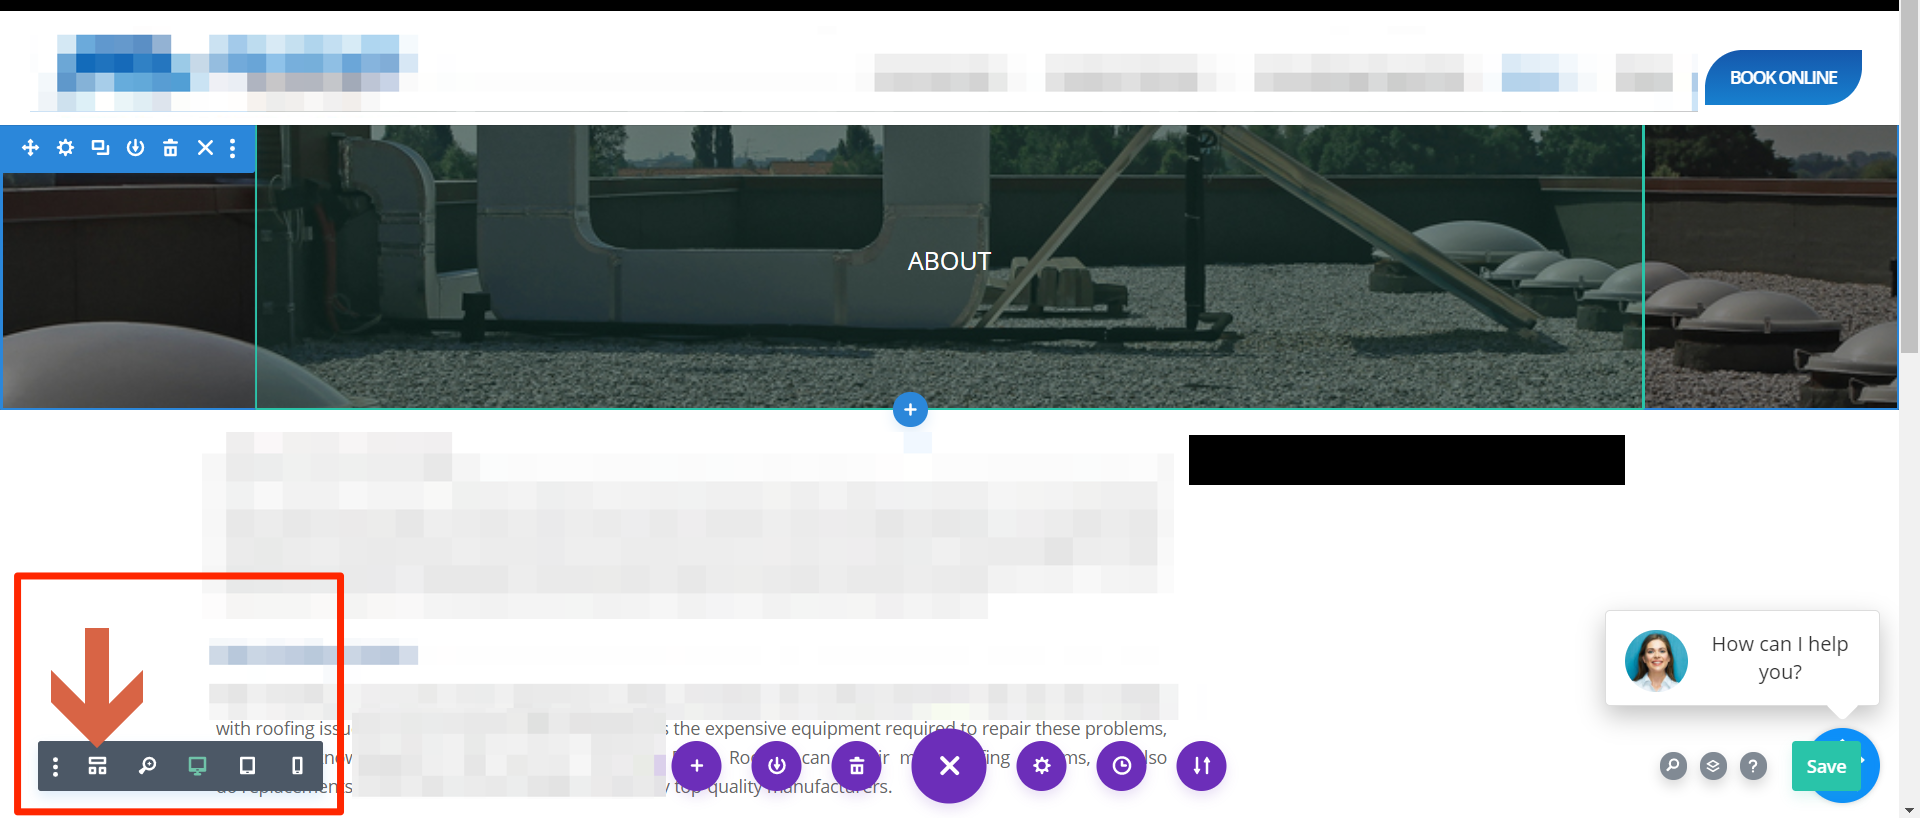
4. Click the wireframe button
Open the Divi wireframe view by clicking the button highlighted below.
This will open your current page in its wireframe design view, which will look like a series of solid-color boxes. Each box represents a section, row, or module on that specific web page.
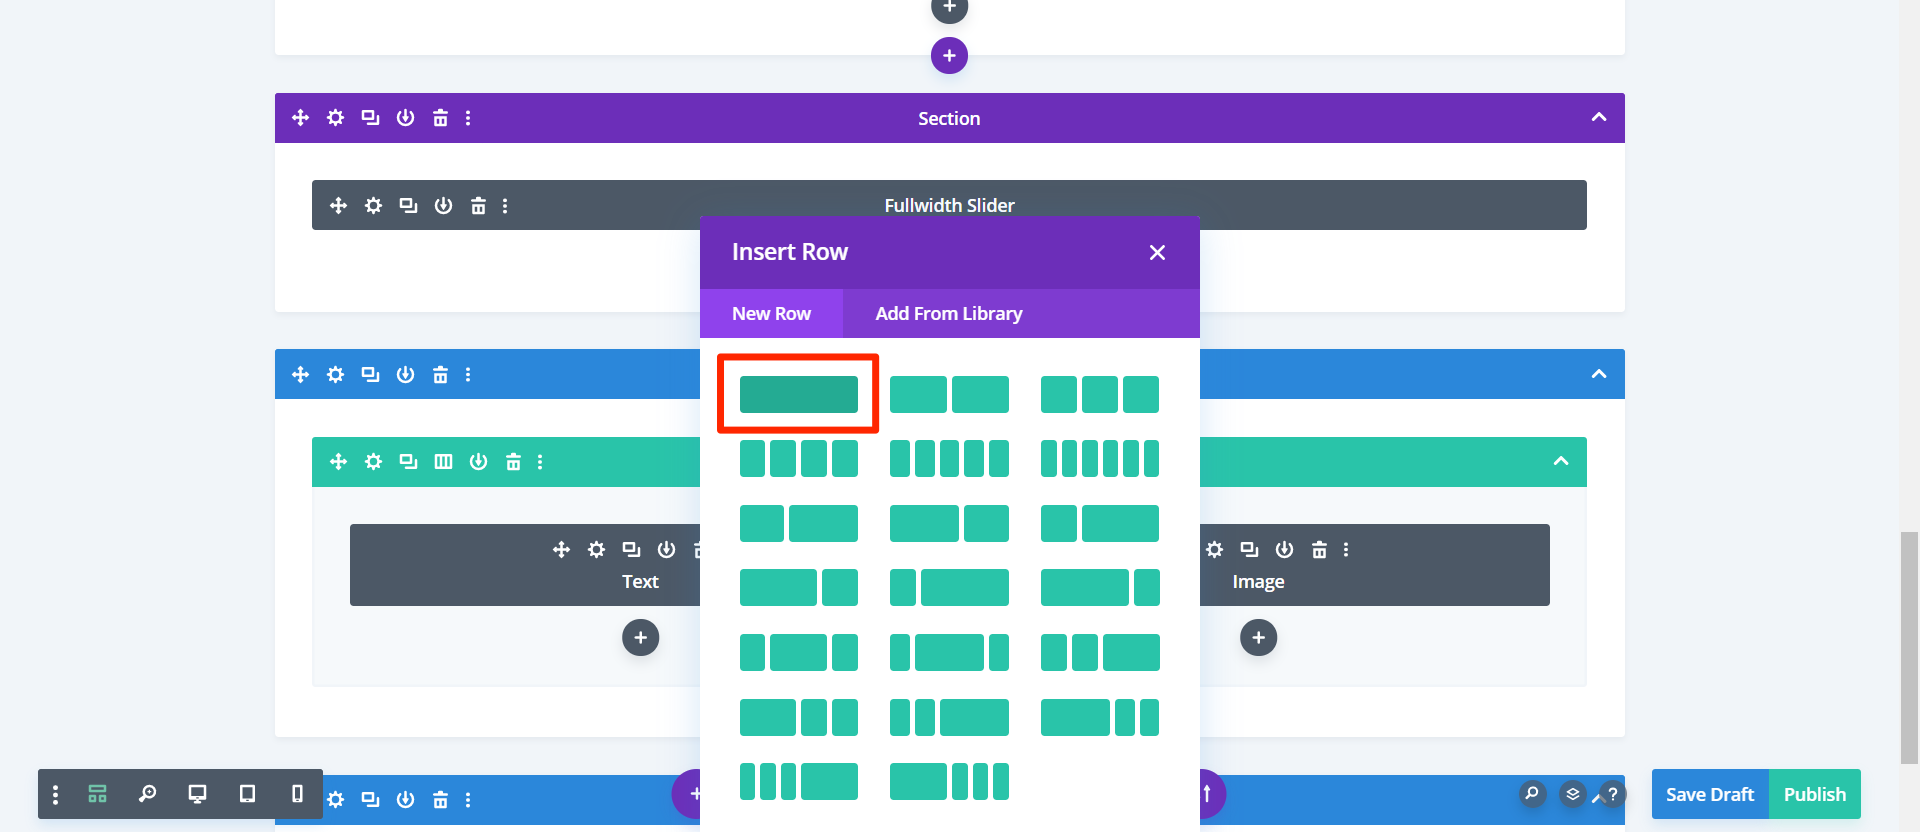
5. Add a new section
From the wireframe view, click the blue plus sign (+) to add a new section. (This new section will be used to house your PSAI Quote Form.) When prompted, choose "regular" for your section style.
6. Choose your row's display style
From the next panel, you can choose how your new row will be visually displayed.
We recommend choosing the first option, which will display your PSAI Quote Form as a stand-alone section. If you want to display your quote alongside other pieces of content, then feel free to choose one of the more complex multi-module designs.
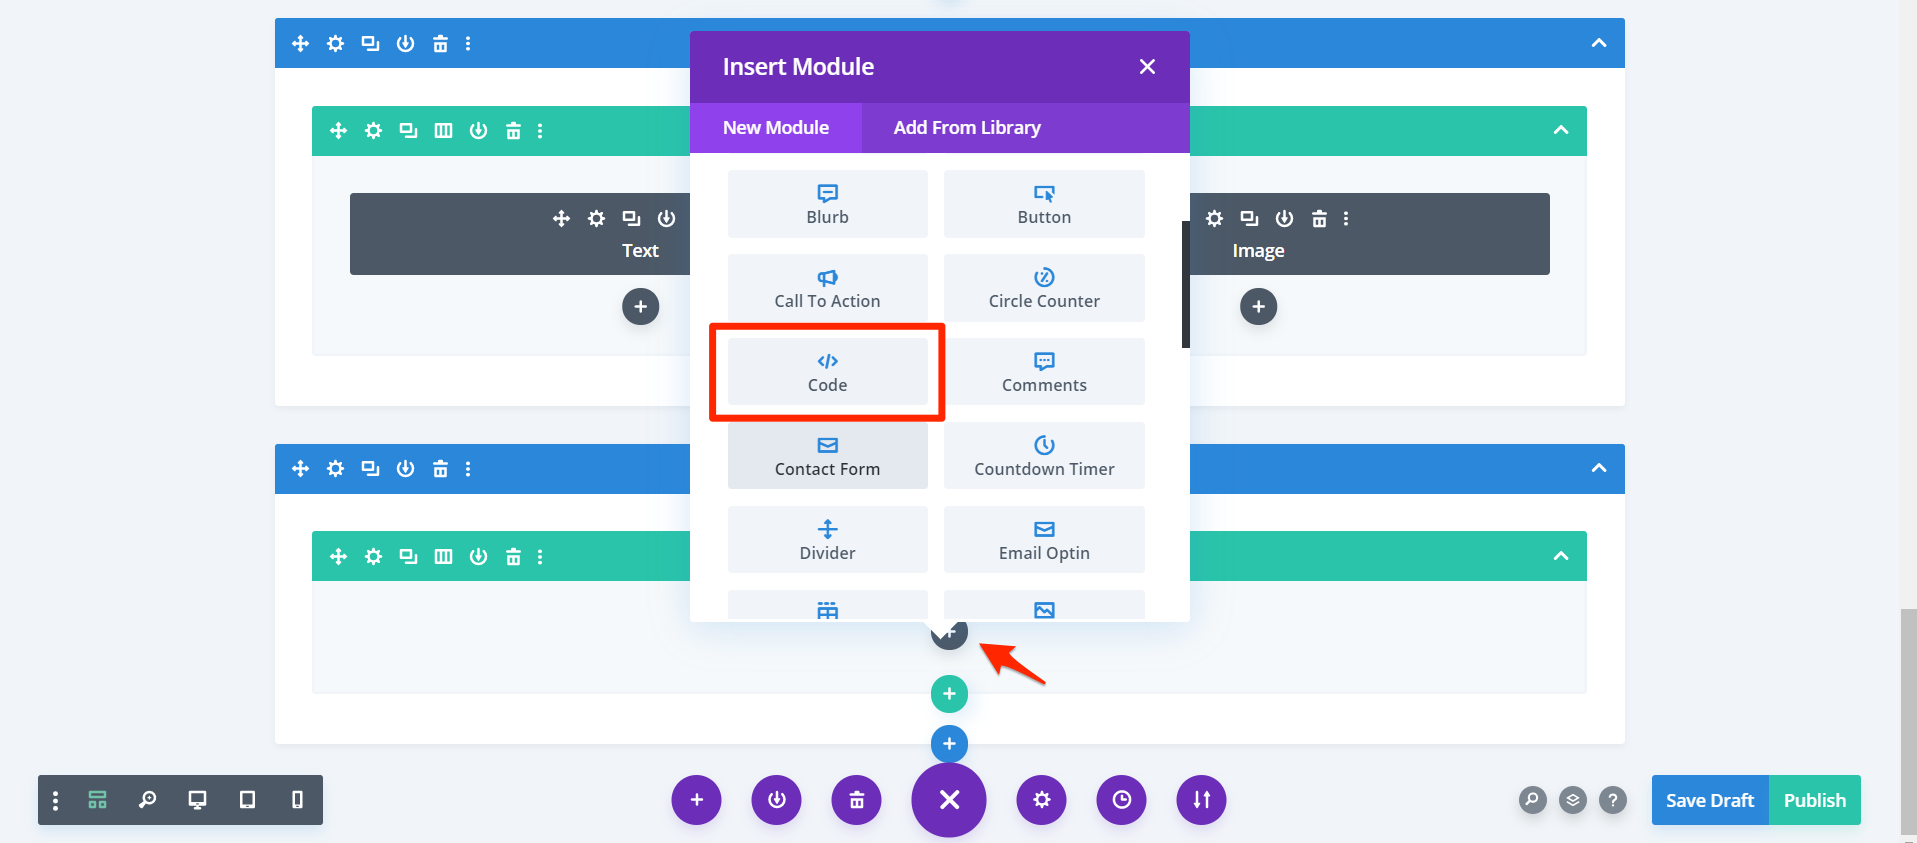
7. Add a new module within your new row
Inside of your new row, click the gray plus sign (+) to add a new module. Then in the popup panel that appears, select "Code."
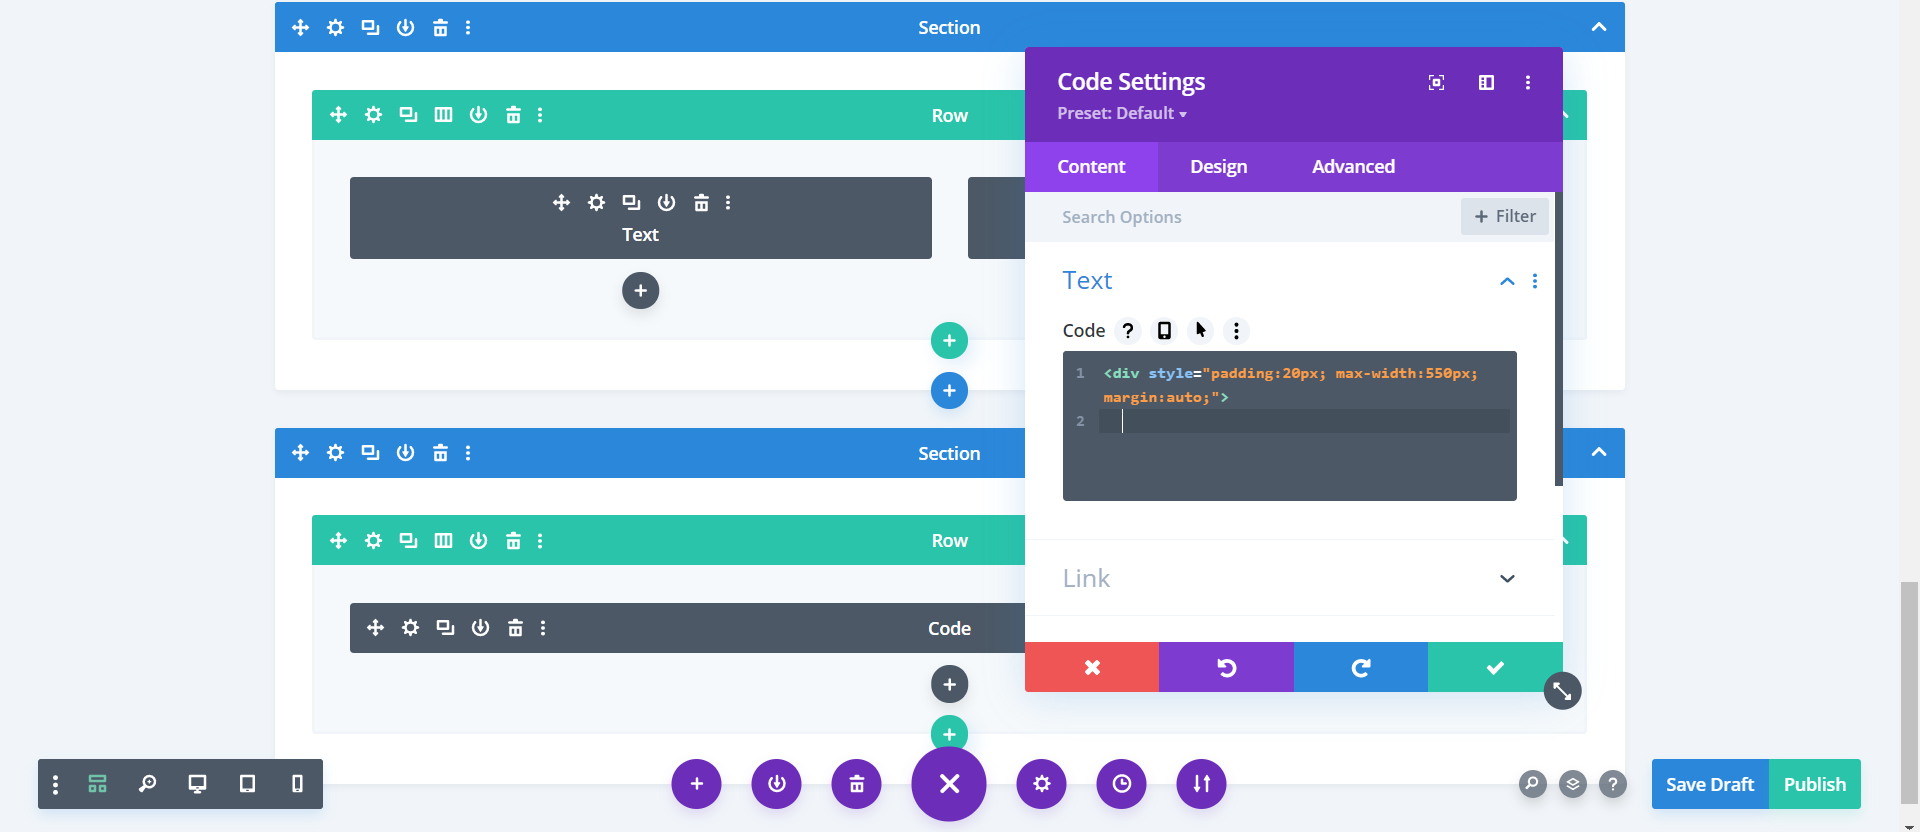
8. Paste your PSAI code, plus any styling edits
In the Divi code box, paste the PSAI code that you copied in Step 1. Depending on how your website is designed, you may need to add some additional code to adjust the form's width, margins, and padding to get it to look right. If you have a web designer or developer, ask for their input.
For example, you can see our sample styling edits in the screenshot below.
If you do not have a web designer or developer available, then you can try doing it yourself by copying and tweaking our sample code below. You'll need to paste one piece of <div> code before your PSAI Quote Form code and another </div> after.
By increasing or decreasing the padding (which is currently set to 20 pixels), you'll add more or less space around the edges of your form. Play around with the number of pixels to see what looks good on your site—maybe it looks better with 10px or maybe 30px. You can test out different numbers to see. We recommend leaving the "max-width" and "margin" settings as shown.
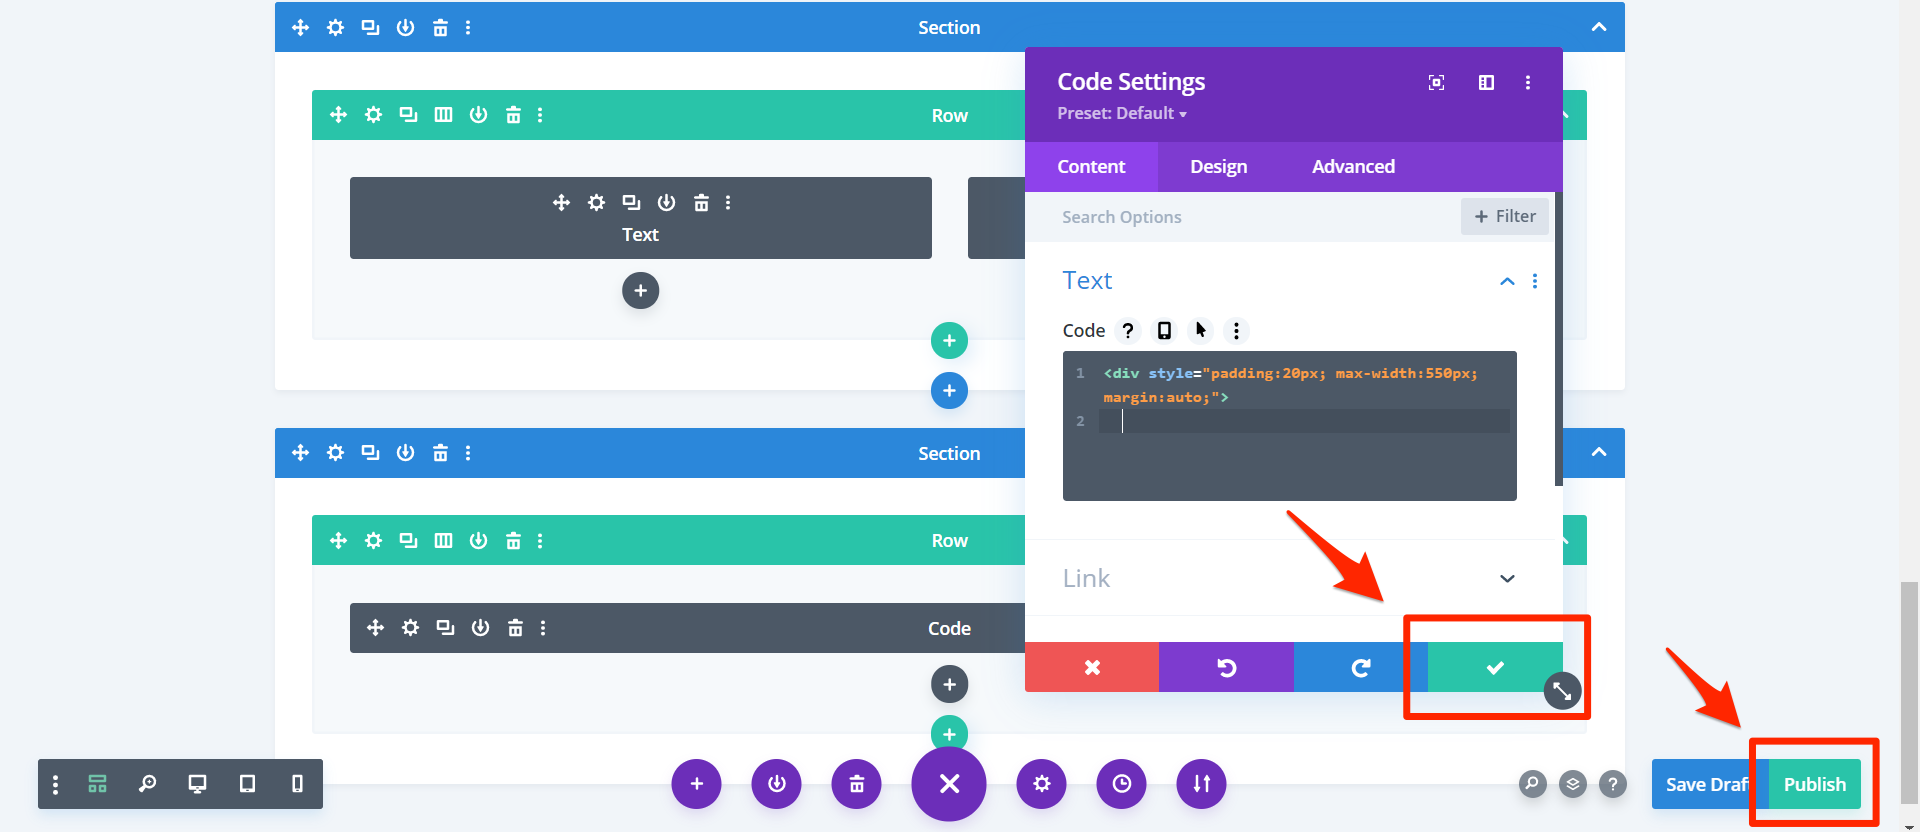
9. Save and publish
When you've finished pasting your code and have tweaked the padding if necessary, click the green check box to close the code panel. Then be sure to click "Publish" in the bottom right corner to complete your edits.
10. Verify that your form is working
It's a good idea to check that your PSAI quote form is displaying and working as expected. As a final step, navigate to the live version of the page. You can visually check the appearance of the form and even fill it out with your own data to make sure it works properly.
Below is an example of a form that is embedded on a page with a background image.
Once your form is live, all leads collected here will go straight to your Com Portal.
Troubleshooting Your Form Embed on Divi
If you've tried to follow the instructions above but cannot get your PSAI Quote Form to look right or work properly, please contact Support for help. The quickest way is to use this link to fill out a Support ticket or to open the Help widget in the bottom right-hand corner of your screen.