Floating elements can display many different types of content, including quote forms, call-to-action buttons, weather widgets, chatbots, and even simple text alerts. No matter which type of content you want to display, all floating elements are added to Wix in the same way. Follow the steps below to add a floating element to your Wix website.
1. Copy Code Snippet from PSAI
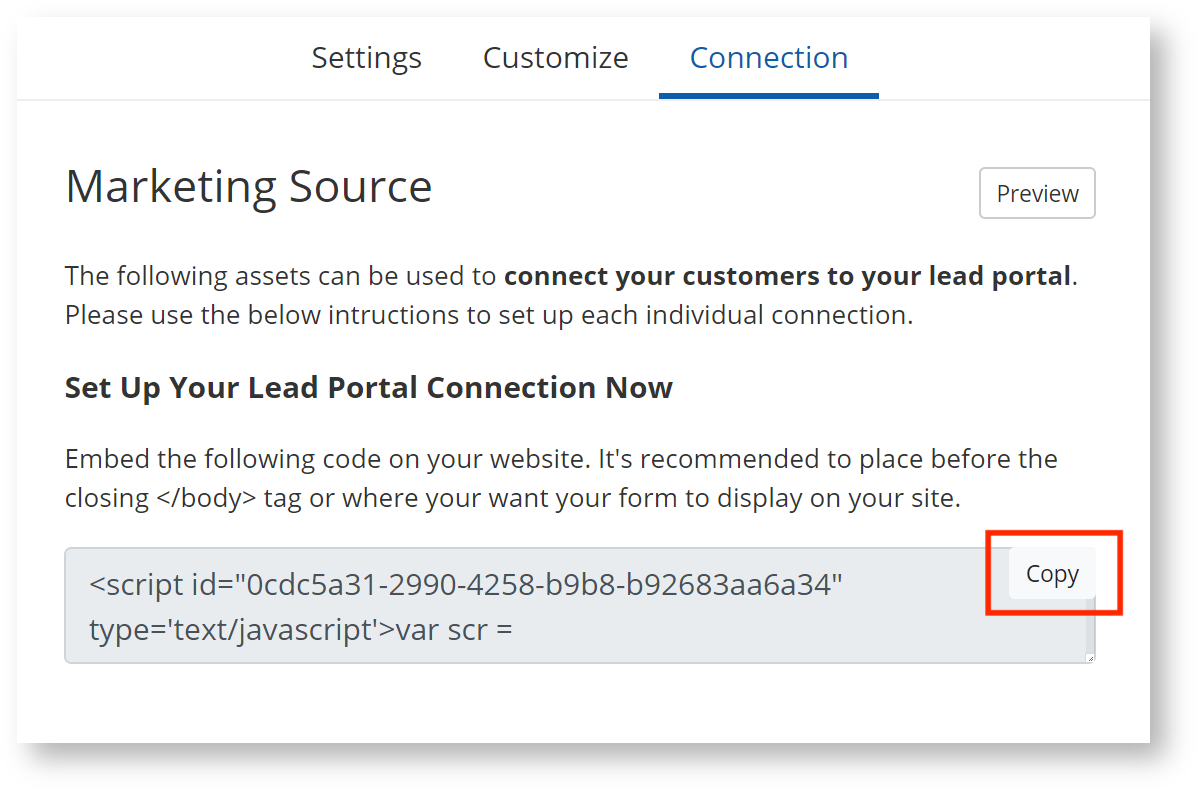
From your PSAI dashboard, go to the "Manage" tab and find the Marketing Source that you'd like to add as a floating element. Click on it, go to the "Connection" tab at the top, and then click the "Copy" button to copy the PSAI code snippet.
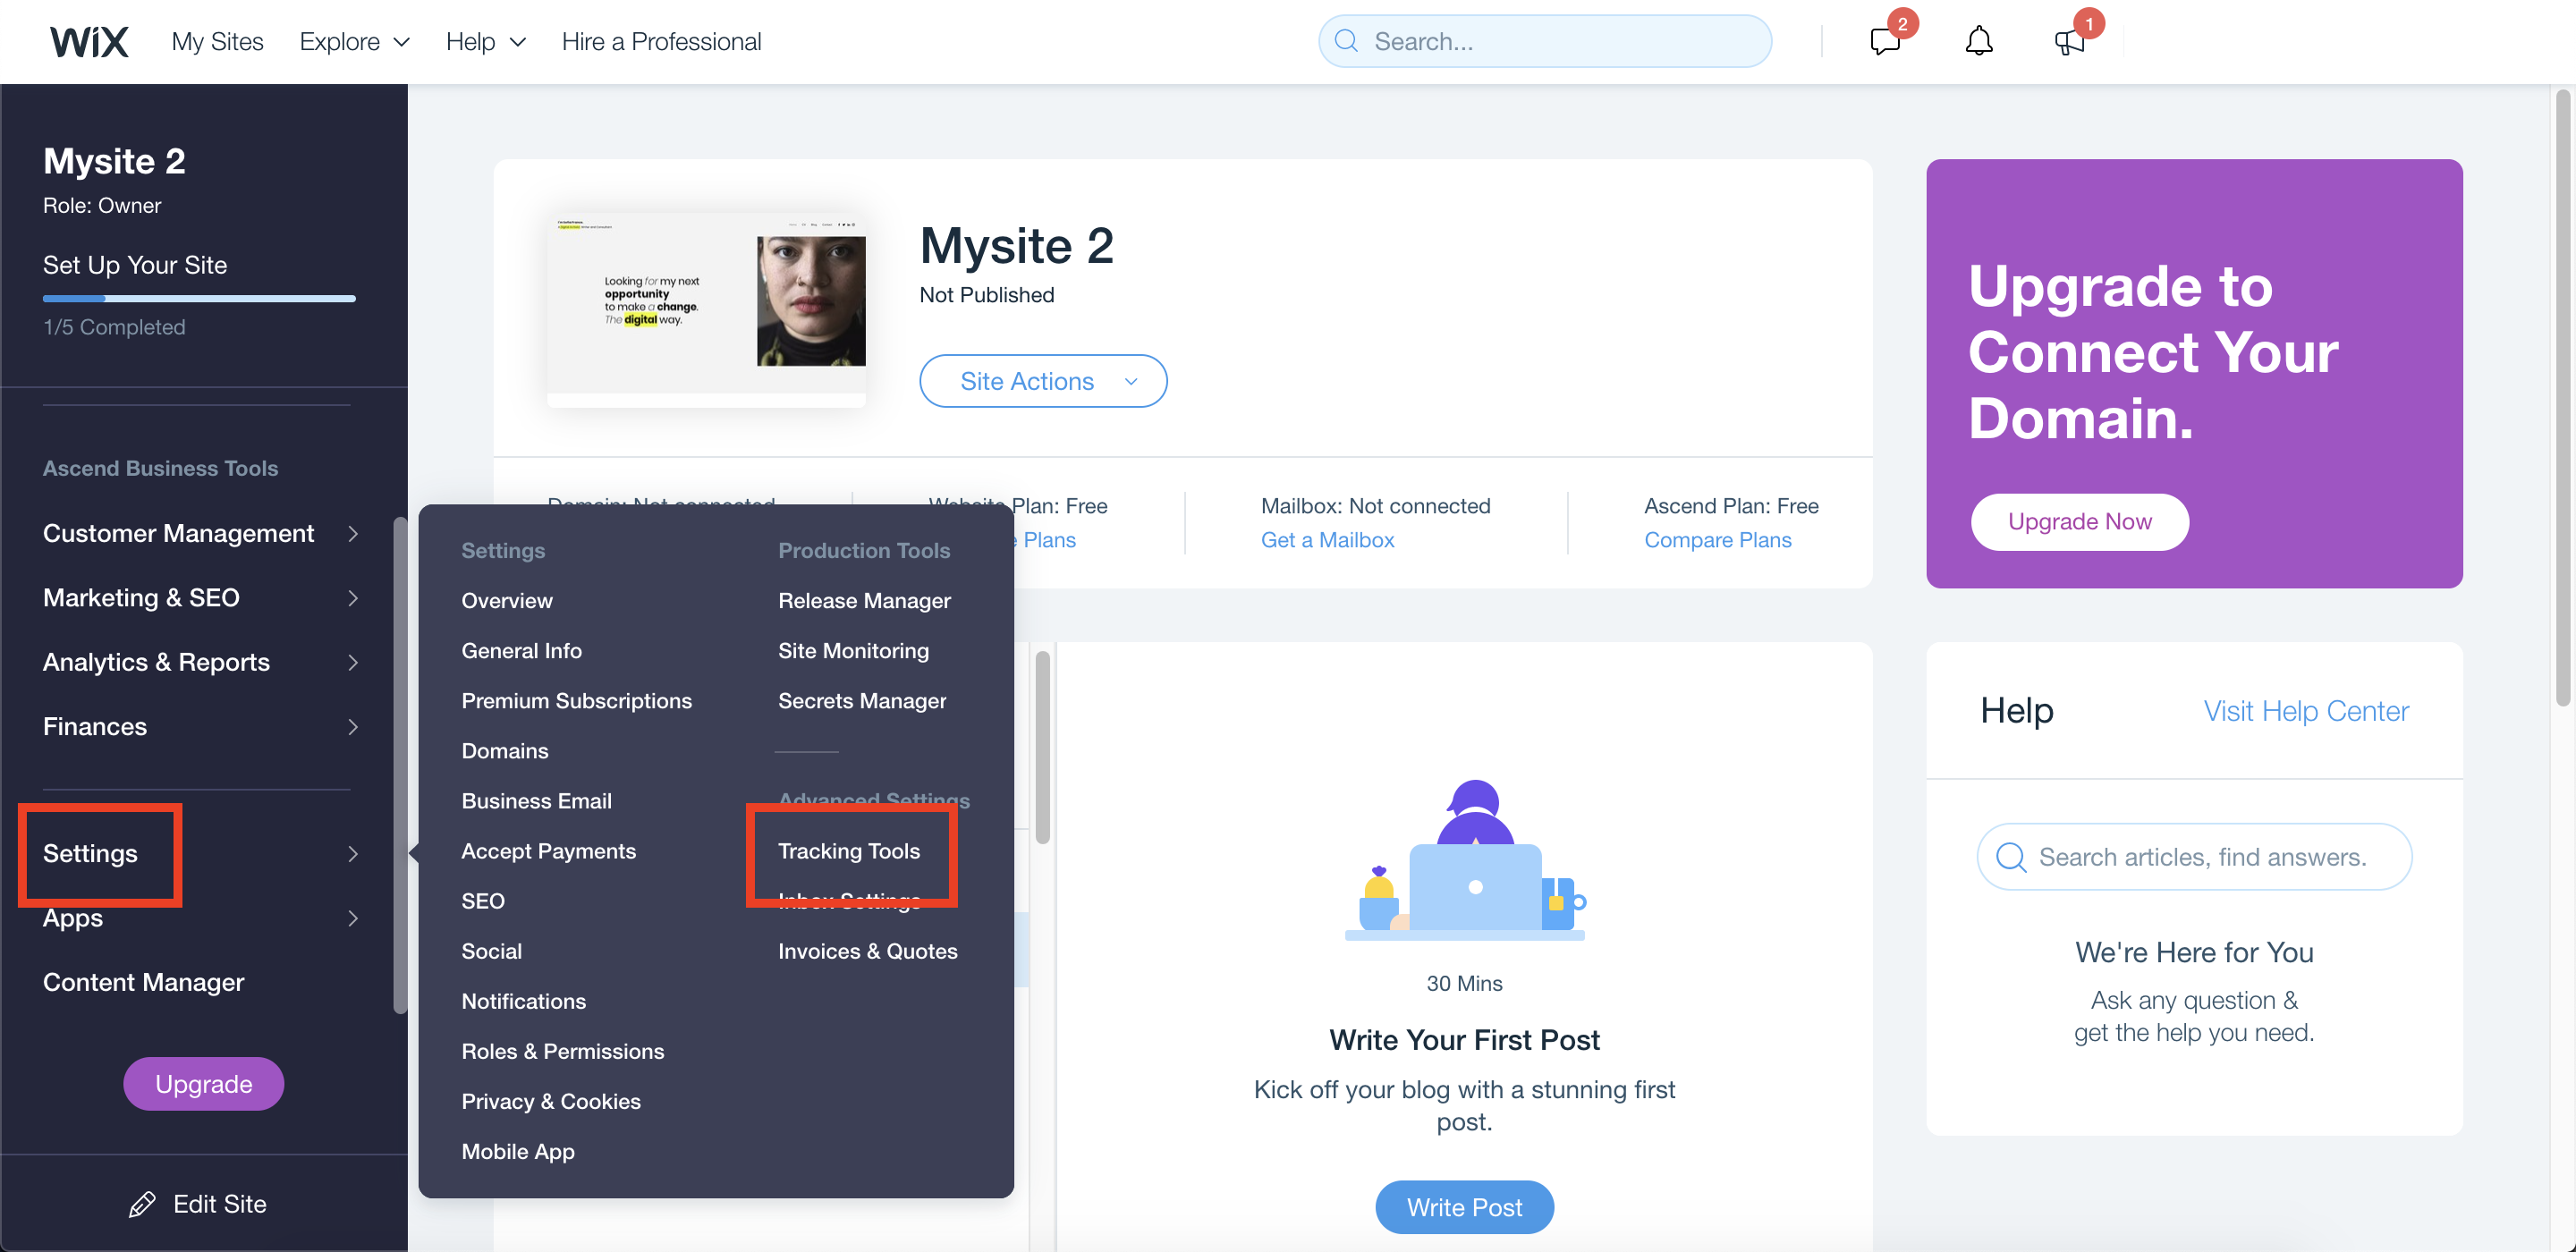
2. Open Your Tracking Tools Panel in Wix
Log into your Wix website, go to your admin dashboard, and navigate to the "Tracking Tools" panel. As shown below, you can click "Settings" in the left-hand toolbar and then "Tracking Tools."
3. Add a Custom Tracking Tool in Wix
Once you've entered the "Tracking Tools" page, add a new tracking tool by clicking the "+ New Tool" button shown below. Then click "Custom."
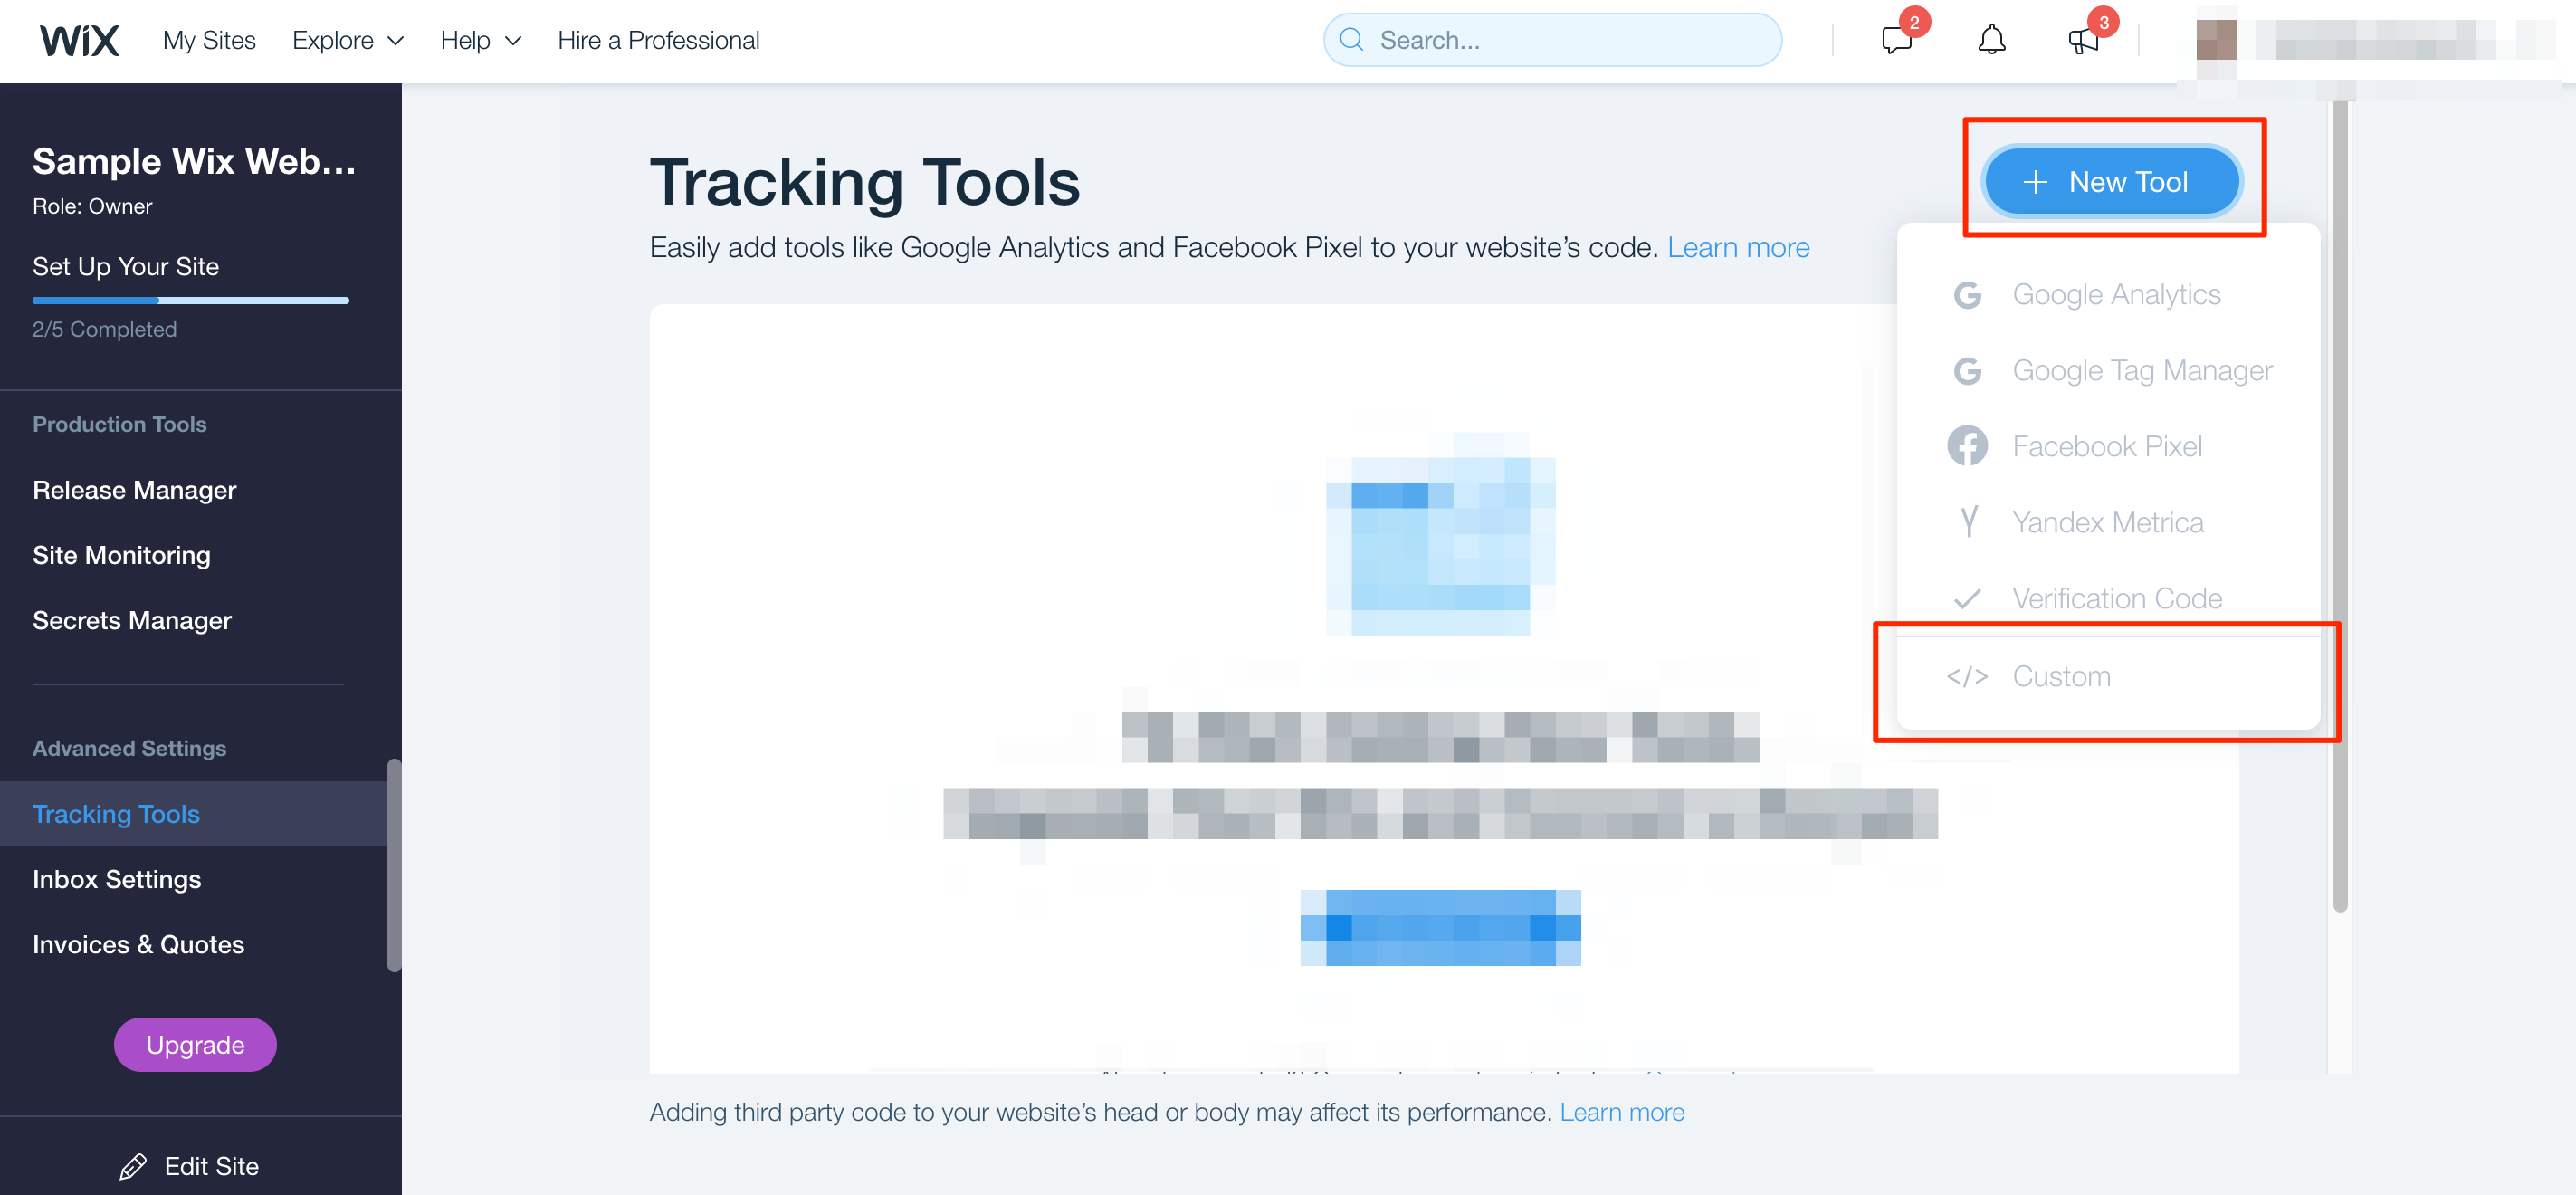
Note that you must be on a premium Wix plan (with your own domain and Wix ads removed) to be able to access to Custom Elements.
4. Paste Your PSAI Code into the Wix Custom Code Panel
In the box at the top of the "Custom Code" panel, paste your PSAI code snippet. Be careful not to add any extra spaces or characters within the code snippet.
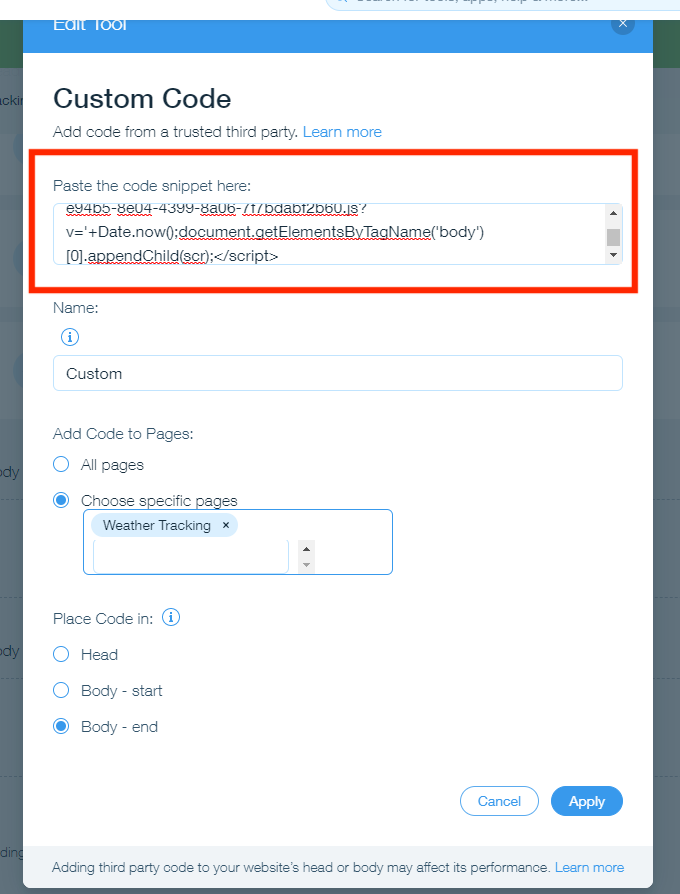
Choose the Settings You Want
Below the pasted code, you can toggle the other settings for your Custom Element. To make sure that your floating form, chatbot, or text alert works correctly, the most important setting is the last one: "Place Code in." Be sure to choose "Body-end," as shown below.
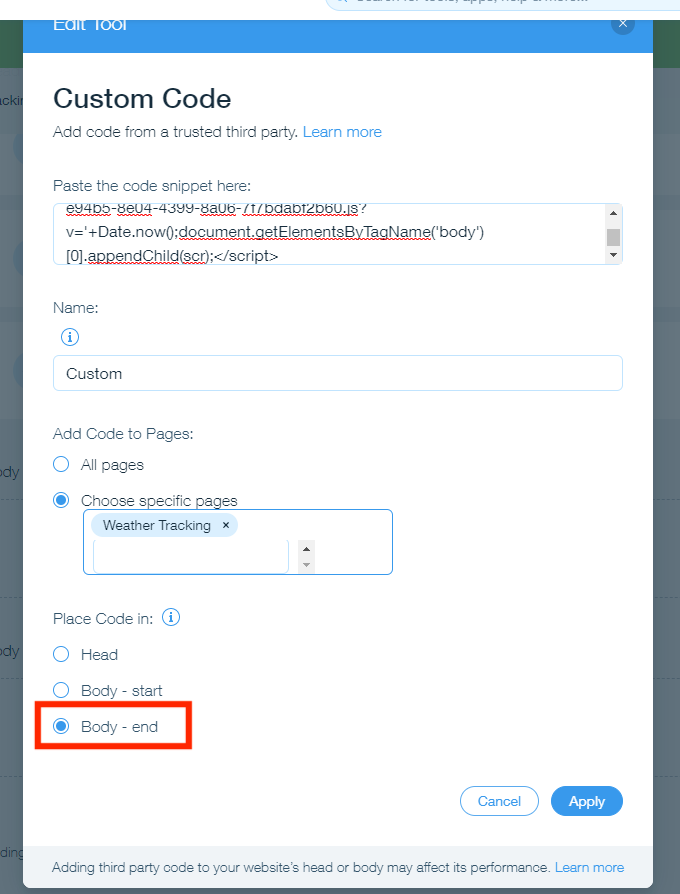
For the other two settings, you're free to set your own preference:
- "Name" Field: Choose a name that is descriptive and will be easy for you to identify later. Try something like "Weather Report Floating Form" or "Exit Intent Floating Chat."
- "Add Code to Pages" Field: You can choose to add your floating element to all pages on your website or only to specific pages, depending on what makes sense. (For example, an extreme weather report form might make sense to appear only on roofing-related pages, while a general call-to-action to receive a virtual quote might make sense on all pages. It's up to your business goals.)
Be sure to save your changes by clicking the "Apply" button when you're finished.
5. Check That Your Floating Element Is Working
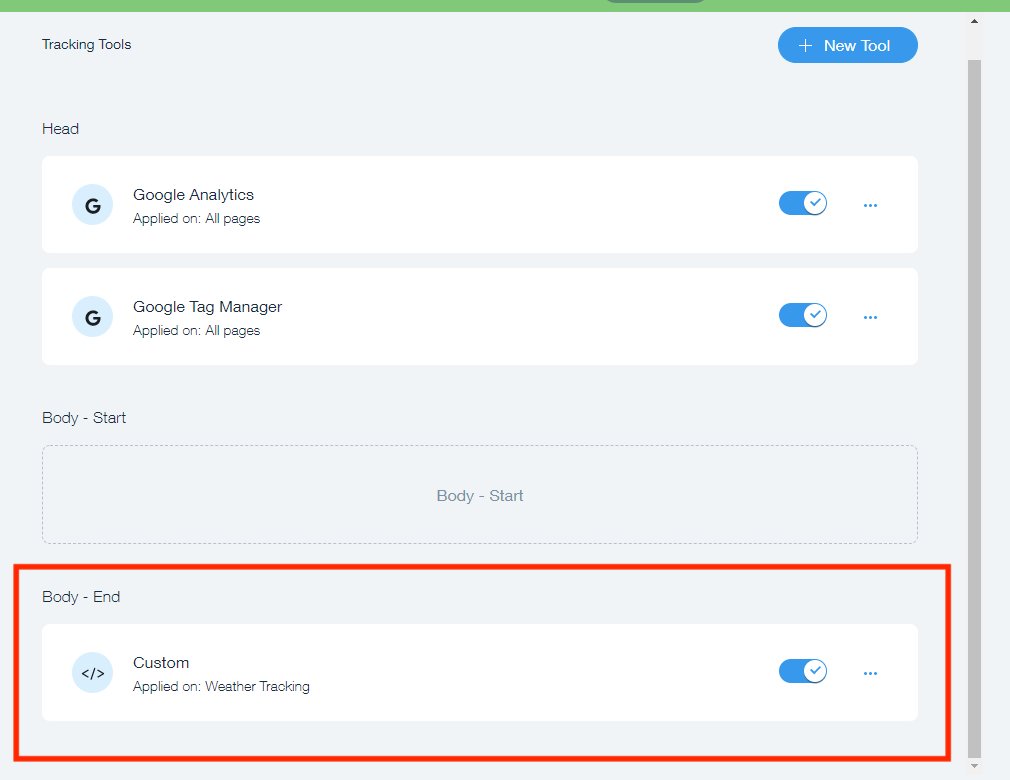
Navigate to the page or pages where your floating element will appear to make sure it's showing up and working properly. You should also see your Custom Element now appearing on your Wix Tracking Tools overview, as shown below.
Troubleshooting
Compared to embedded forms, floating elements are typically very straightforward and rarely experience problems with functionality or design. If you've followed the instructions above but your floating form is still not working on Wix, then please submit a ticket for Support through this link or through the Help widget at the bottom right corner of the screen.