Problem
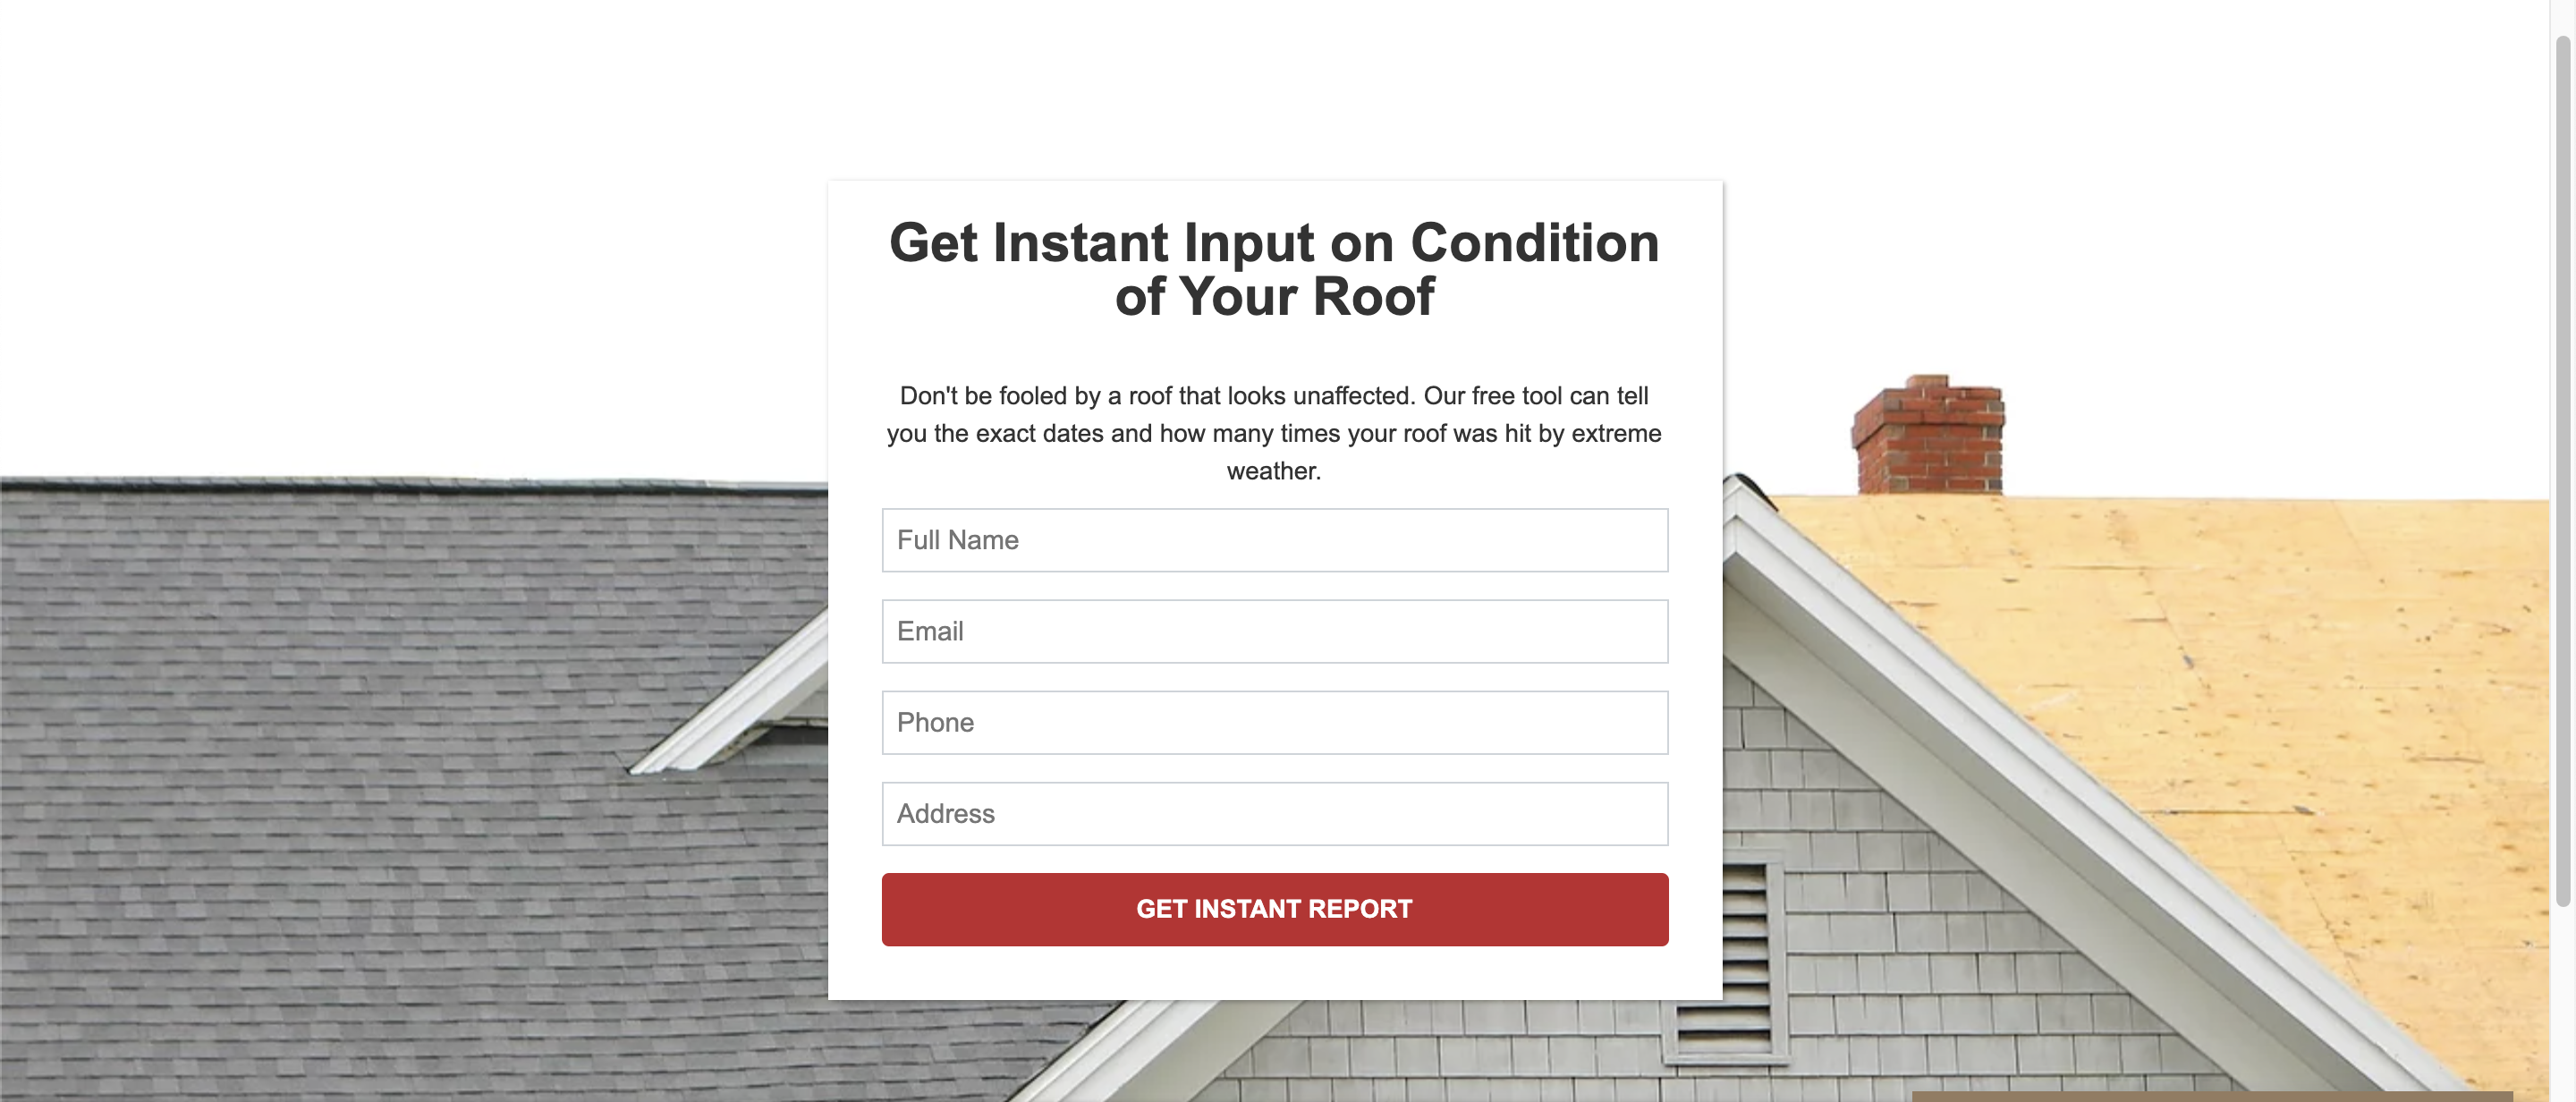
You have successfully embedded a form onto your Wix website. The form technically works, but the design does not look right.
For example, your form fields are being stretched across the entire page, as shown below.

Solution
To make your form look better, you’ll need to adjust a few settings from within the Wix Tracking Tools setting. Follow the steps below to do so.
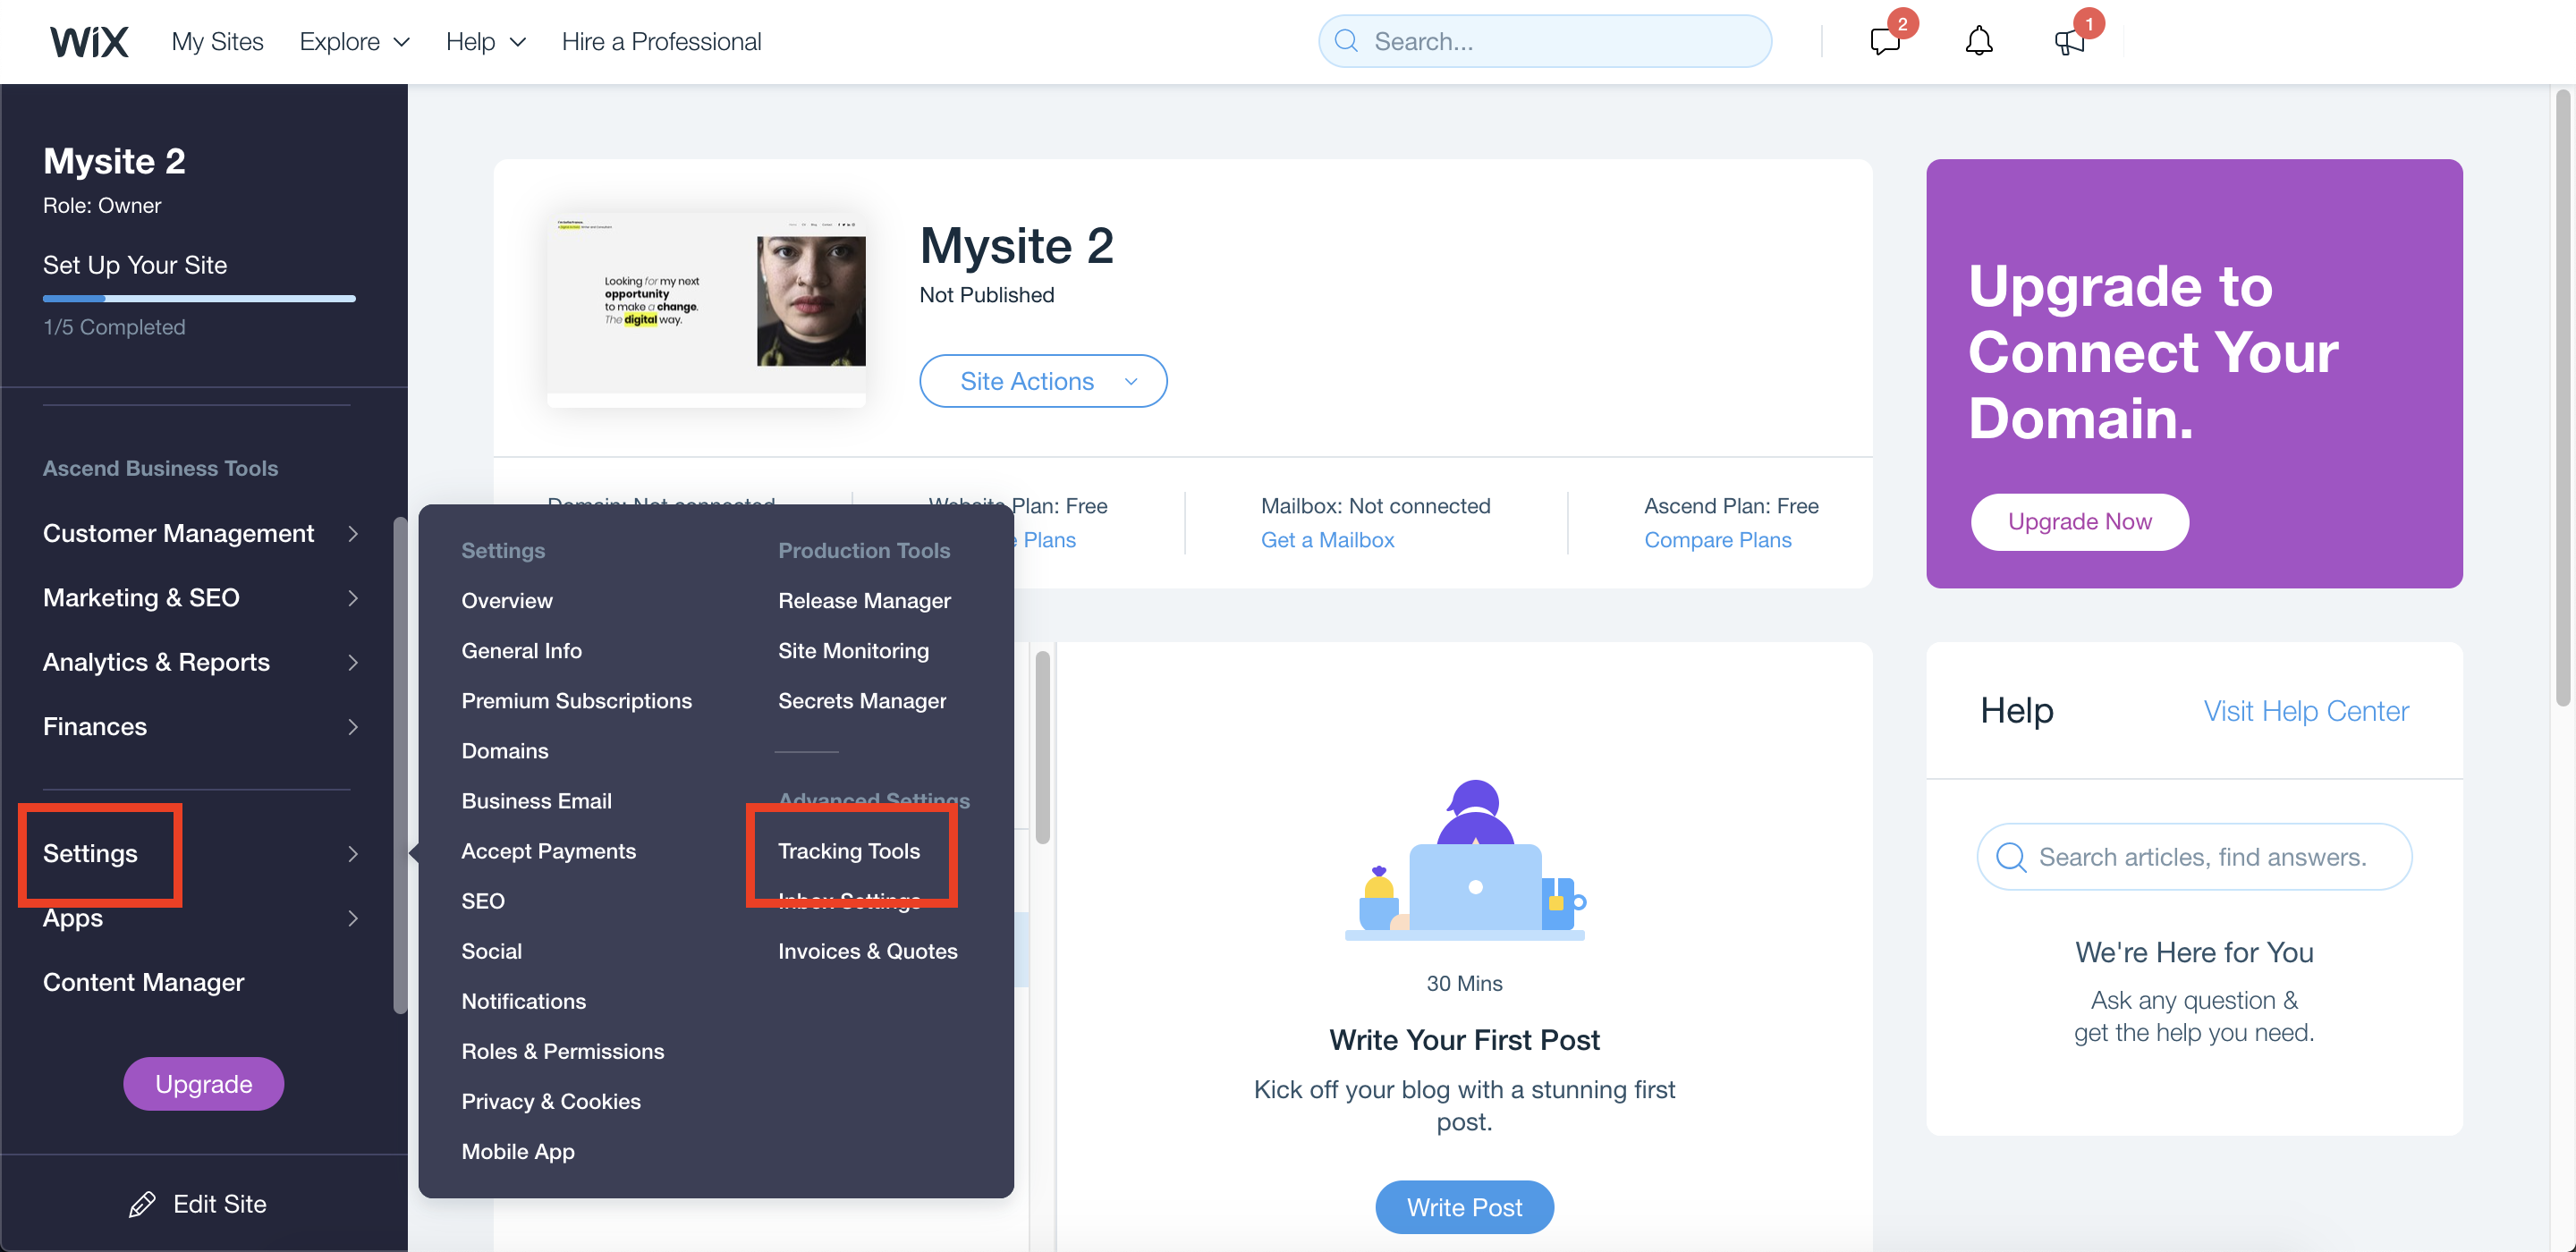
1. Navigate to the Tracking Tools panel in Wix
From your Wix admin dashboard, click Settings from the left-hand toolbar. Then click Tracking Tools under Advanced Settings.
2. Adjust two settings within Wix Tracking Tools
1) Change the Setting of the “Place Code in” Field
As a standard best practice, we recommend setting your embed form code snippet into the section for “Body – end” under the “Place Code in” field (as shown in the screenshot below).
However, depending on the design of your particular page, the form may look better if it’s set to “Body – start.”
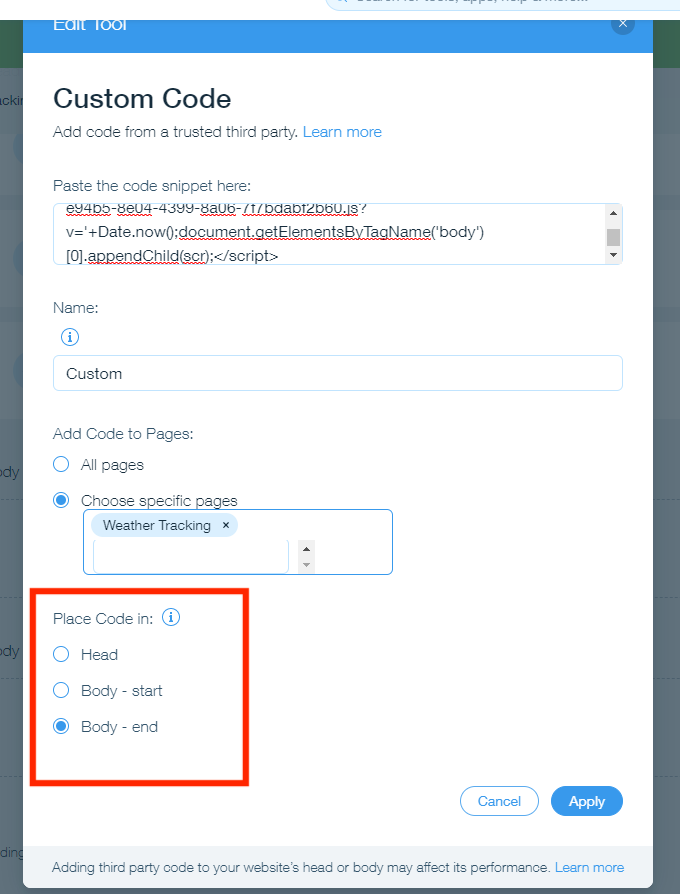
You can try both settings—“Body – start” and “Body – end”—to see if one ends up looking better than the other.
To do so, choose the radio selection for “Body – start,” click the Apply button, and then view the page. If the form doesn’t look right, go back to your Wix Tracking Tools panel and choose the radio option for “Body – end.” Click the Apply button, and then view the page again to compare.
Which setting looks better?
2) Wrap Some New Code Around Your Existing Code
In the field where you originally pasted your form embed code, you can also try adding some extra code to make the form look better.
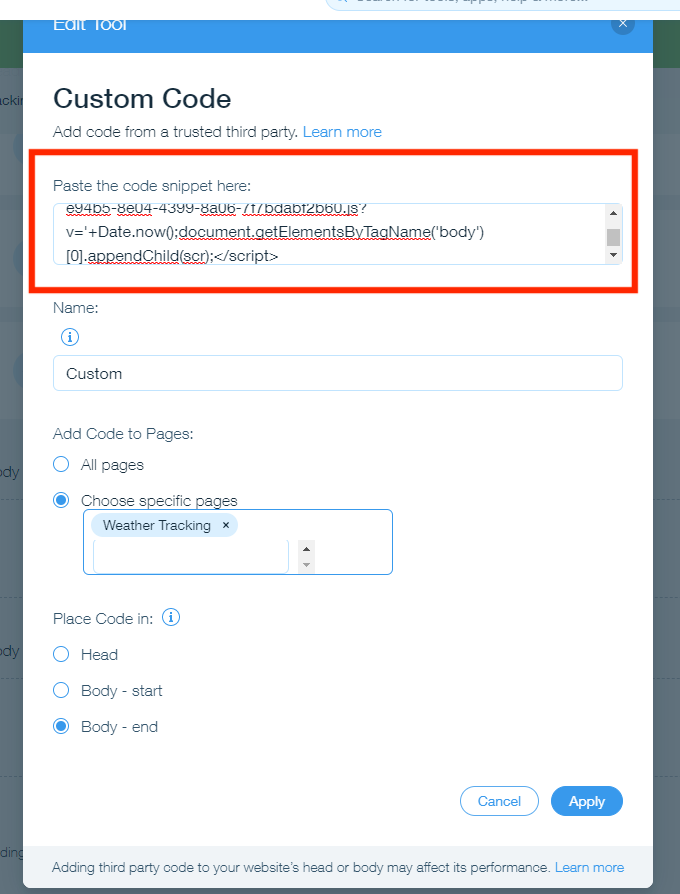
In the box highlighted above (titled “Paste the code snippet here”), you’ll want to wrap the existing code with a <div> tag. Simply copy and paste the following:
Before the existing form embed code
<div style="max-width:500px; padding-top:40px; margin-left:auto; margin-right:auto; position:relative; z-index:100;">
After the existing form embed code
</div>
You should have a new snippet of code pasted before and after the existing form embed code. Before is the opening <div> with styling information, and after is the closing </div>. Both pieces must be pasted correctly for the code to work.
The end result should look like this:
<div style="max-width:500px; padding-top:40px; margin-left:auto; margin-right:auto; position:relative; z-index:100;"> [EXISTING CODE] </div>.
To save your changes, click the “Apply” button at the bottom of the Custom Code panel. If successful, your embedded form should now display as expected, as shown below.
Troubleshooting
Forms can be embedded almost anywhere on your website, but the layout of the page matters a lot. Depending on how your page is set up (and how your website as a whole is designed), an embedded form may require some extra styling to display correctly.
If you’ve tried the above adjustments in the Wix Tracking Tools settings and your form is still not looking right, then there may be other design elements on the page that are interfering with the form’s display. Even if the page appears to be empty, Wix may have something hidden that is interfering with the layout and making the form render strangely.
Design considerations vary greatly from website to website. Please submit a ticket here or by using the Help widget in the bottom right corner of the screen. We'll work with you to assess the problem and find a solution.
In a hurry to use your form and don't want to troubleshoot it? Instead of embedding the form, you can display it as a floating element, which will not affect your existing web page's styling. Learn how to choose a floating display by customizing your app's Display Type, or check out some examples of embedding vs. floating elements.