After you've generated an ad—whether by creating one from scratch or by choosing an AI Recommended ad—you'll be brought to the final screens to complete your ad set-up and launch it on Facebook and Instagram.
As shown below, the second of these final screens is the Ad Design page.
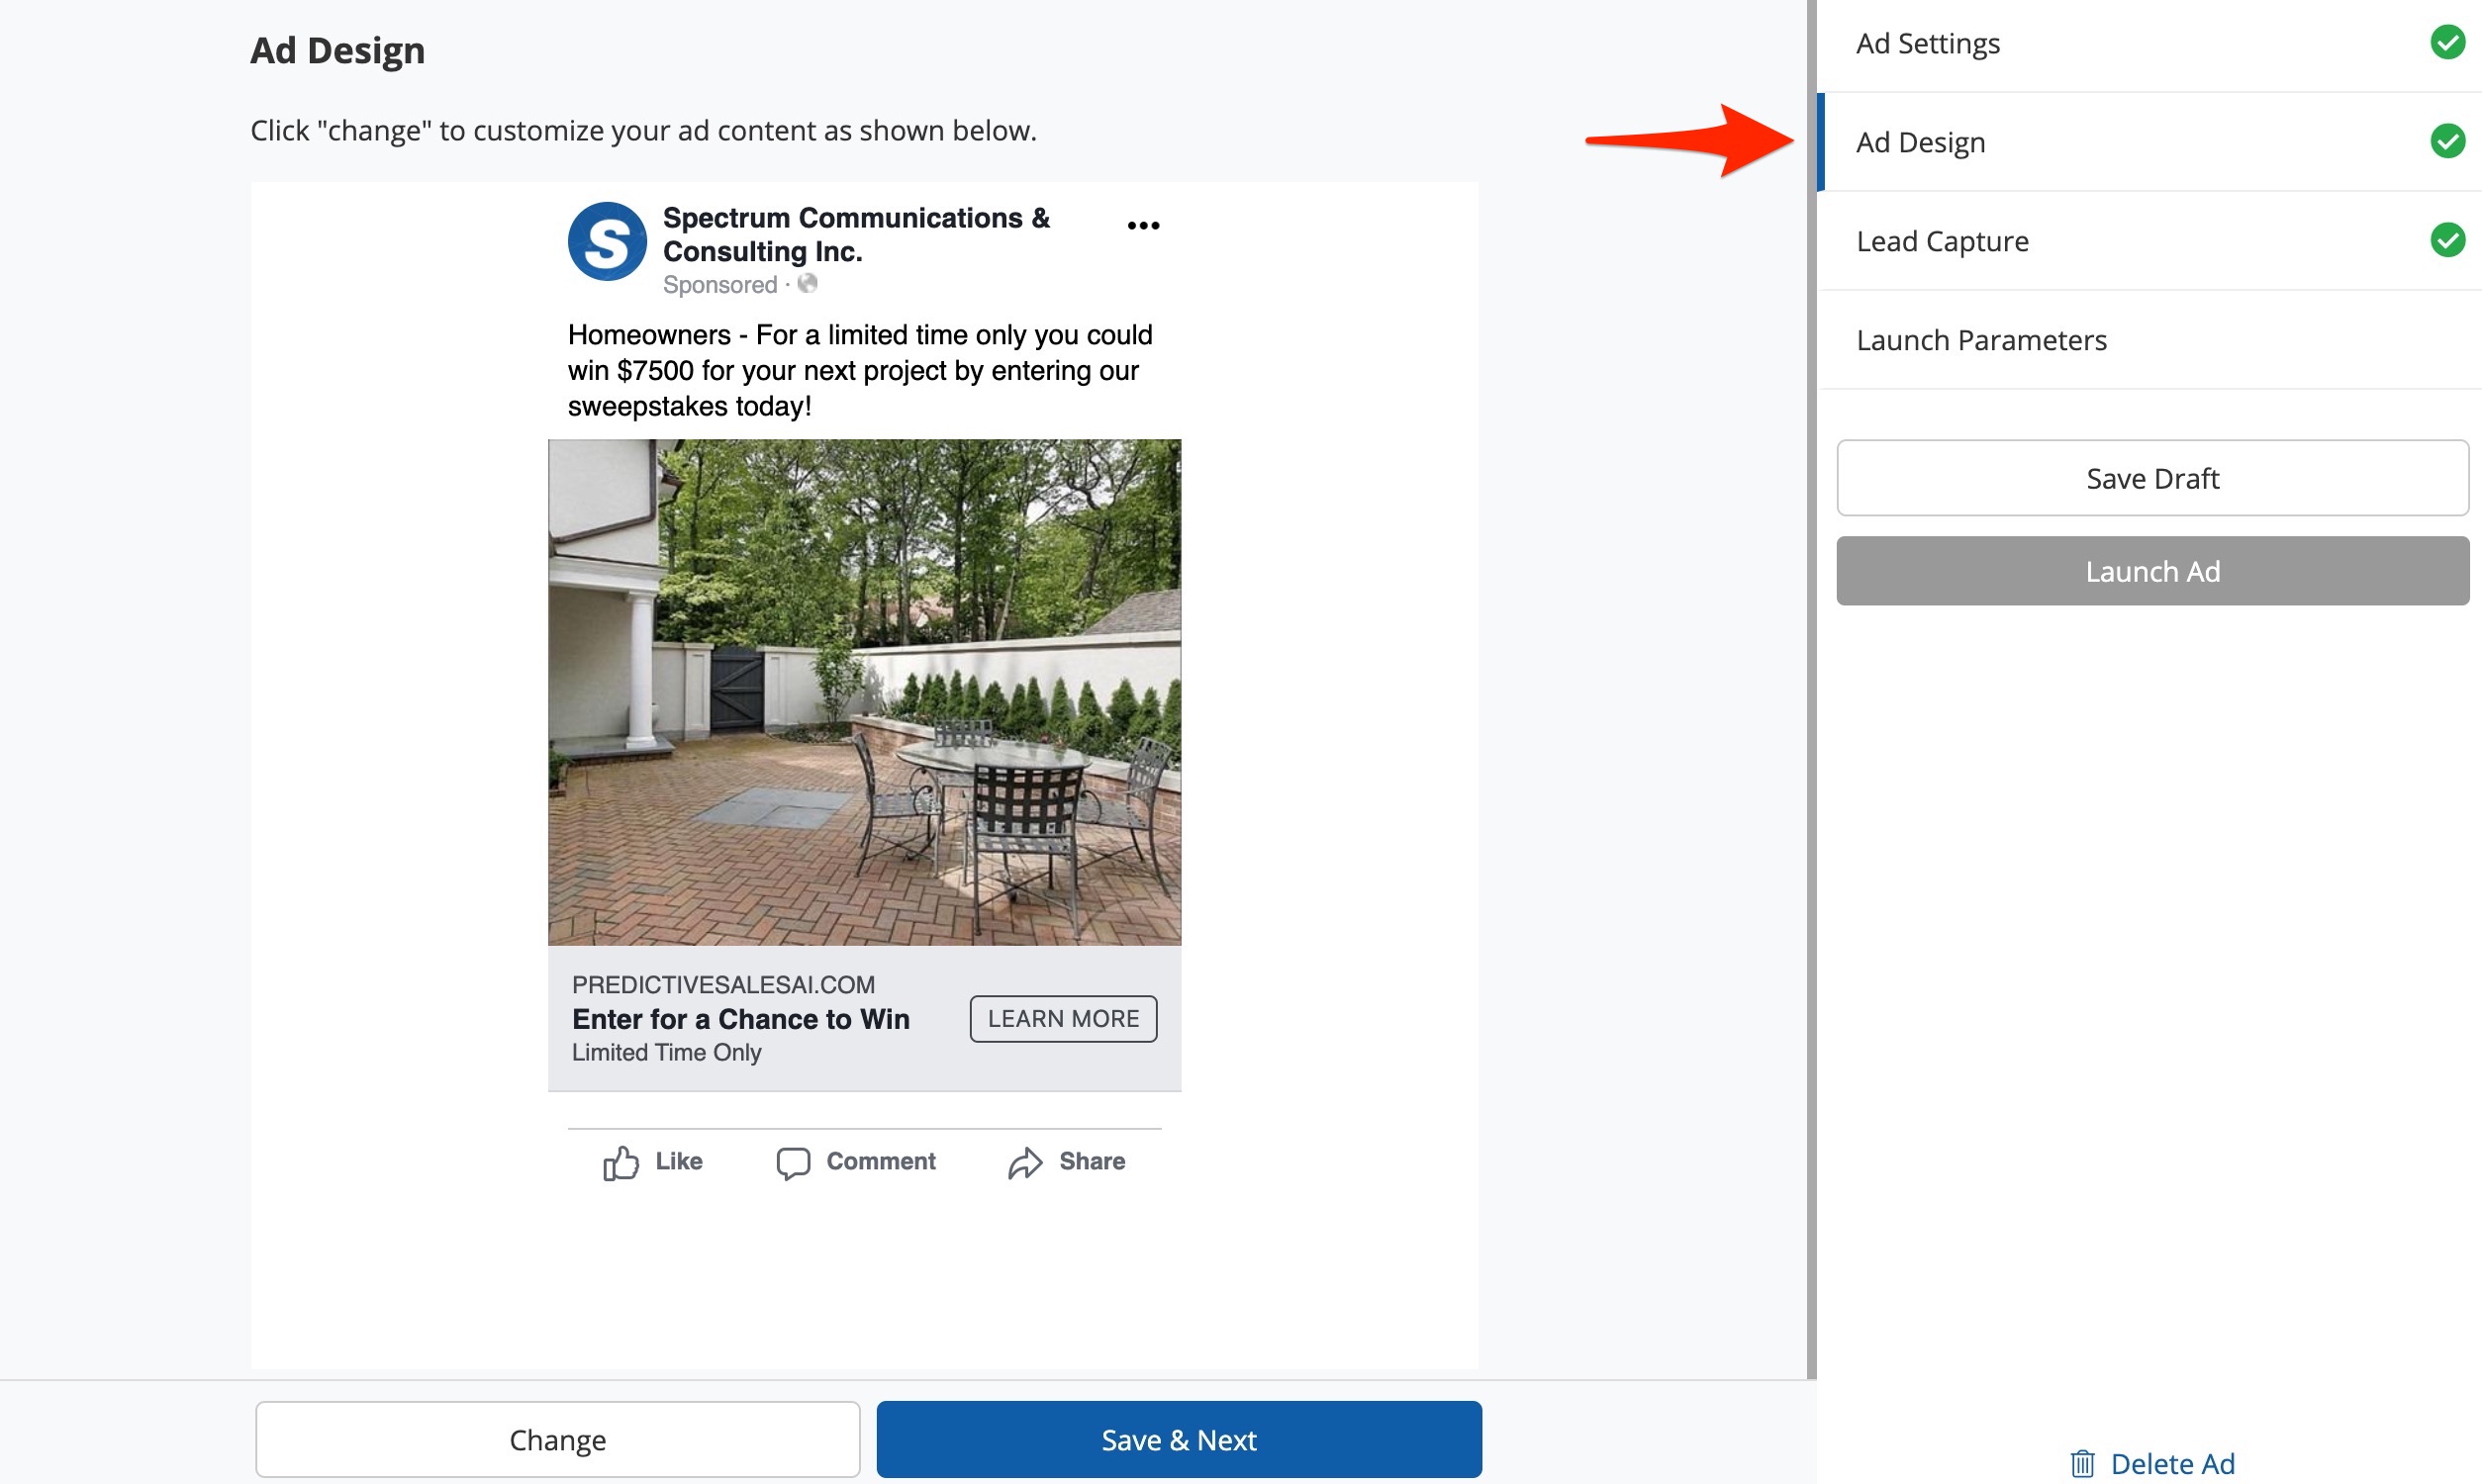
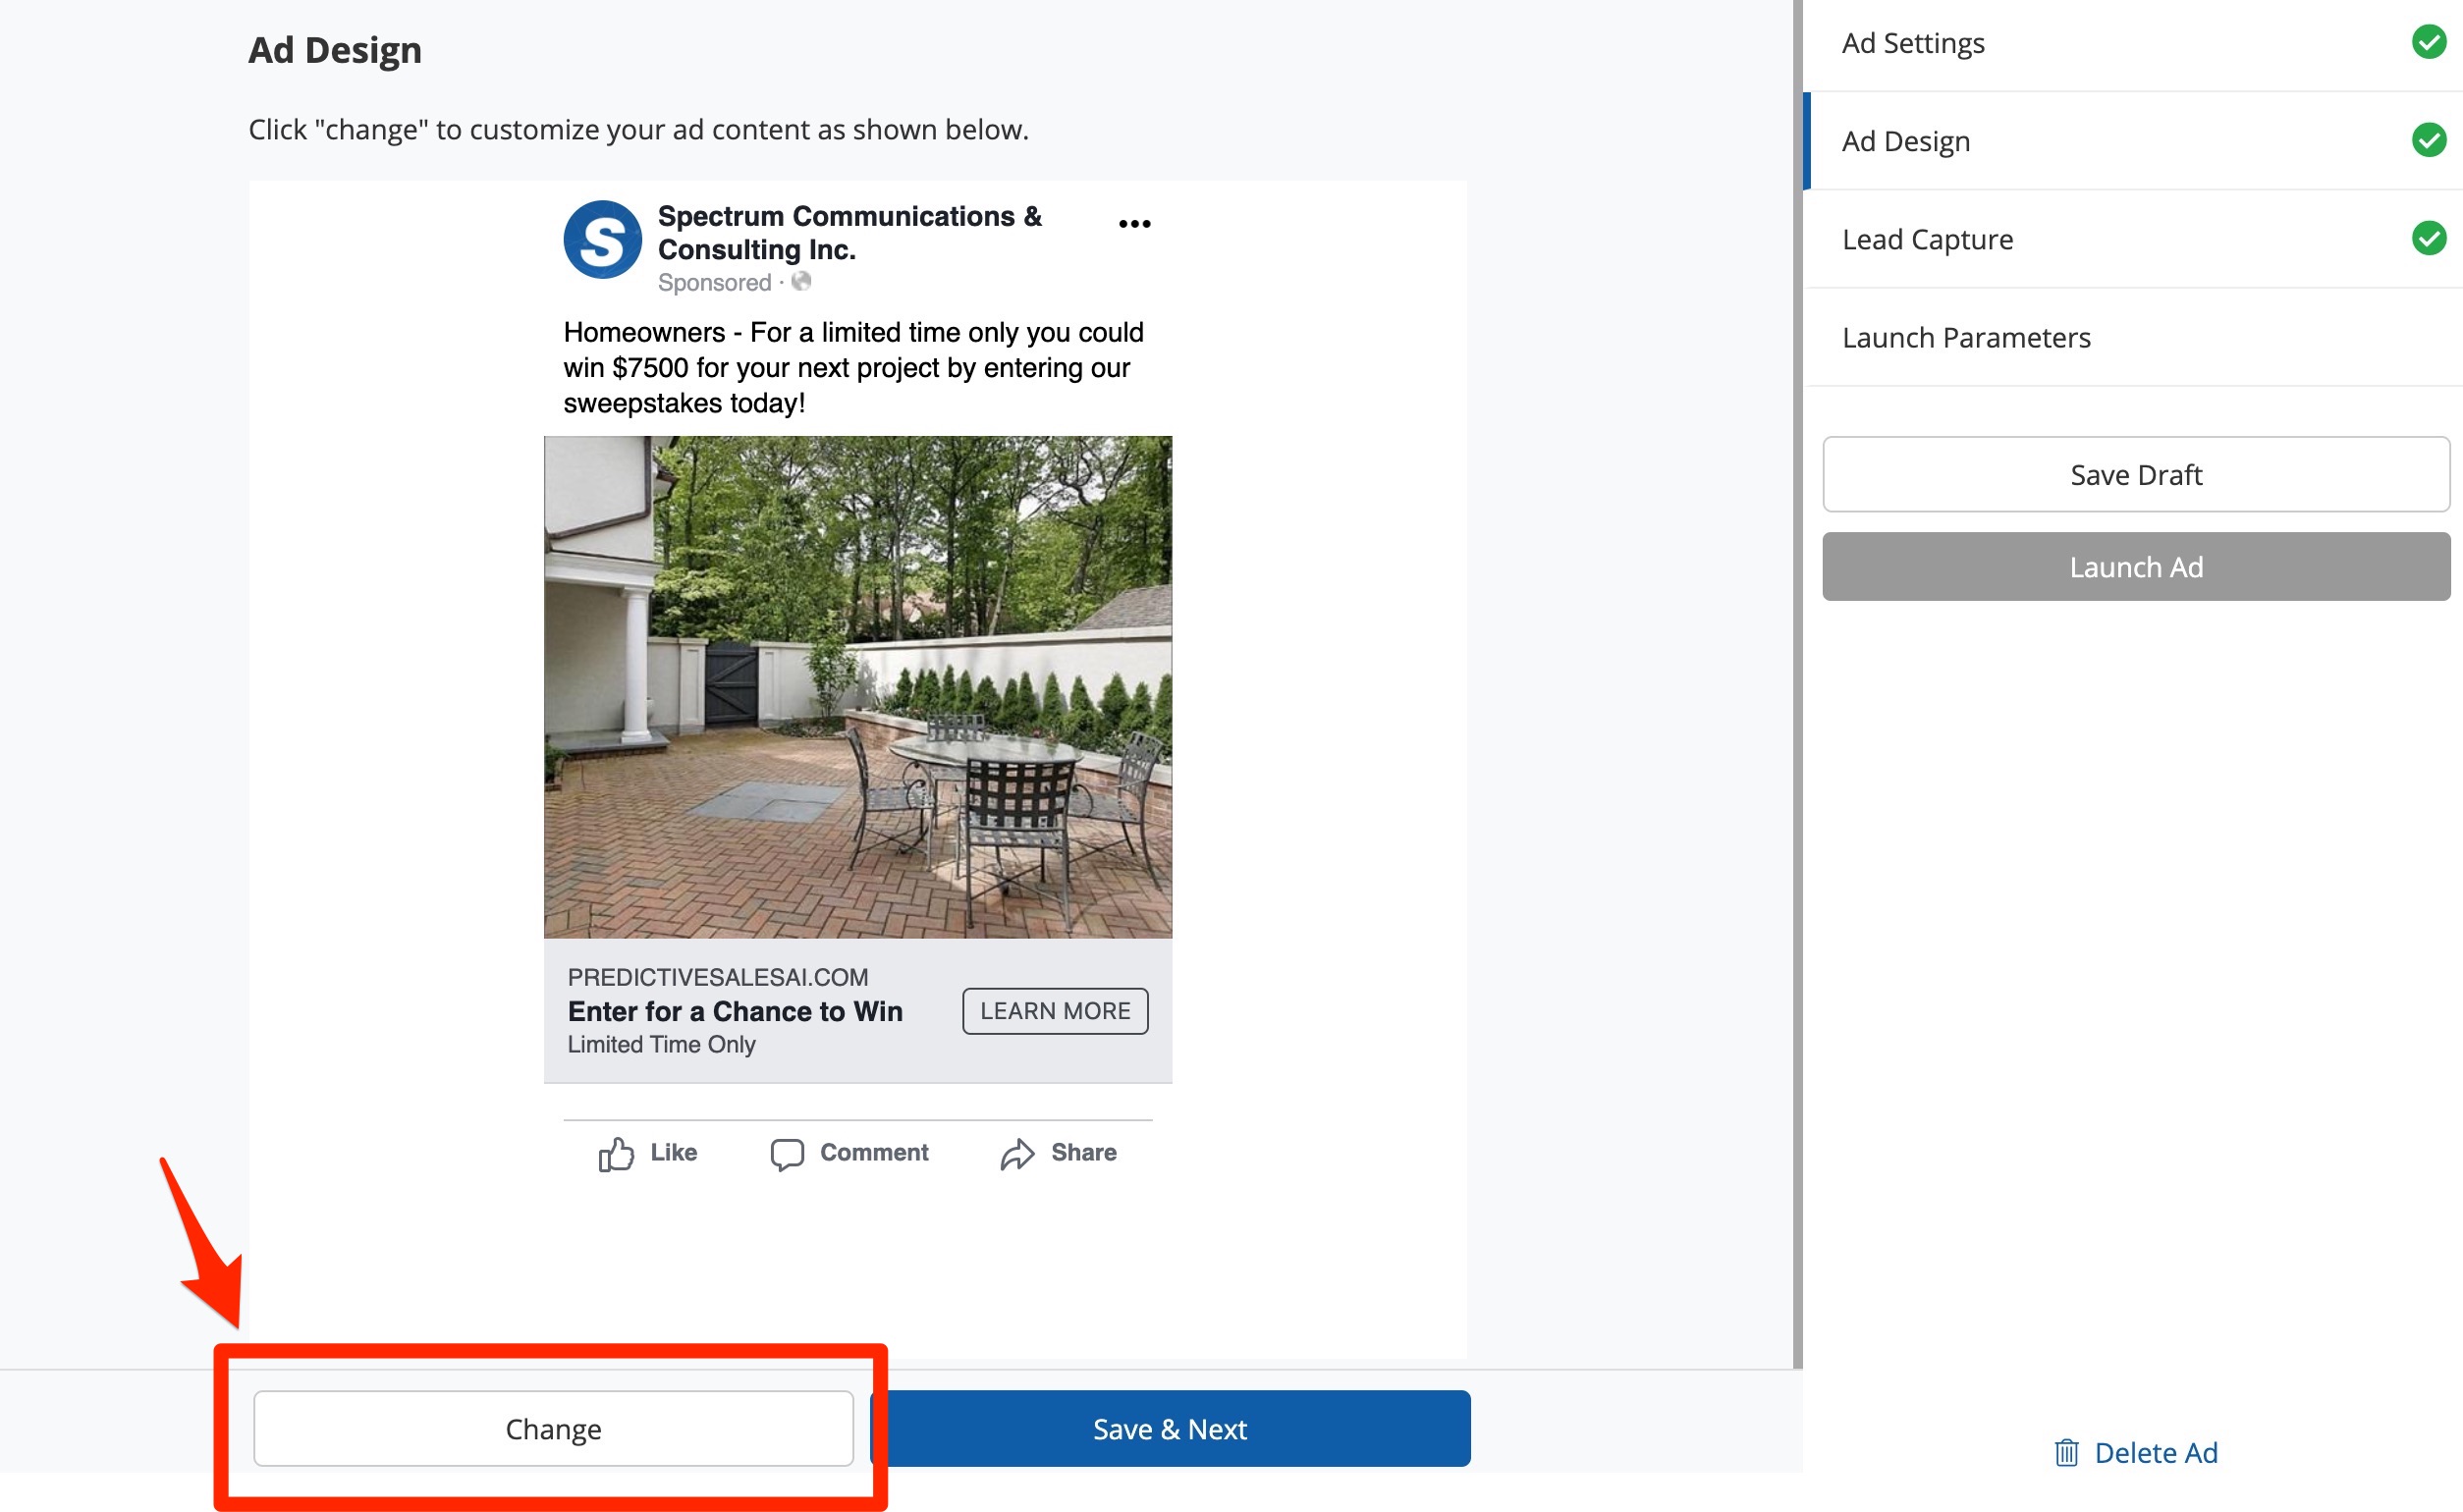
From this page, you can either accept the design that PSAI has made for you, or you can click Change at the bottom of the screen to tailor your ad's headline, body message, image, and more.
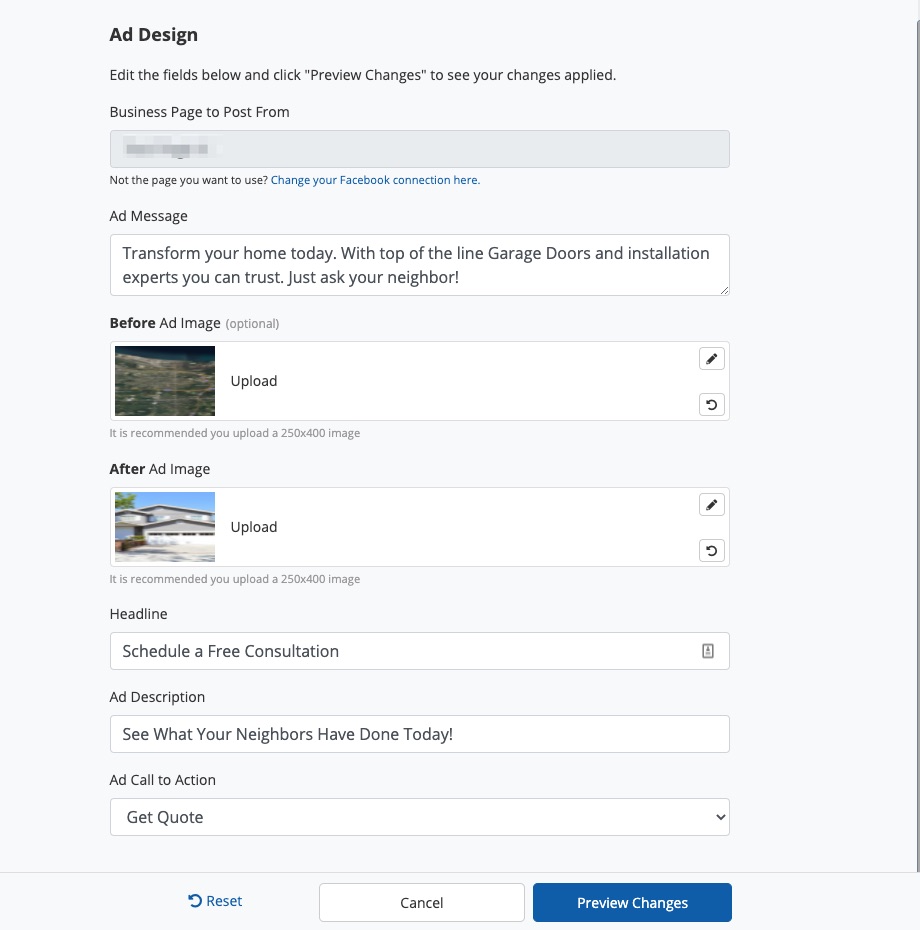
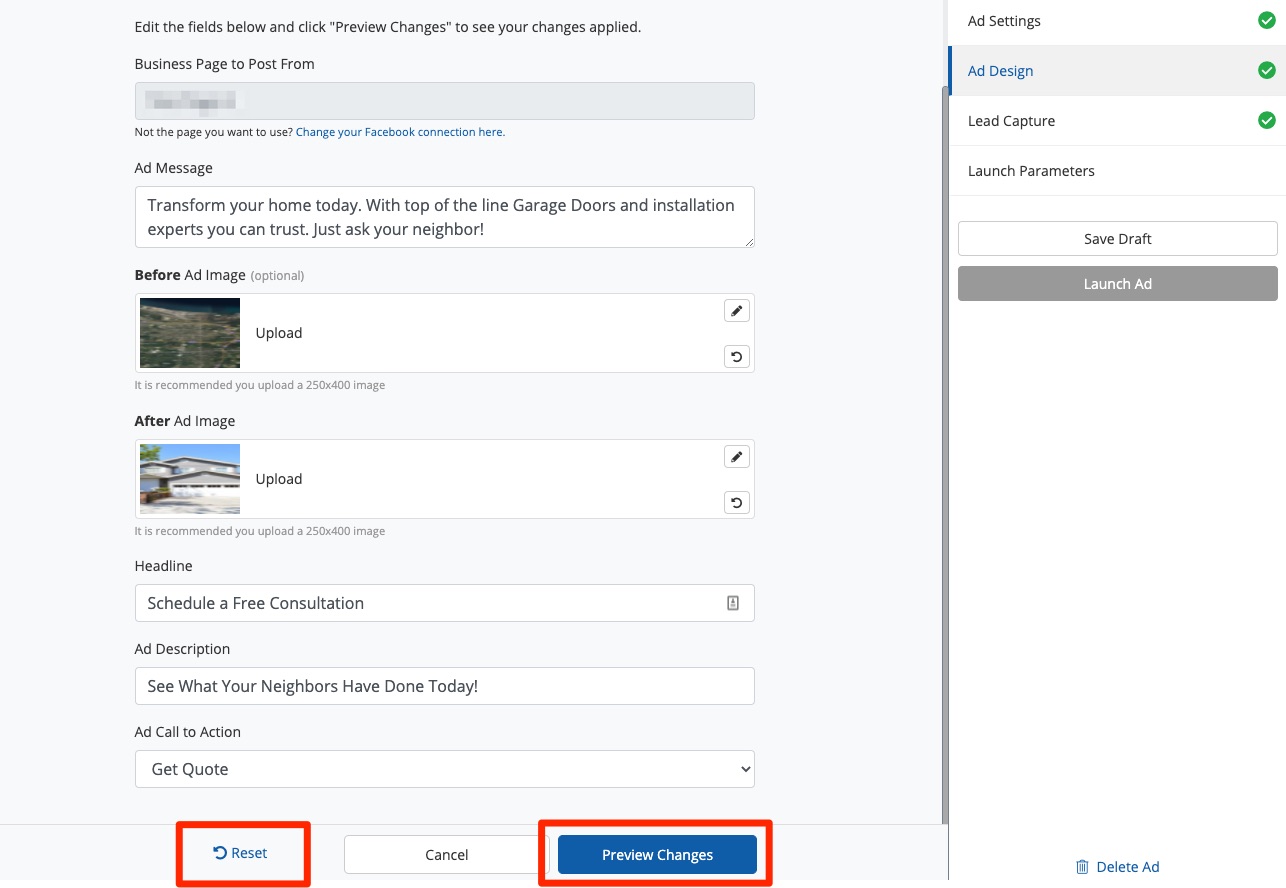
When you click Change, you'll be brought to the editing page for your ad's design, as shown below.
Ad Design Options
The specific editing options on the Ad Design page will vary slightly depending on the type of ad. The example shown throughout the rest of this article is a past project ad, but the same basic process and settings will apply to any type of ad.
As shown in the screenshot just above, these ad editing options are as follows:
Facebook Business Page

By default, this field will be populated with the Facebook Business Page you connected whenever you set up Ads Manager for the first time. If for some reason this is not the correct Business Page, click the link for "Change your Facebook connection here" to go to your PSAI Company Settings and connect a different page.
You can learn more about Facebook connections here.
Ad Message
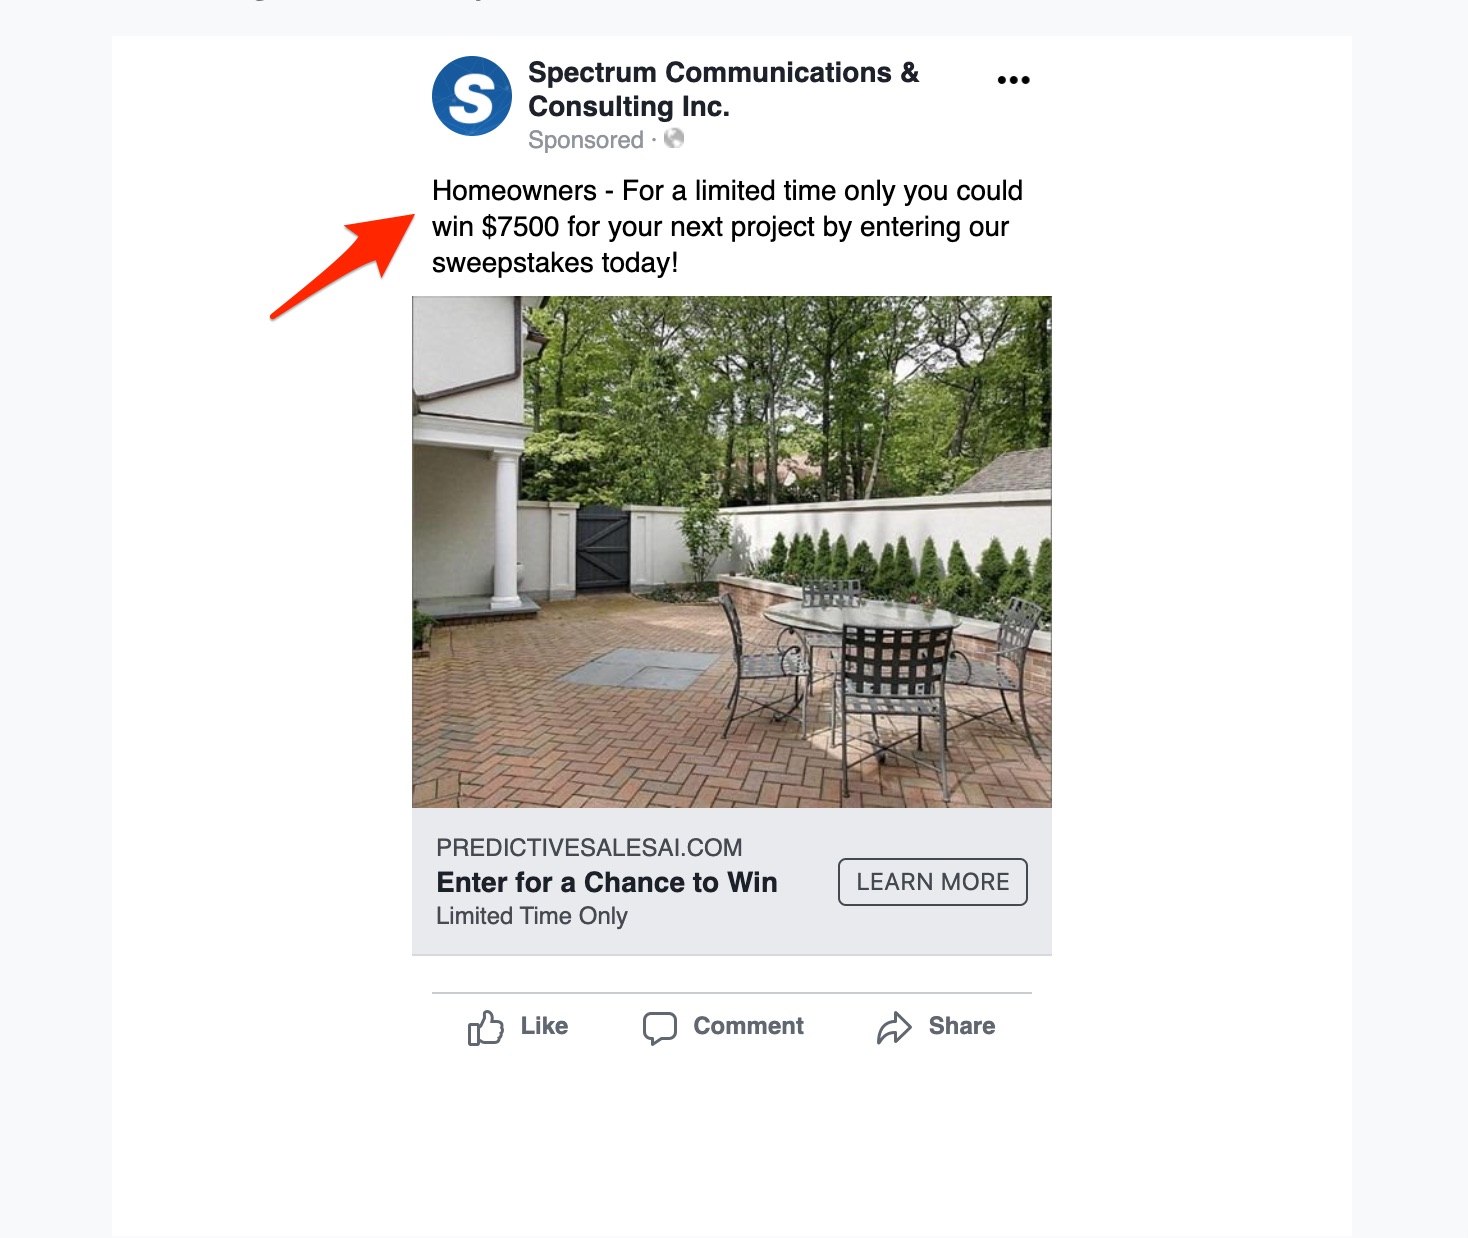
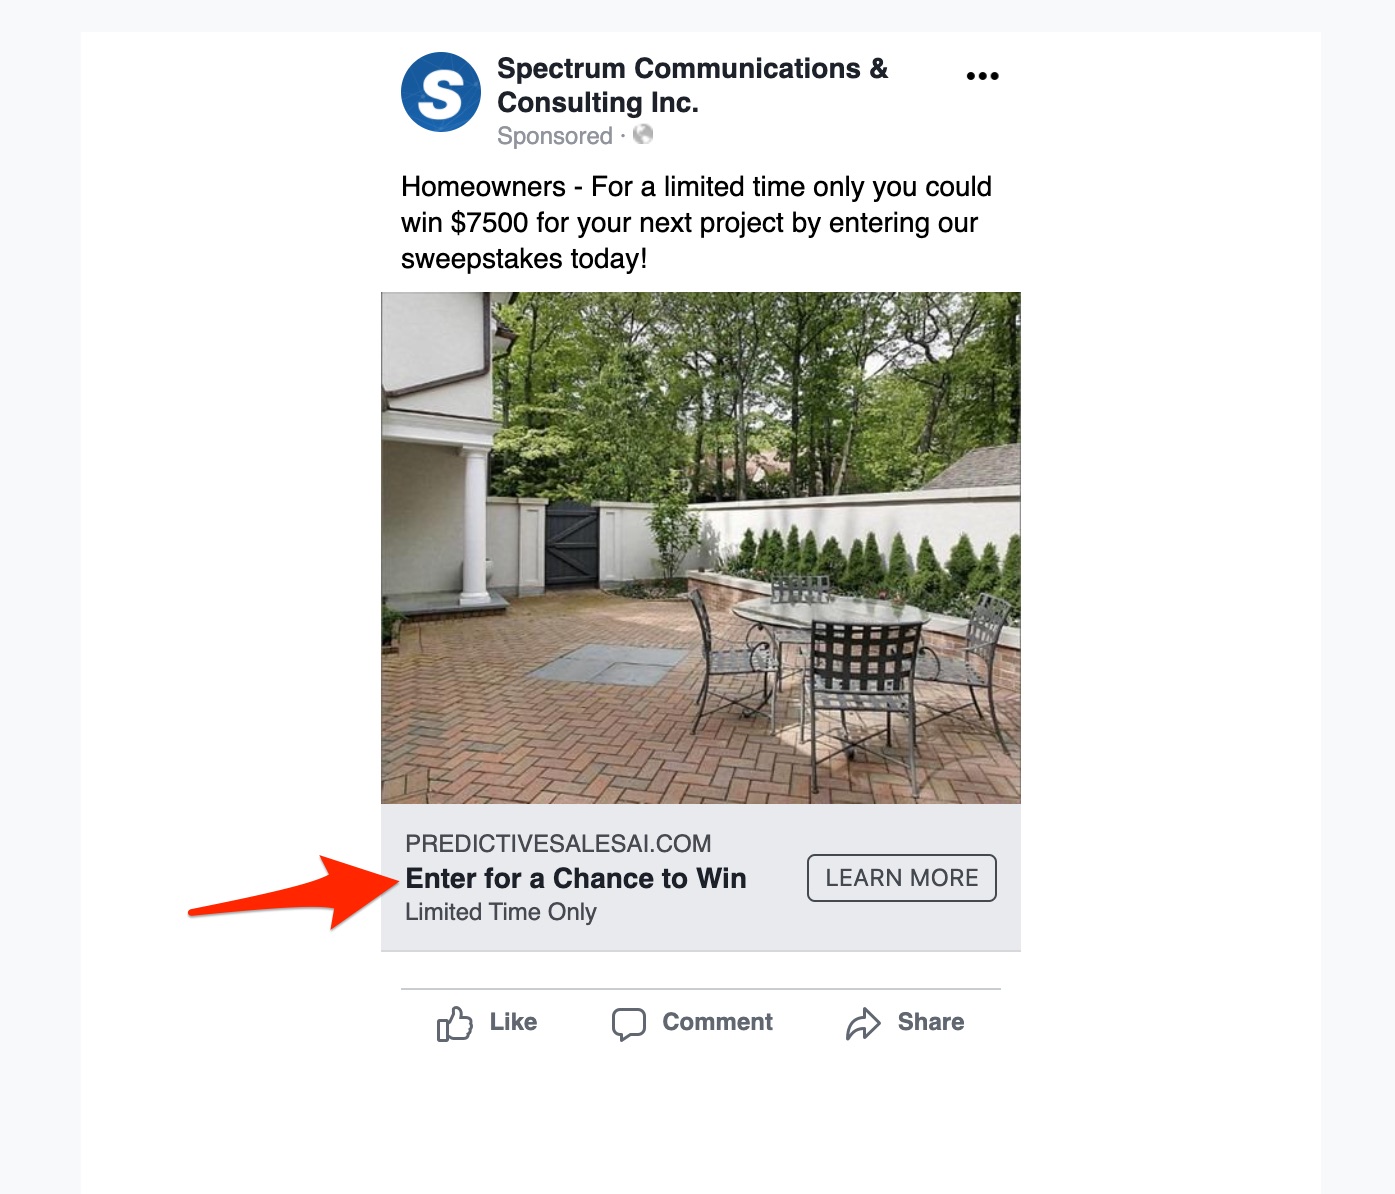
The first field for Ad Message is what displays at the top of the Facebook ad.

See an example here.
Ad Imagery
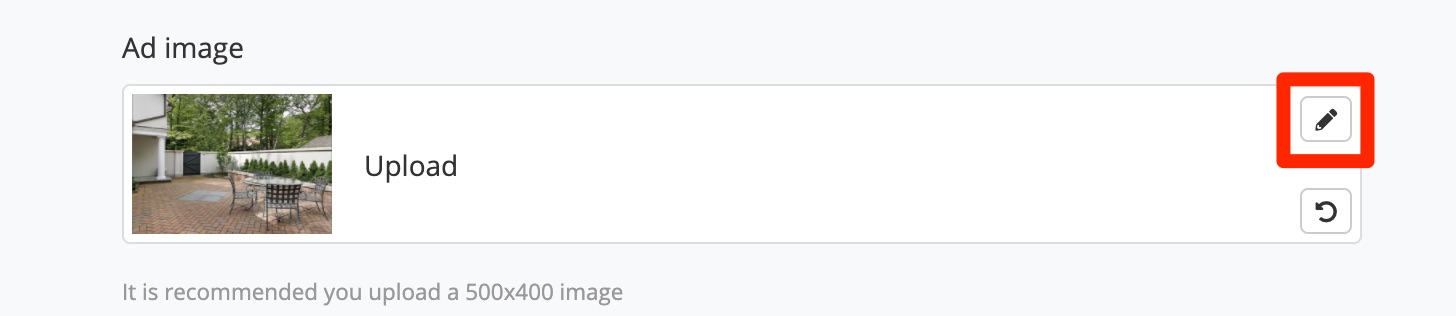
Depending on the type of ad you created, this image was either uploaded by you or chosen by PSAI. Either way, you can always change the original image by clicking the pencil icon. This will open up your computer's file uploader, so you can add the photo of your choice.
Please take note of the recommended image sizes provided below the upload area—in this case, it's 500x400 pixels, but other ad types will vary.
Images for Other Ad Types
The image field is one of the sections that varies most from ad type to ad type. For example, if you're creating a custom ad with a video, then this field will be for "Ad Video" (but will function in the same basic way).
Headline
The Headline section is very straightforward, as it's simply a text field that allows you to edit your ad's main headline.

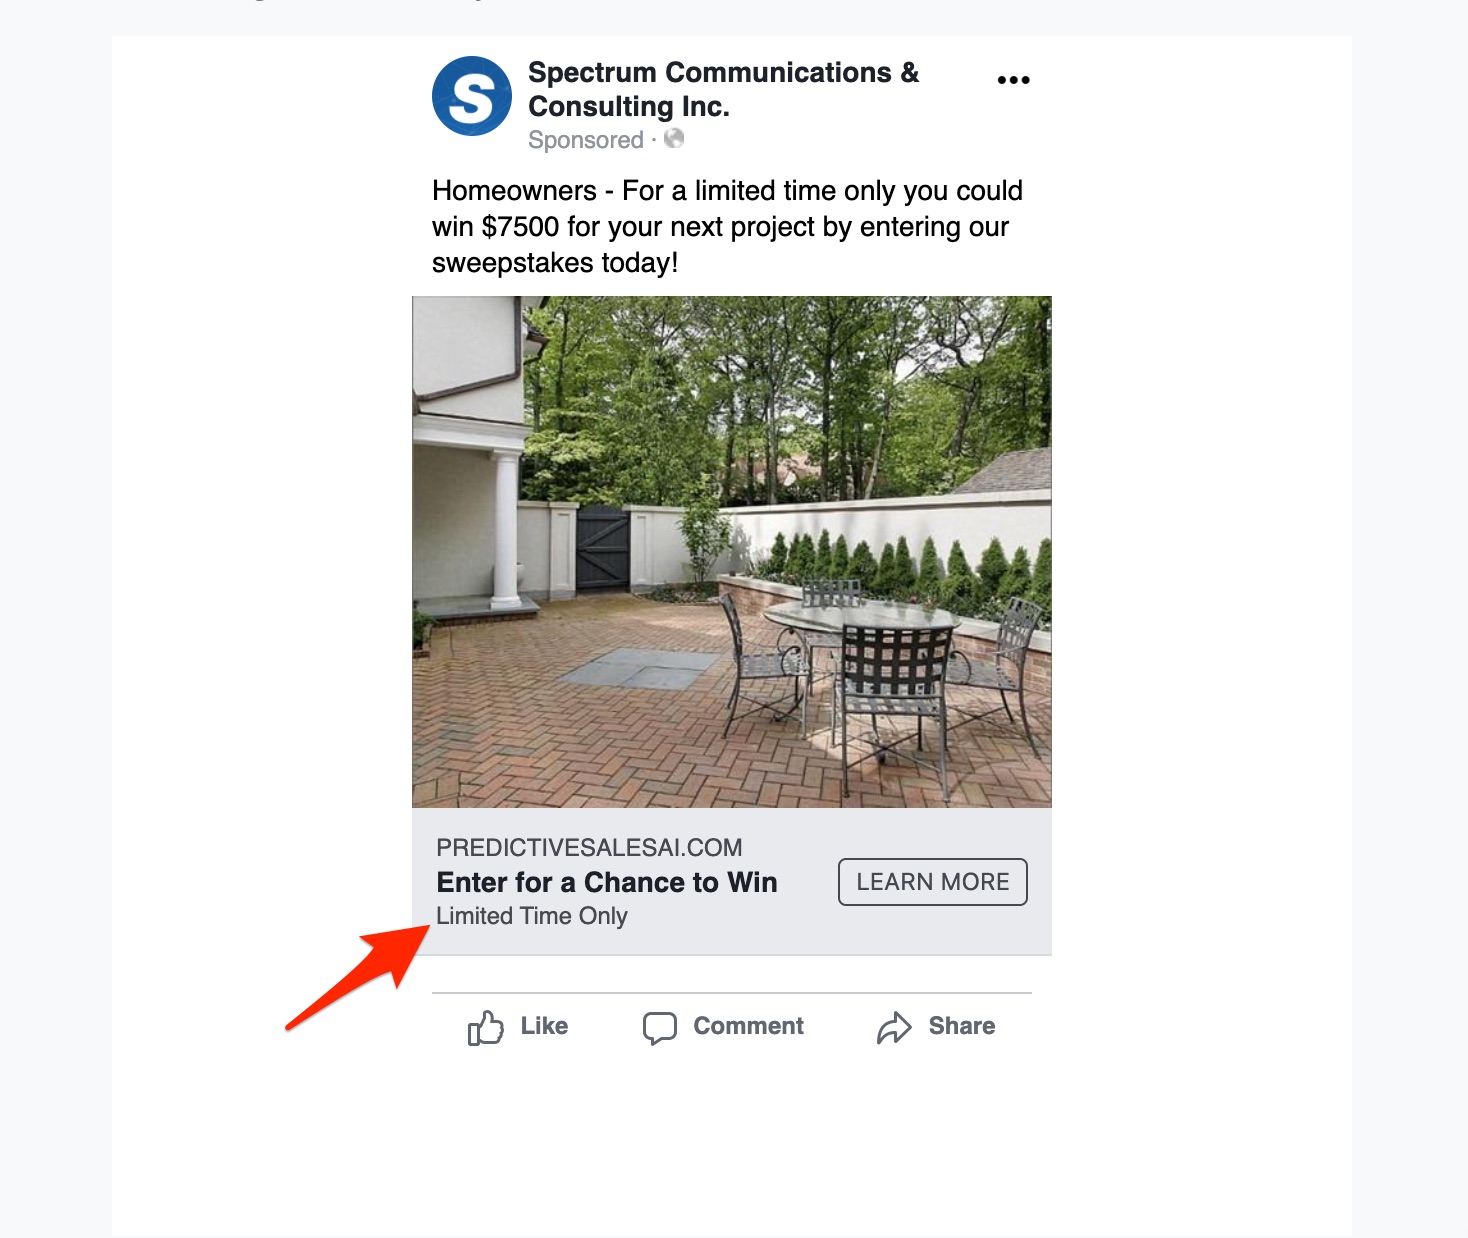
The headline text appears at the bottom of the Facebook ad in larger text, as shown below.
Ad Description
The Ad Description field is similarly straightforward. Simply click into the field and make any changes you'd like.

The description is displayed beneath the headline at the bottom of the Facebook ad.
Ad Call to Action
The final field, Ad Call to Action, allows you to choose the text that appears on the button of your ad.

Click the dropdown menu to choose your preferred button text:
- Get Quote
- Apply Now
- Get Offer
- Learn More
- Sign Up
Previewing, Resetting, and Saving Your Changes
As you make changes to your ad, you can preview how it's looking by clicking the button for Preview Changes. If you don't like your latest edits, then simply click Reset to revert the ad to its last saved version.
Once you've finished editing your ad's design, click Save Draft at the right-hand side of the screen to save your changes.

You can return to the Ad Design page to make changes to your ad any time before you've launched it. Keep in mind that once you've launched your ad campaign, however, you will no longer be able to make edits in this way.
Next: After you've edited your ad design, the next step is to edit your lead capture form.