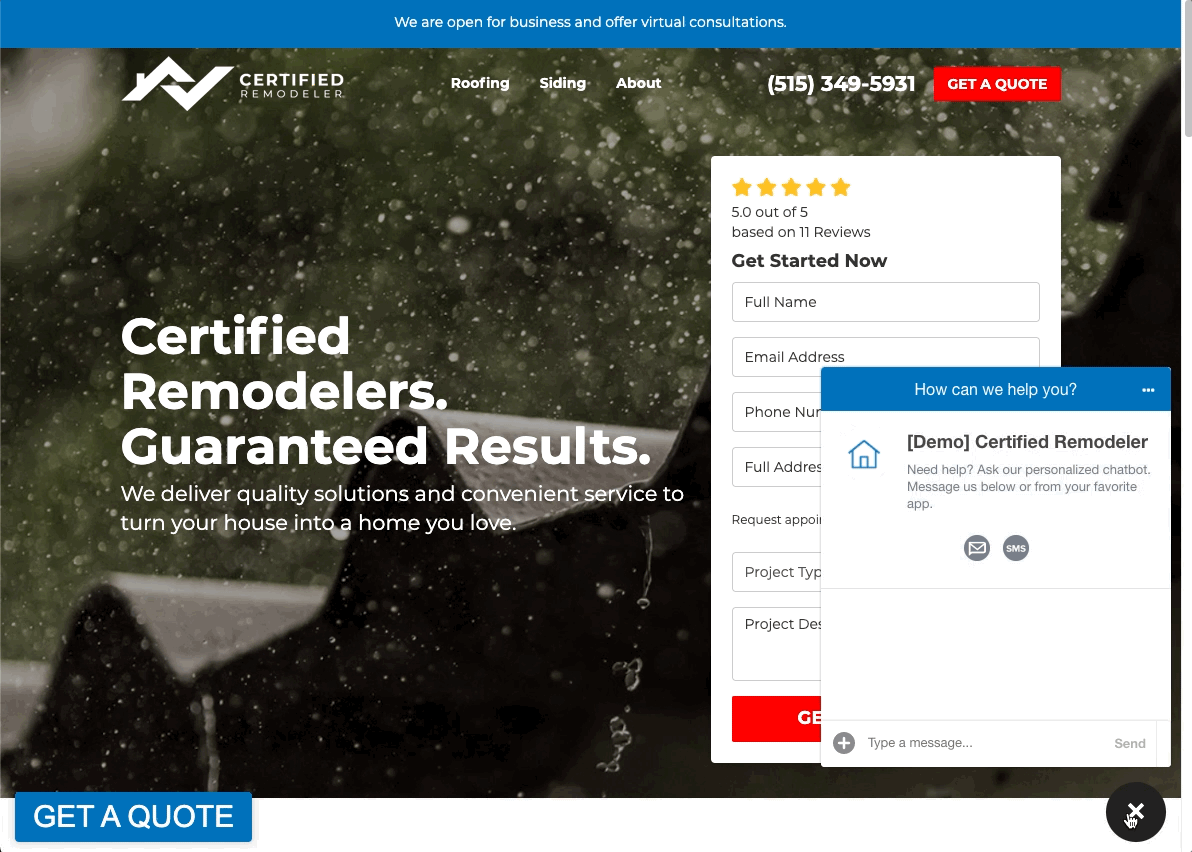
The GIA chatbot is one of five site tools that you can create in PSAI and easily drop onto your website. GIA gathers lead information 24/7 and seamlessly sends leads to the Com Portal, where your team can follow up by phone, SMS, or email.
To create a chatbot in PSAI, follow the instructions below.
These instructions explain how to create a chatbot site tool in PSAI. Once it's created, you'll need to add it to your website.
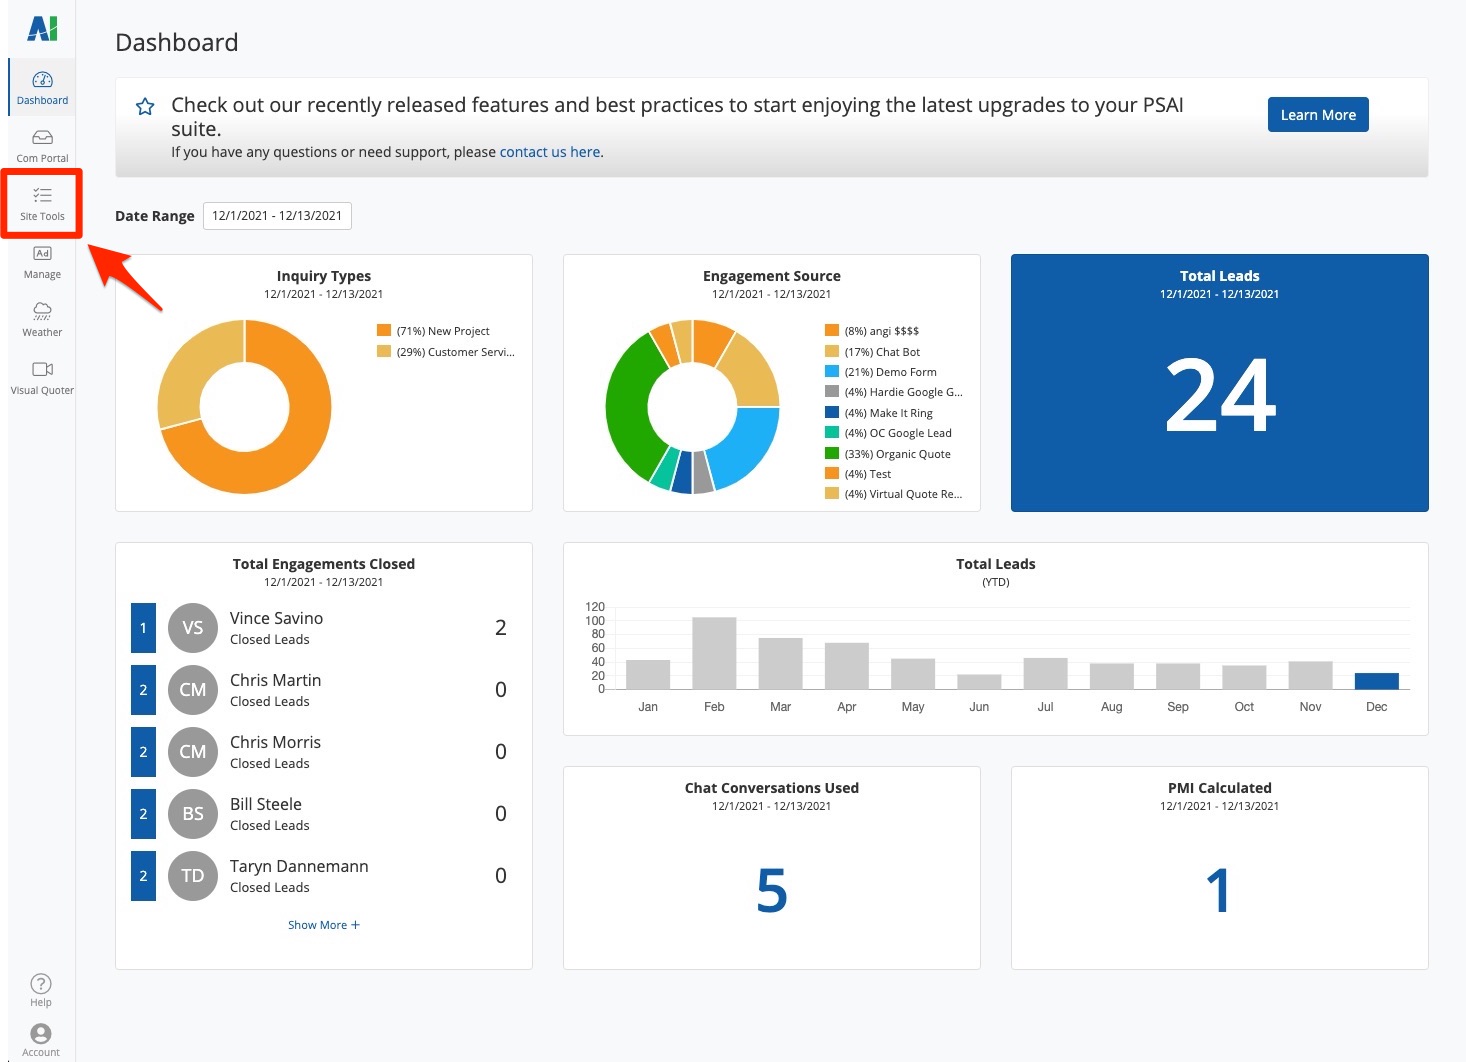
1. Go to Site Tools
After logging into your PSAI platform, go to Site Tools from the left-hand navigation bar.
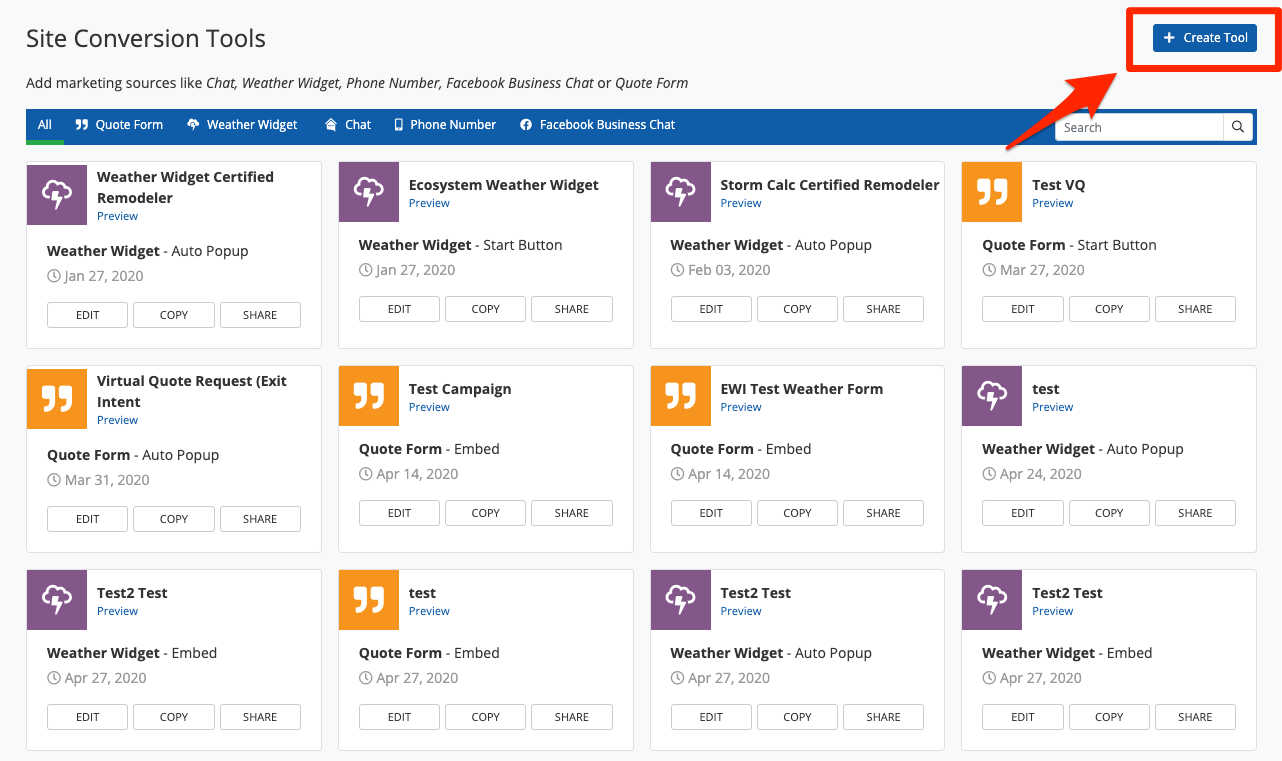
2. Create a Tool
From the Site Conversion Tools page, click Create Tool in the upper right corner.
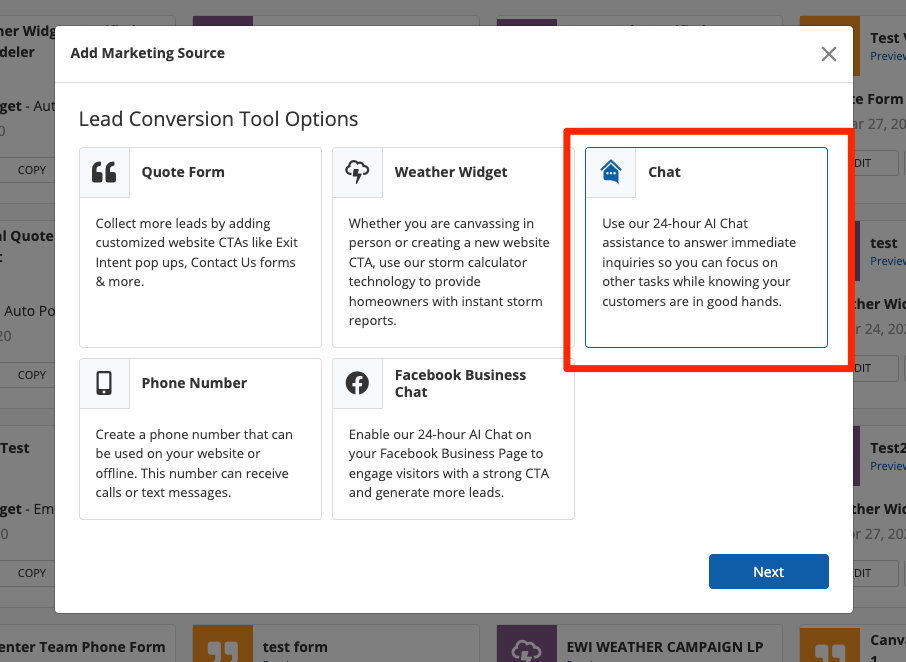
3. Choose Chat
From the site tool menu that appears, choose the option for Chat. Then click Next.
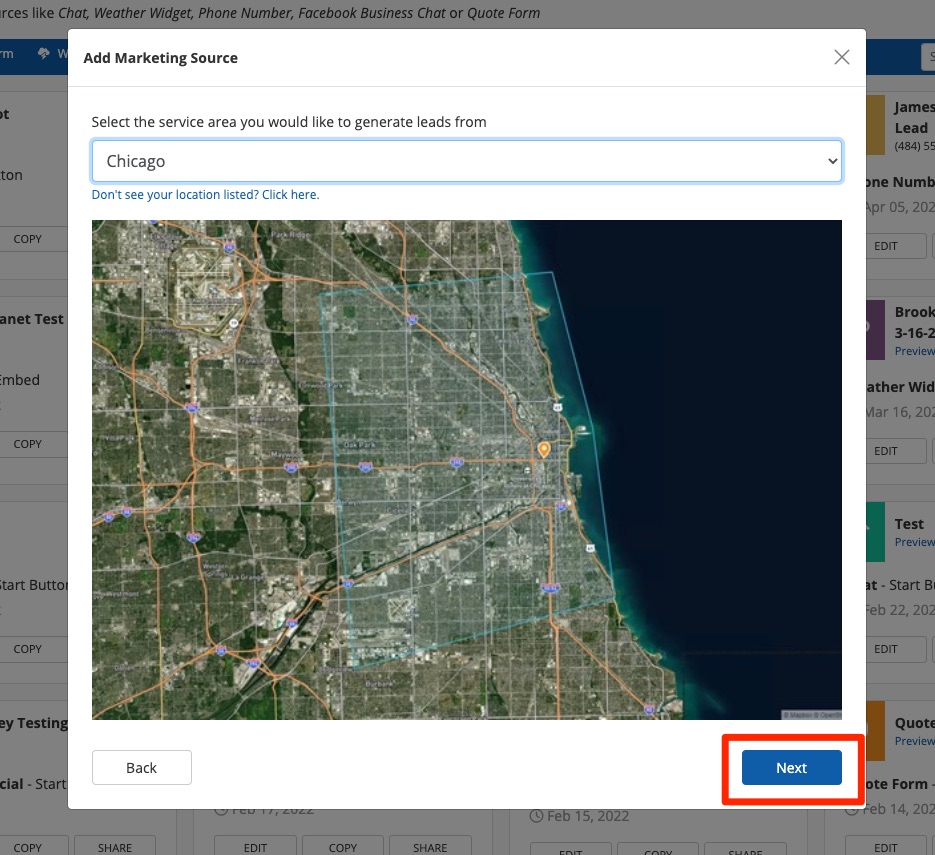
4. Select a Location
Choose the location associated with this chatbot. (If you don't see the correct location, go to your company settings and create it. Link coming soon!)
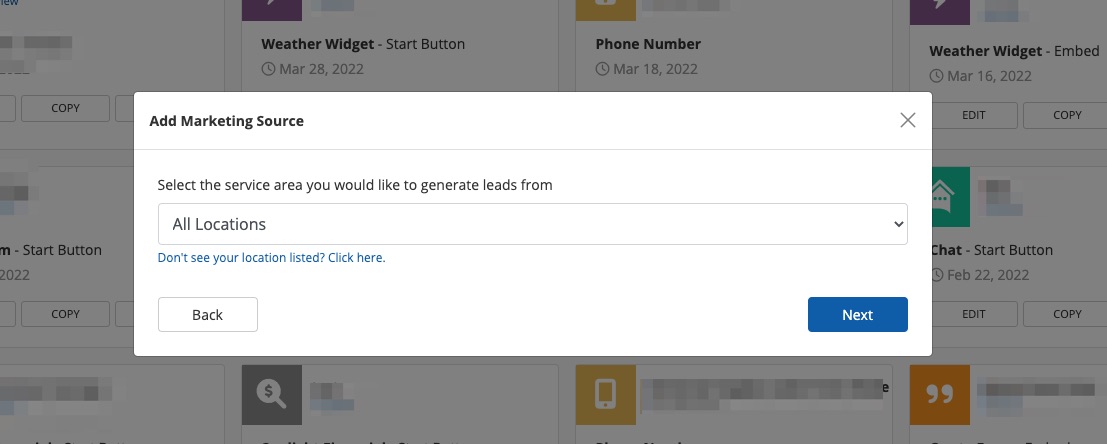
Note: The Nationwide option will consider all leads in the United States to be within your service areas. The All Locations option will instead check to see whether the lead falls within any of your locations.
With your location selected, click Next.
5. Choose Your AI Assisted Chat Settings
On the next screen, decide how you'd like GIA to work. (More on what these options mean below the screenshot.)
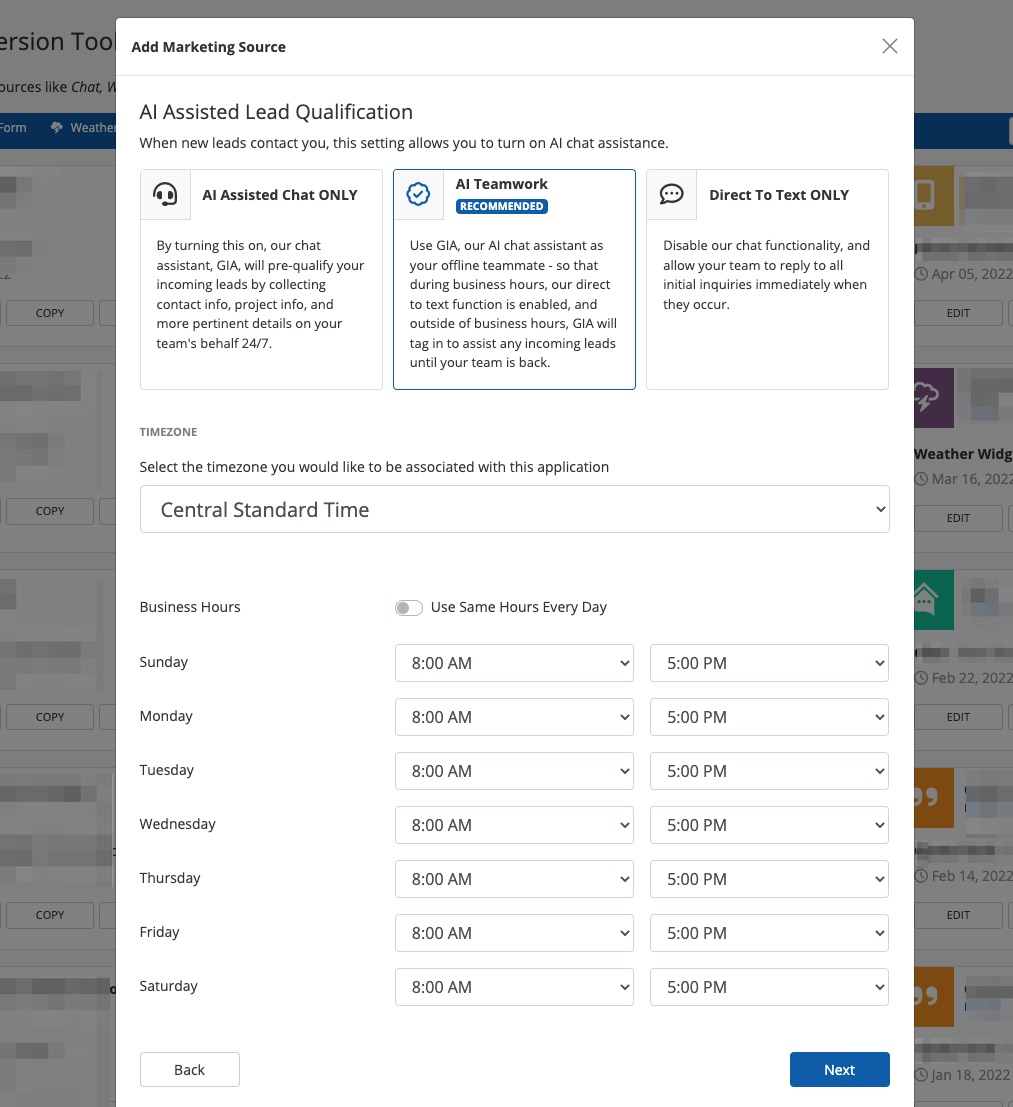
Here's what each option means:
- AI Assisted Chat ONLY: Allow GIA, our AI chat assistant, to pre-qualify your incoming leads 24/7. She will collect contact info, project info, and other pertinent details on your team's behalf.
- AI Teamwork: Use GIA, our AI chat assistant, as your offline teammate only. During business hours, our direct-to-text function will allow your team to reply to all initial inquiries; outside of business hours, GIA will handle inquiries until your team is back.
- Direct To Text ONLY: Disable GIA, our AI chat assistant, and instead enable direct-to-text function 24/7. Your team can reply to all initial inquiries immediately, regardless of business hours.
Please note that updating business hours here will not update the hours saved to that location. It will only affect the GIA chat hours. To update the location's business hours across the board, go to your company settings. (Link coming soon!)
6. Choose the Display Type and Color Theme
On this screen, you'll be able to choose your chat's display option—either floating all the time in a bottom corner or popping up as an exit intent feature. (Explore the various display types and see examples here.)
You can also set your chatbot's color theme, which impacts the header and button color.

7. Add URLs
Add the URLs on which this chatbot app will appear. By default, the URL associated with your PSAI account will be automatically populated for you; you can add additional URLs if needed.
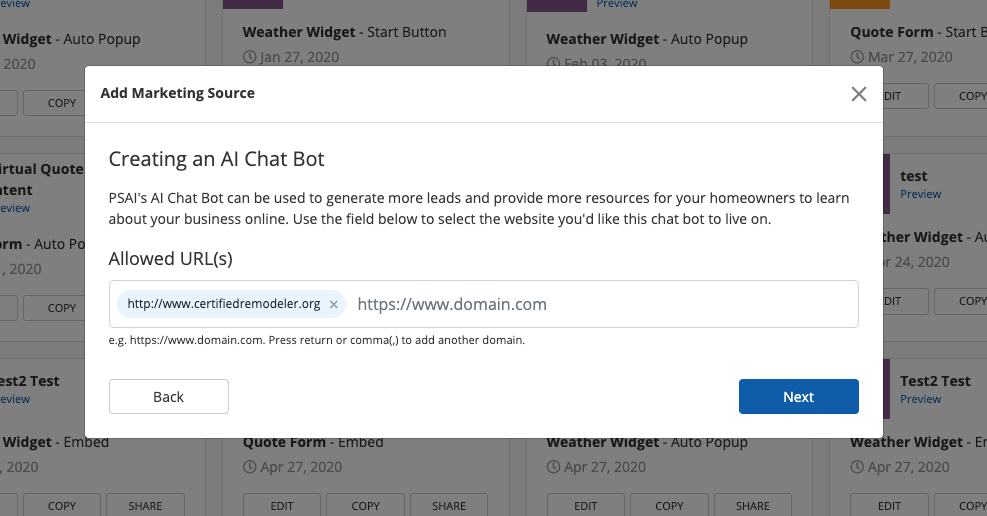
Please note that your chat app will only work on the URLs listed here. You can always come back to edit these settings later if needed.
8. Set Lead Notifications
On the next screen, enter the email addresses and/or phone numbers of anyone on your team who should get notified when a lead interacts with your chatbot. This might be an office manager, a sales rep, etc.
At least one email address is required.
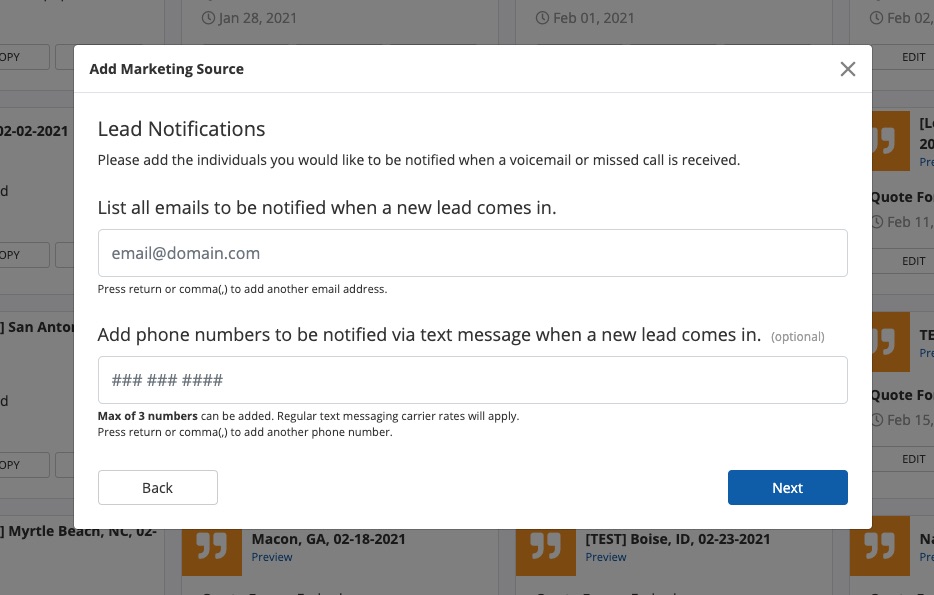
You won't have to remember your staff's email addresses or phone numbers, either! PSAI will suggest them to you based on the information saved to your PSAI user profiles.
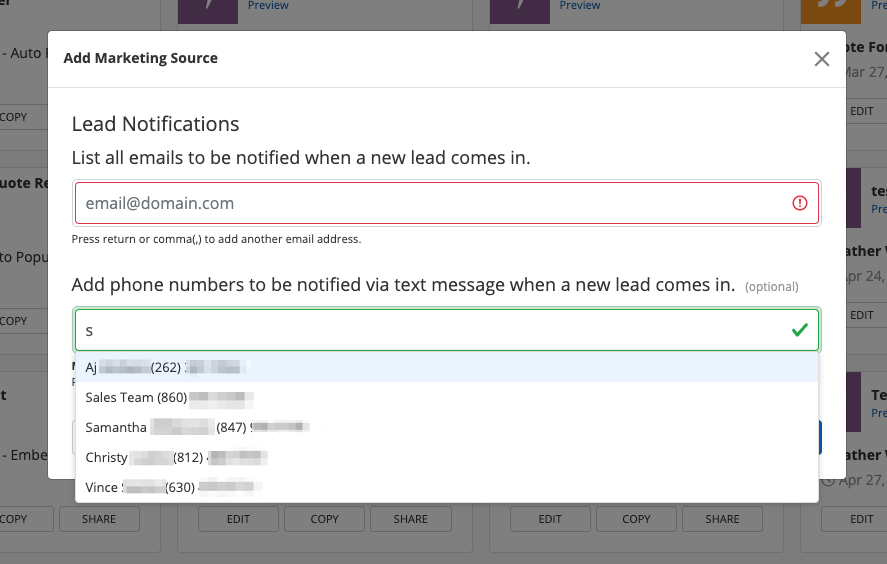
Not seeing the right staff? Learn how to add contact information for auto-suggestion purposes.
9. Name the Tool and Create It
On the final screen, give your chatbot a name. (Please note that this is an internal name for your app, not the name of the bot. Her name is GIA and cannot be changed.) Then click Create Tool.
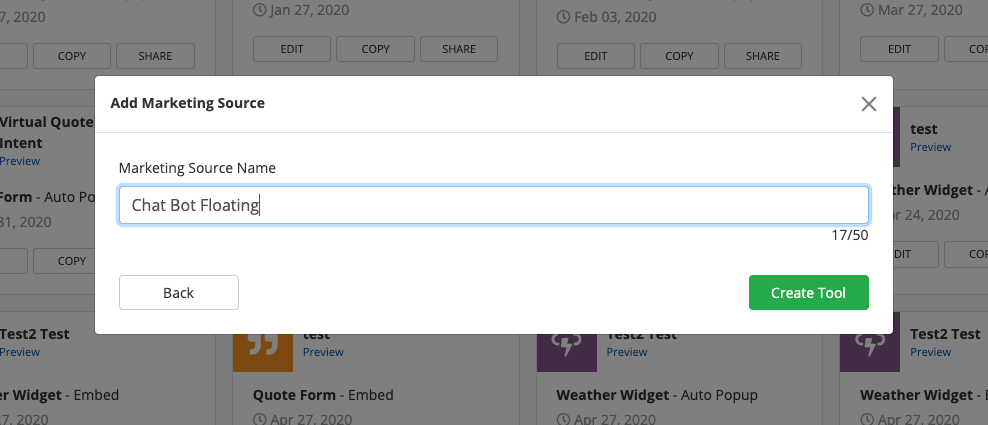
When naming your chatbot, keep in mind that the name will appear in the Com Portal as a label for leads. We recommend choosing something short, simple, and easy to recognize.
10. Customize Your Chatbot
After you've saved your chatbot, you're ready to customize it! Click into the Customize tab to make any edits you'd like:
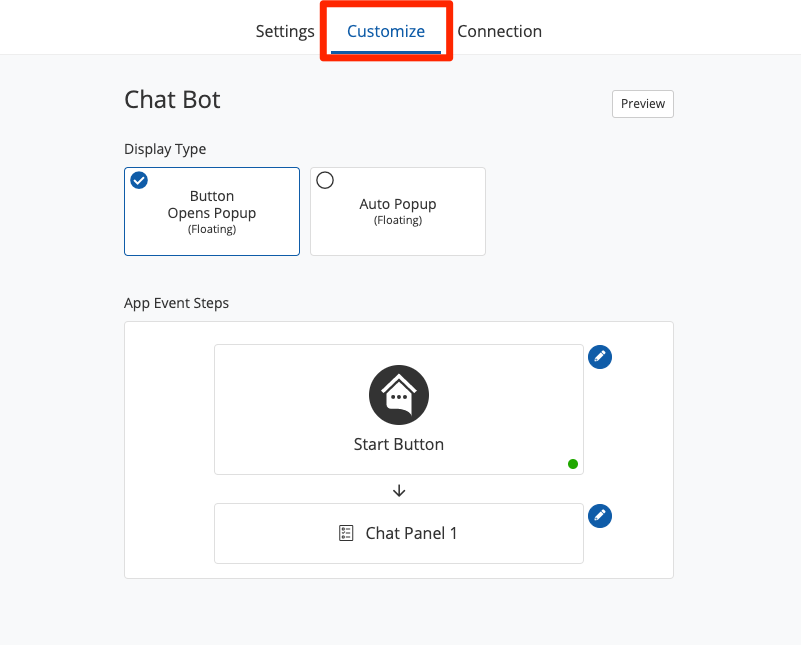
Want some assistance editing your chatbot's appearance? Get more tips on customizing your chatbot.
Next: Add It to Your Website
After your chatbot is created and customized, you will need to add it to your website. Learn how to add a floating element in these instructions.