Past project ads are perfect for showcasing before-and-after images of a recent job. By showing Facebook users a real-world example of your work, you'll get them much more interested in seeing your work on their home.
Past project ads look like the one below and are one of three main types of Facebook ads you can create in Ads Manager. (You can learn more about all three types of ads here.)
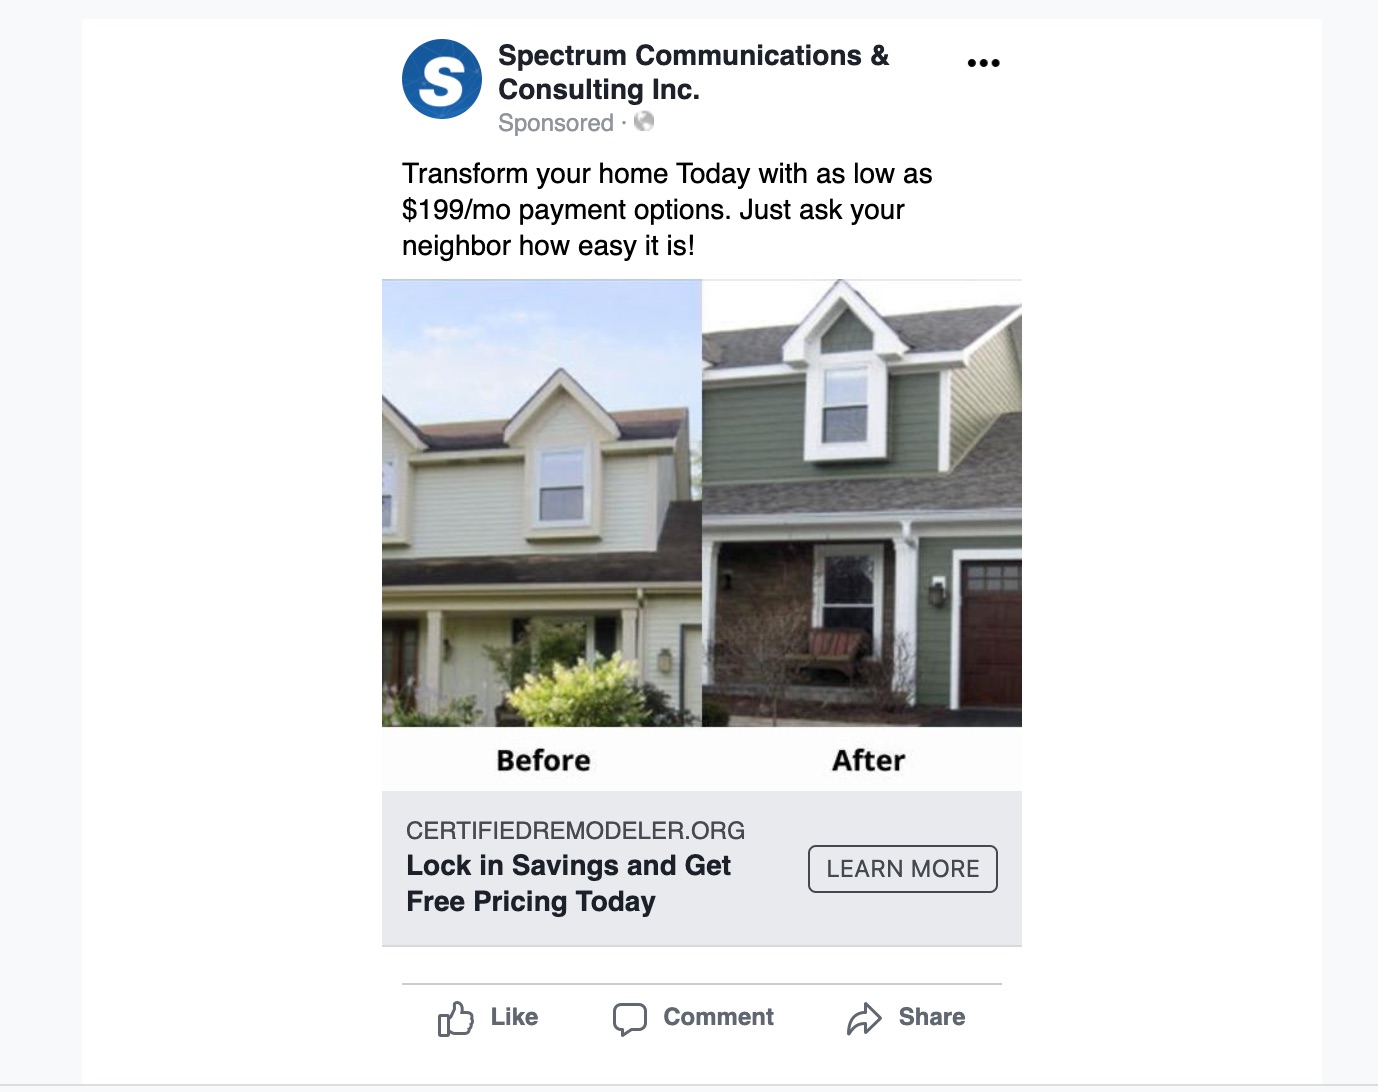
To make the most of the before-and-after display, follow the tips below.
1. Good Angles
As you can see in the screenshot above, the before-and-after image display is inherently limited by the size of the Facebook ad. Choosing an appropriate angle will make sure that the image is easy to comprehend, even at a small size.
When taking both before and after photos, try to:
- Stand far enough away that the context is easy to understand
- Angle the camera to frame the most important element of the shot
The image below is a good example of a kitchen renovation that is photographed very well, with an angle that highlights its features.

Notice how the angle is wide enough to understand what we are looking at. The tall height also works especially well given the size and layout of the before-and-after Facebook ad.
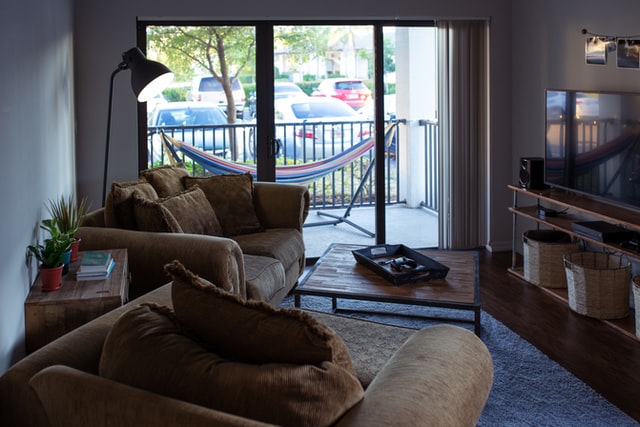
2. Adequate Lighting
Lighting is perhaps the most important aspect of any kind of image. Even the most beautiful craftsmanship or high-end product can end up looking mediocre in poor-quality lighting.
For both the before and after images, aim for lighting that is:
- Natural or as close to natural as possible
- Evenly distributed throughout the space
- Consistent in brightness and tone across both images
Good lighting will also help your camera capture the details in higher resolution, preventing the image from looking blocky or pixelated.
If possible, all-natural lighting is always best to show off the details of your work.

If all-natural lighting isn't possible, try to light up the space as evenly as possible. Even an interior room can be lit enough to create a clear and attractive image, as shown below.

The image below is a good example of a photo that is technically high-quality but is too dark to really see anything—especially when you consider the small size of a Facebook ad.
If your original image is very dark, you may be able to use your phone's built-in photo app to brighten it before uploading it to Ads Manager. However, improving the lighting at the time of photographing will always provide better results.
3. Matching Images
Like the name implies, before-and-after images are designed to show the before and the after—and the closer you can get to exactly matching imagery, the better these ads work.
For instance, the images in the sample ad below are close to matching, but if we could get the exact same angle, that would be even more effective at grabbing Facebook users' attention.
The goal is for the Facebook user to immediately understand that this is a before-and-after—before they even see the labels beneath the photos.
While they're working on a project, encourage your team to take many different photos so that you have a good selection to work with when you later create a Facebook ad.
To improve the quality of photos taken by your team, we recommend showing them how the Facebook ads will actually look! You can walk them through Ads Manager yourself, or you can add them as a PSAI user and grant them Ads Manager access, so they can play around with the tool on their own.